.jpg)
.png)
Julia Quinn wrote a book.

Well, that's an understatement, isn't it?! Julia Quinn wrote a series of eight novels set in the Regency Era. They feature the charming Bridgerton family and the eight charming and alphabetized children Anthony, Benedict, Colin, Daphne, Eloise, Francesca, Gregory and Hyacinth.

The first novel, The Duke and I, is Daphne's story set in 1813 when Daphne is 21 years old.


Fast forward twenty years as Julia Quinn's Bridgerton novels have been translated into thirty-seven languages and are beloved the world over. And then, one day, a special event! But I won't share that here as it's much too fun to learn yourself. This is the link to a YouTube video with Author Julia Quinn on How Shonda Rhimes Unexpectedly Discovered Her Book Series.
.png)

Although as with many adaptations the show doesn't follow the books exactly, it does revolve around the charming Bridgerton family set in Regency era London during the social season. It also features the ton which was the high society in the United Kingdom during that time and later. The ton means "manners" or "style" with the full phrase being le bon ton, meaning etiquette, "good manners" or "good form". And our Lady Whistledown does know how to stir up the ton with her Society Papers!

Here is another YouTube video link for you to hear Shonda Rhimes revealing that the show WON'T follow the flow of the books.
.png)
But whatever the order, the series was a hit when Season 1 was released in December 2020 with over 625 million hours viewed and was the most-watched English-language series on Netflix. That record was surpassed by the second season and by April 2021 the series was renewed for a third and fourth season. We will have All Things Bridgerton for the near future! Yay!
The costume designer, Ellen Mirojnick, was one of the first of the staff to be hired. The decision was made to feature a fictional, fantasy, fun, feast for the eyes as an adaptation of the Regency Period. It was to be a colorful and *gasp* bonnetless! costume series. The 230 artisans created 7,500 full costumes for the first season. This link will take you to the YouTube video of an hour long question and answer period with Ellen Mirojnick. It is fascinating! She understood she would be "raked over the coals" by the historical purists, but her vision worked and delighted an audience who needed love, drama, fantasy, and color during a world health crisis. We got all that and some very steamy romance as well!
.png)


The Pattern
Soon, the costuming industry began offering some very Bridgerton- and Featherington-inspired items. A welcome sign to me that maybe more people were discovering this wonderful hobby of grown-up dress-up. The Simplicity Pattern Company released S9434 in very Featherington-esque inspirations and I decided to create a fun Bridgerton gown. The pattern was on sale and I ordered it choosing the correct size option for me.


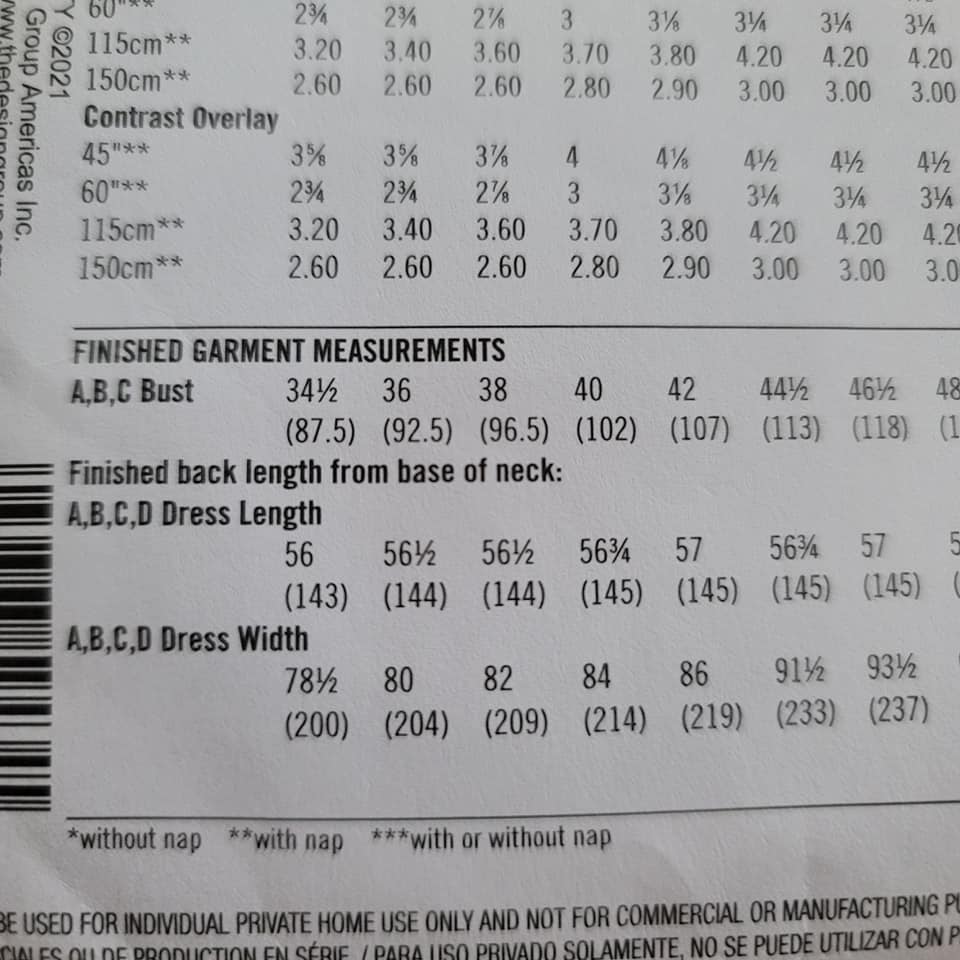
My size for this pattern will be 16 based on the measurements on the back of the envelope flap.

The finished garment measurements are on the bottom of the envelope back and a size 16 will have 2" of ease built into the pattern. "Ease" which is explained on one of the pattern pieces is "the difference between the standard body measurements for a size given on the envelope back and the finished garment measurements as printed on the pattern tissue".


Now it's time to choose which gown I will sew. I know I want a contrast overlay which narrows my choices to C or D. I also prefer the sleeve in View D. So D it is!

With the choice made I again refer to the pattern envelope to see how much fabric I will need and what notions are required for my choice.


The pattern is multi-sized for size 10 through 18. There are several pages of instructions and that is where I put my attention next.

The first page has illustrations of all views both front and back. The pattern pieces are illustrated with a key as to which pieces will be required for a specific view.
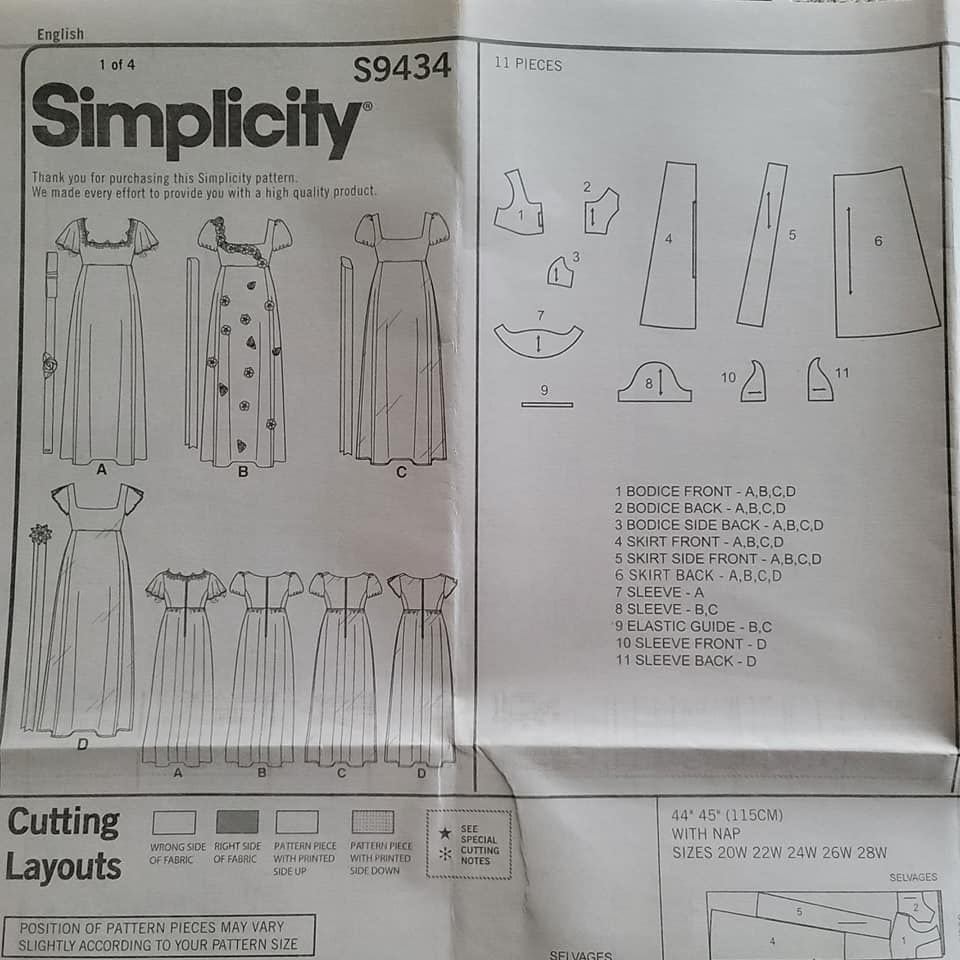

Next there are cutting layouts for different fabric widths with a key for pattern front or back, and fabric right or wrong sides.

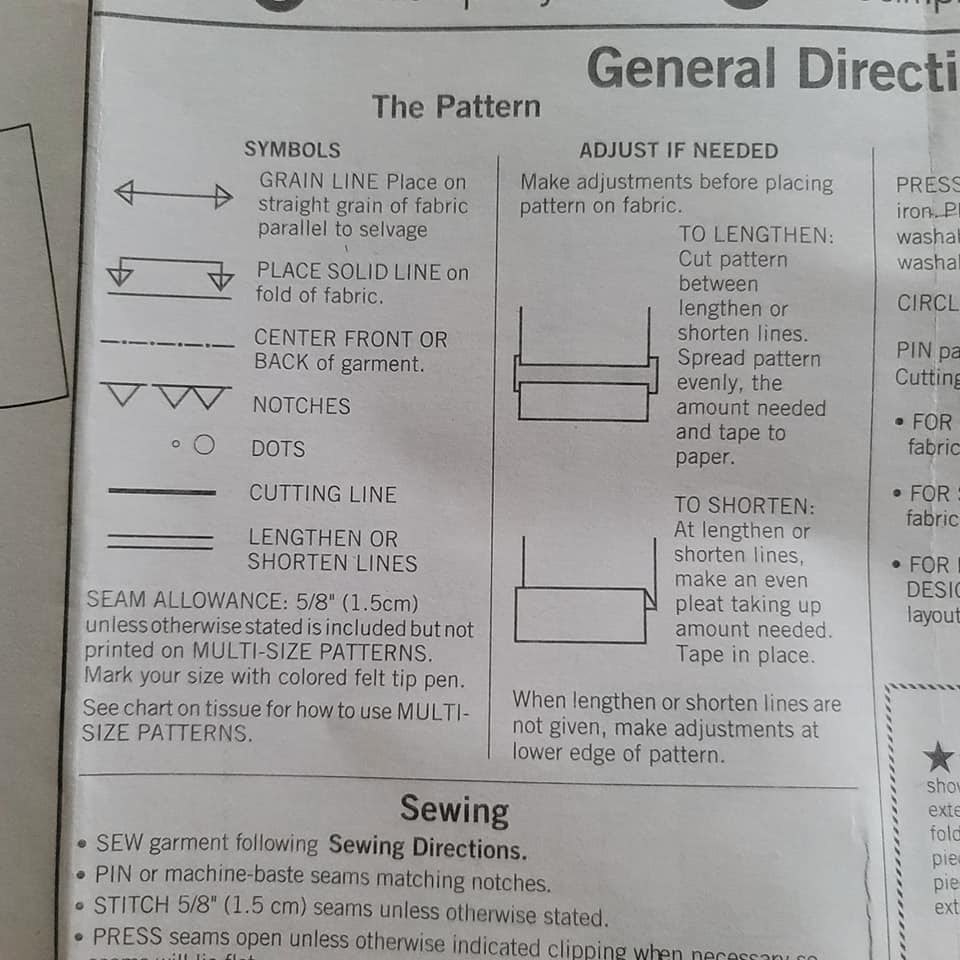
The next section is General Directions.

Here are the symbols used on the pattern and what they mean. There are also directions to lengthen or shorten the pattern piece.
The section Cutting/Marking will give directions for before and after cutting and how to mark the fabric for matching one piece to another.

There are directions and tips for pinning, stitching including what seam allowances are required for this pattern, pressing, and trimming seam allowances after sewing.

Special Cutting Notes are included for this pattern as well as Seam Finishes for Sheer Fabrics since a contrast overlay is suggested for two of the four gown options.


I open the pattern tissue and find instructions on the pattern for adjusting a multi-sized pattern for a unique fit, a glossary in several languages, and I'm pleased to see the note that recycled paper is used to print the pattern.
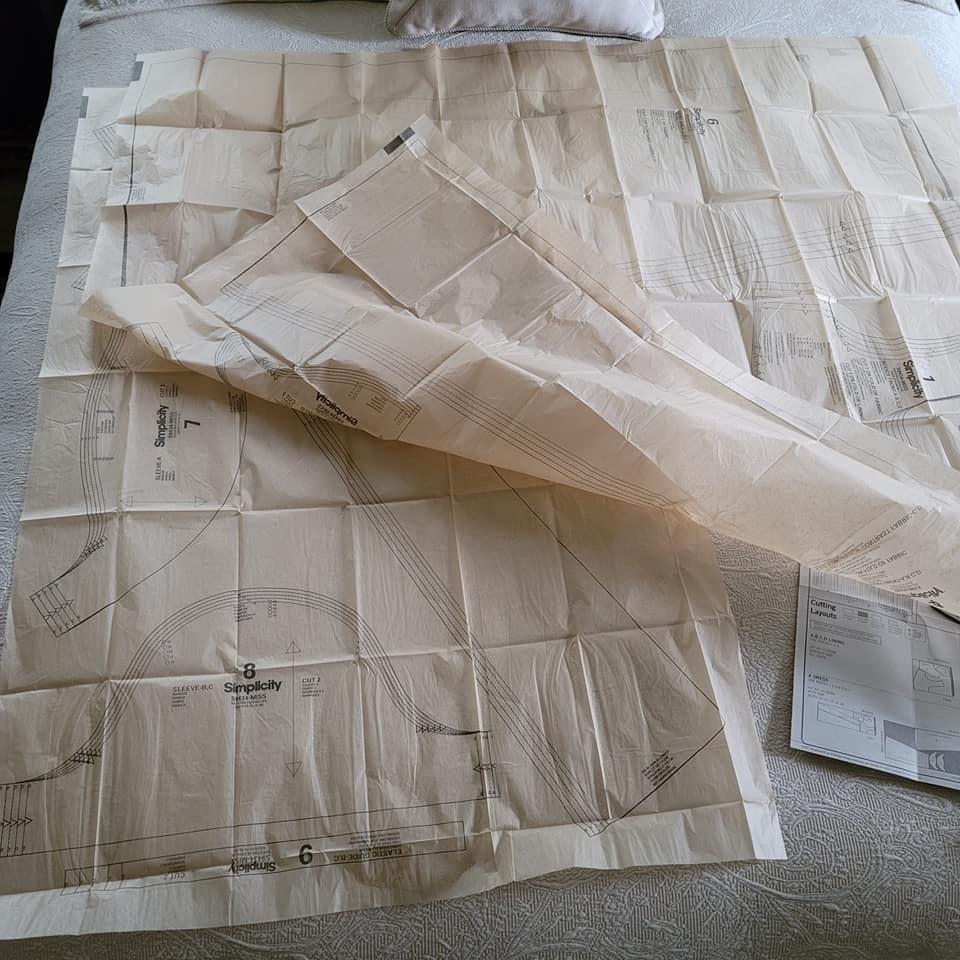


I find the pattern pieces I will need for View D, set aside the pieces I will not need, and rough cut the pattern apart.
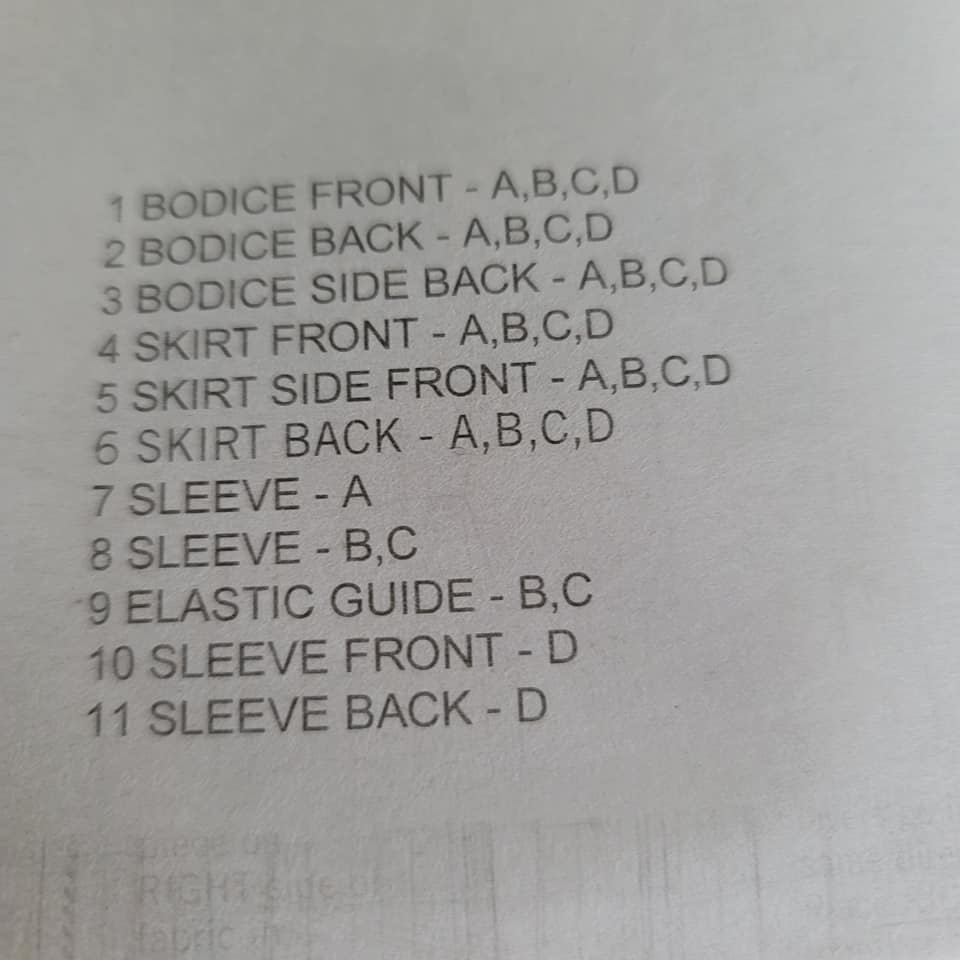


I trim each pattern piece to my size. There are three parts to the skirt portion of the gown: front, side front, and back.

The bodice portion has a front, side, and back. I'm not always attentive to following the size lines and thank goodness for tape.


The sleeve has a front and back.

A bit of pressing with a warm iron and the pattern is ready!
The Inspiration
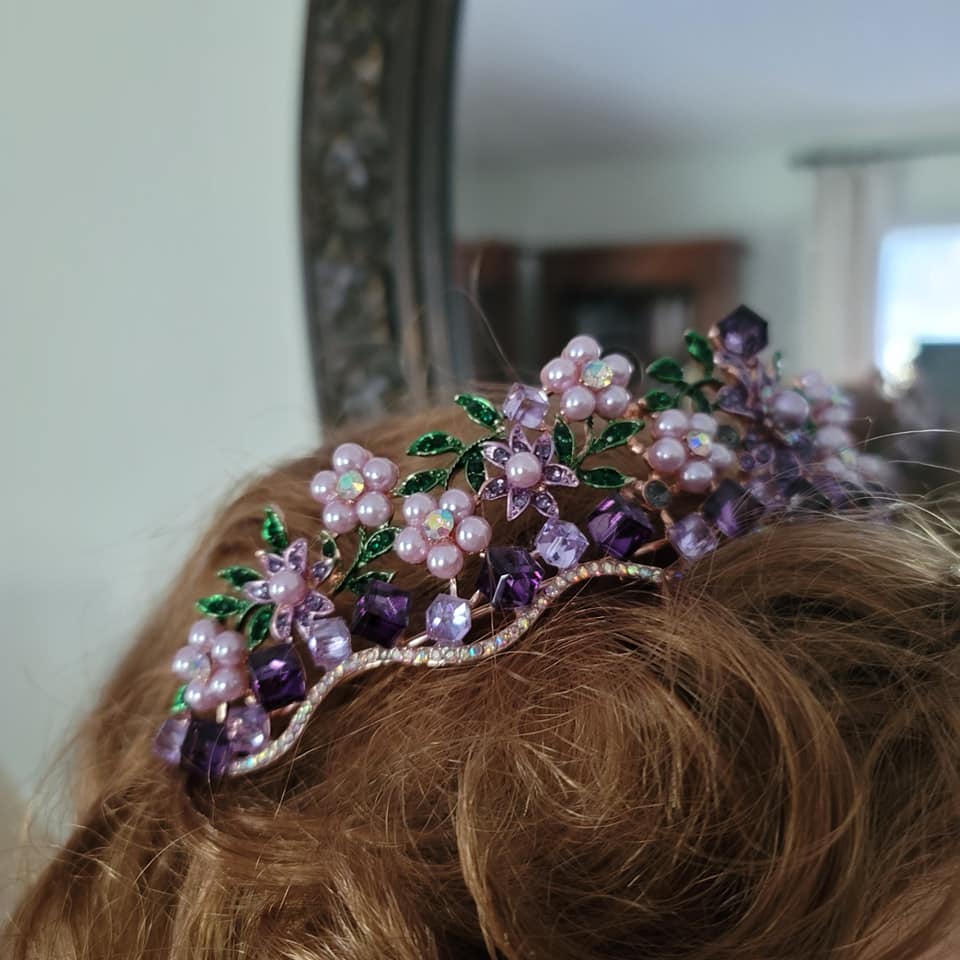
I imagine a light and airy gown with a contrast overlay of flowers. I imagine attending a garden party with tea and cookies and sunshine. And one day as I'm scrolling social media, there is my inspiration! A floral tiara from beElemental called Amethyst Garden.


The tiara arrives and shows beautifully on a red wig. Perfectly Featherington!

The Fabric
Loving the amethyst color I shop online and find a dimensional overlay with lavender petals.

While the overlay is beautiful over white, I have a bit of both yellow and lavender fabric and test the effect of the overlay on those colors.


The overlay colors pop against the yellow and the decision is made.


Sewing the Gown
With the pattern directions studied, the tiara, fabric, and notions in hand, it's time to sew the gown. The bodice lining is cut from a white cotton fabric and those pieces are used to position the overlay to make best use of the dimensional flowers. The overlay is pinned to the lining and then the overlay piece is cut.


I decide to repeat the yellow underlayer on the sleeve pieces and position the overlay with a flower at the center of each piece. Where petals may be in the way I pin then to the side on all pieces so I can save them for future use.


Once I have one sleeve piece cut, I lay the cut piece right sides together on the overlay to mirror the flower position and cut the piece for the other sleeve.


I repeat the process for the other sleeve half.


The yellow faux silk is cut for the remaining pattern pieces and the overlay cut for the skirt portion of the gown. It is all pinned to the dressform to make sure I love the design before I begin sewing.


All pieces are pressed one more time before sewing the bodice.


The overlay fabric is sewn to the yellow faux silk inside the seam allowances on the bodice front, backs, and sides. It is also sewn to the sleeve pieces. I decide that I don't want hems showing on the sleeve pieces so I cut another layer of yellow faux silk to use as a lining.


The sides are sewn to the backs.


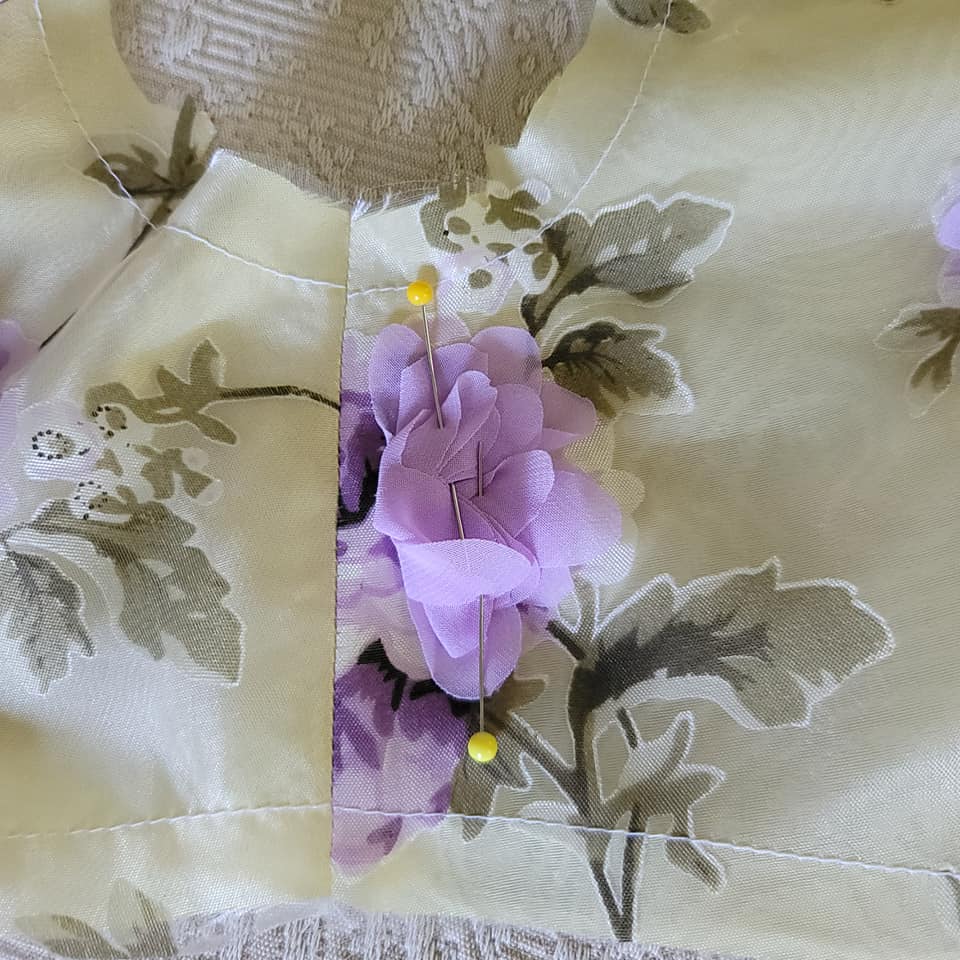
The sides are sewn to the front and a flower is pinned out of the way of the seam before sewing.

The front and sides are sewn and then the shoulders are sewn together.


The bodice lining is staystitched as instructed and then assembled the same as the bodice exterior.


The bodice exterior and lining are sewn together along the neck edge and then understitched as directed to keep the lining from turning to the outside of the bodice.


After pressing, the raw edges of the sleeve openings and lower edge are basted. Two gathering stitches are made between marks on the bodice front lower edge.


The sleeve lining is pinned to the sleeve piece wrong sides together and sewn with a narrow hem along the two outside edges. The sleeve is turned right side out and pressed.


Two rows of gathering stitches are sewn where instructed along the edge of the sleeve pieces that will be sewn to the bodice.


The sleeves are pinned to the armholes matching marks and gathering as necessary. The sleeves are sewn with two rows of machine stitches. The seam is finished with a small zigzag stitch to prevent fraying and the fabric trimmed close to the stitches.


On to the skirt portion of the gown. The side fronts are sewn to the front. This fabric frays easily and I use a French seam as shown in the directions for the sheer fabric.


A French seam is also sewn for the back sections.


A French seam is also used to sew the front to the back at the side seams. You can see that the back will have a lot of gathering and be very full.


All steps are repeated for the overlay fabric including sewing French seams.


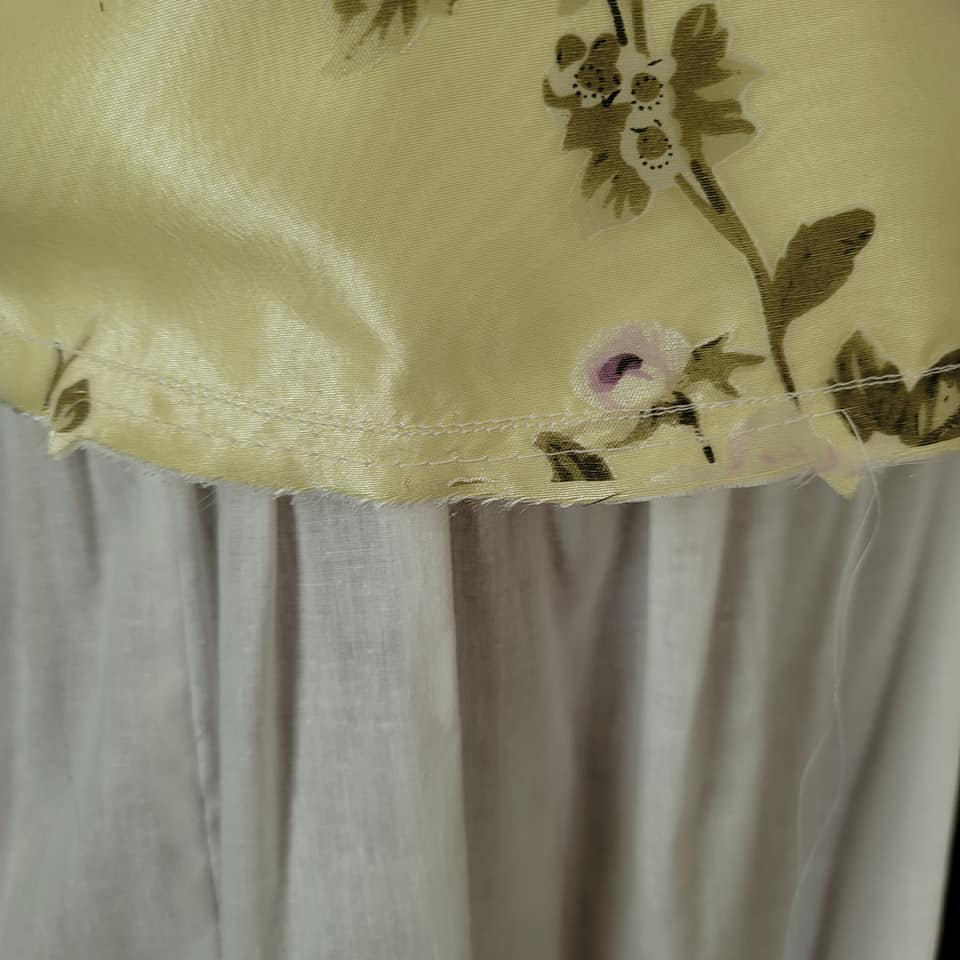
Gathering stitches are sewn to the upper skirt back edge as instructed and the overlay basted to the front upper edge of the skirt. Then the skirt is sewn to the bodice gathering as necessary. The hems of both the fabric and overlay are sewn separately with narrow machined hems.

A zipper and hook and eye are sewn into the gown with a length of satin ribbon attached to the zipper for ease of closing when dressing without assistance.


The last piece for the gown is a belt. The lavender fabric was a lovely accent and I made a long tube with a slight overlap which closes with snaps for ease in dressing. Two stash buttons cover the snap stitches.


The Perfect Touches
But you know I am all about the accessories and with this colorful gown and lovely tiara I have to add just a few more touches.
There was just a bit of lavender belting left and I cut that in half, removed some flowers from the scrap overlay fabric, added a few crystals, and stitched everything together and then to a pair of flats.

I loved the crystals so much I added pink and clear crystals to all the dimensional flowers over the entire gown and imagine them sparkling in the sunshine!


More flowers are cut from the scrap overlay with more petals added to the large flower, a few crystals, and a long length of satin ribbon creates a neckpiece that ties and hangs down the center back blending in the zipper pull.


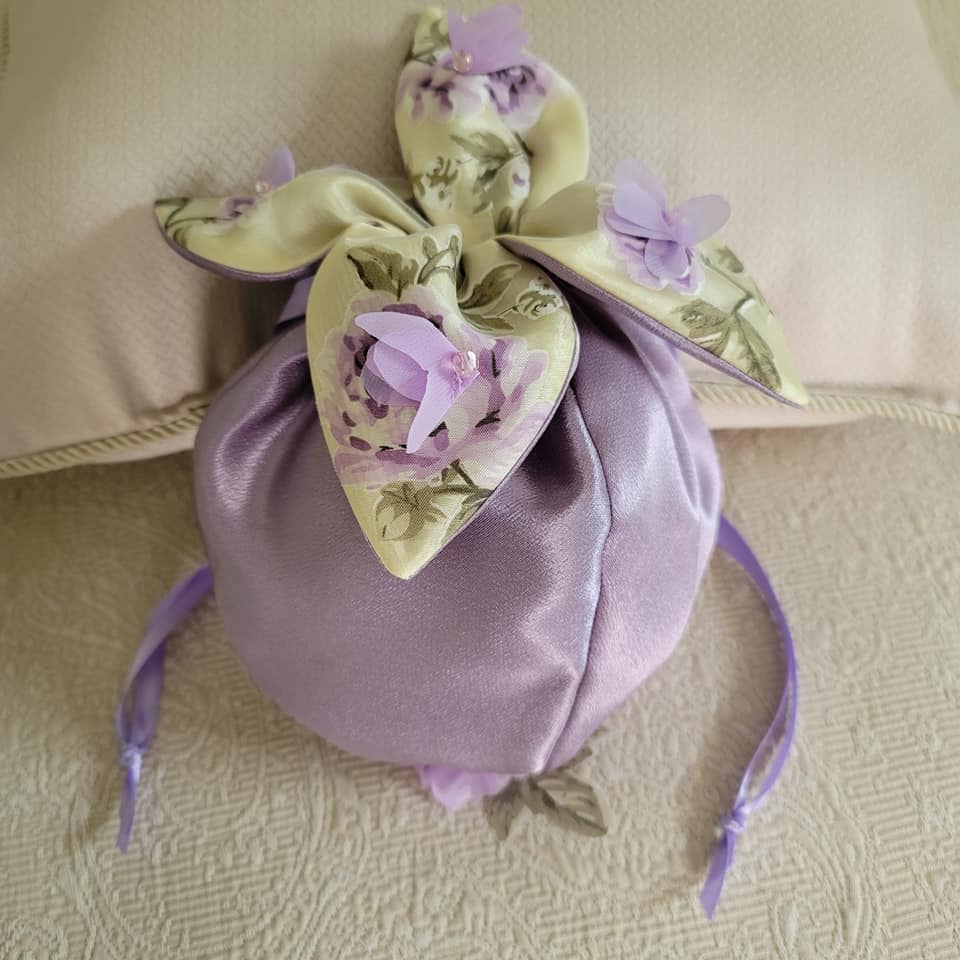
A reticule is always a useful accessory and I use a pattern for a Drawstring Petal Reticule from Out of a Portrait by Lynn McMasters. I will share a link to a blog post and video I shared previously with more details of creating this reticule than I'll share here.
Blog Post: http://theperfecttouchvictorian.blogspot.com/2021/05/making-regency-gathered-day-hat-and.html
YouTube Video: https://www.youtube.com/watch?v=WwphS3hxx6M
Here is just a little photo journey.


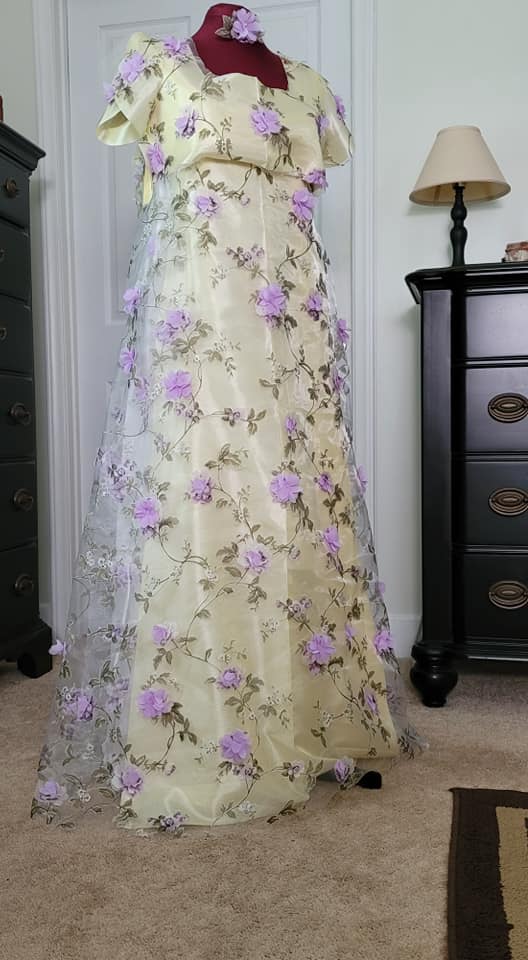
The Finished Bridgerton Gown...and Accessories


A Surprise!

At this point in my blog posts and videos I would throw myself a celebration for finishing the project. Tea. Maybe cookies! Or ice cream! And I would set up my phone to capture some photos and a bit of video of the full costume.


But something amazing happened as I was sewing this gown to share with you. The Queen's Ball, A Bridgerton Experience, was going to open in Atlanta, Georgia and would be there while I was attending a four-day costume symposium nearby. What extraordinary good fortune! I now have a ticket! So I will be wearing this gown for a garden party the day of the ball and have plans for a special ball gown for that evening. And I'll share all of that with you in another blog post and video.
.png)
I'm truly hoping for a Wisteria Tunnel!

Thank you for being here!
Hugs,
Jeanette
Companion YouTube Video: https://youtu.be/Uaqz5ny56dc


Thank you! Wishing you the best with your Bridgerton gown!
ReplyDeletein fact, this dress would be perfect for a movie
ReplyDeleteThank you! What a nice thing to say!!
DeletePerfect! This dress has an amazing character, looks beautiful and will definitely add charm to any woman :)
ReplyDelete