Thursday, March 21, 2019

Historical Sew Monthly 2019 - March - Sewing Kit and State Tribute Gown

March:  Sewing Kit:  create an item that makes use of your favorite sewing tool, instrument, or gadget: or an item made for your historical sewing kit.

The Dreamstress


This project started many, many, many years ago and ended today.  A group of ladies were attending a costume convention and decided to make a Victorian gown representing our individual states.  While North Carolina is not my home state, it is my husband's home state and we have lived here since 2002.  From mountains to ocean coast - we have it all.  The weather is temperate and there are four beautiful seasons.  I love it here!

I did make my Victorian tribute gown that many years ago but a family emergency kept me from attending the convention.  The skirt and bodice were stored along with some beautiful leftover Carolina Tartan fabric.


The Carolina Tartan was designed and registered with the Scottish Tartans Society in 1981 by Peter MacDonald of Crieff, Scotland. ... It was made the official tartan of North Carolina in 1991 when it was passed by the North Carolina General Assembly.

Last year Truly Victorian issued a new pattern for an 1878 Polonaise and I was excited to create something from the pattern.  As happens easily with fitted Victorian garments, the bodice from my original North Carolina Tribute Gown no longer fit the older me but the red silk fantail skirt could be adjusted.  With some leftover red silk and the leftover Carolina Tartan fabric I had just enough to create another Tribute Gown.  Yay!!


The pattern is very straightforward and sews together beautifully.  The most difficult part is the long pattern pieces which I kept organized by pinning to my dressform.  For structure I interlined/flatlined the entire gown with red cotton.  In these photos I'm also trying some trim and buttons to see if I like what I'm thinking of using.  I do this often in my sewing so that I can really tell if I love something the minute I see it on the partially completed piece.


These photos are the completed gown ready for collar, buttons, and trim.  The pocket was trimmed before it was sewn to the gown.  The pattern looks simple but there are a lot of drawstrings and pleats to give the beautiful silhouette.  I omitted the front darts from bust to waist to keep the tartan plaid smooth.


All of the trim and embellishment for this gown is a tribute to the State of North Carolina.  On the pocket is a Cardinal, our State Bird, sitting on a Pine branch, our State Tree.  On one sleeve edge is our State Instect, the honeybee.  The waterfall trim is reflective of our State Flower, the Dogwood Blossom, and the Great Seal is at the lower front edge of the polonaise.  Our State Colors of red and blue are in the silk, the Tartan, and the blue vintage buttons from Germany.  A wonderful costumer was selling these buttons and not only were there enough but they have a bird on them that looks like a Cardinal!


The Truly Victorian pattern has an illustration with View A showing the most amazing bows at the pleated parts of the front and sides of the polonaise.  I love bows!  But I hate making them because they always seem to come out lopsided.  Debbie is a friend and fellow costumer and she has become a US distributer of an item from an Italian company established in 1931.  The minute I heard about this gadget that would create bows, rosettes, and tassels I knew it was for me.  Tassels for my parasols and fans!!  And beautiful, non-lopsided bows!  Heaven!

This is my new and much loved gadget, La fiocchetteria and my first bow.


This is a video of one of their tutorials:  Bow Maker

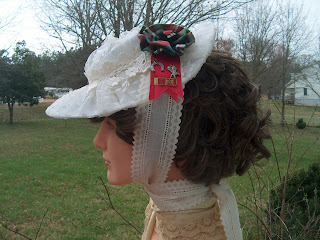
Now with all of the symbols, trim, and beautiful bows, here is my finished Tribute to the State of North Carolina Gown and a little hat made from Ageless Patterns #1525 to complete the costume.


Bows!  Bows!  Bows!
Historical Sew Monthly

The Challenge:  Sewing Kit
How this fits:  Making bows from a gadget.
Material: Bows:  Linen ribbon   Gown:  Silk dupioni, wool blend tartan
Pattern:  Truly Victorian TV430 1878 Polonaise
Year:  Bow/Tassel Maker: 1931  Gown:  1878
Notions:  Lace, state embroidered emblems, lace applique, bias tape for casings, grosgrain ribbon for drawstrings, buttons
How historically accurate is it?  Pattern developed from historical illustrations and historical sewing techniques used.
Hours to complete:  55 hours
First worn:  Not yet
Total cost:  $315

Thursday, March 7, 2019

Parasols and Petit Fours

Last month I organized, hosted, and taught a Victorian Valentine Weekend at The Historic Brookstown Inn in Winston-Salem, North Carolina.  Initially the weekend was to be a trial for an East Coast version of Costume College which is held in July in Woodland Hills, California and hosted by Costumer's Guild West.  While many local costumers expressed interest and the time and travel expense to attend across the country was eliminated, local attendance was light.  Attendance from out of state was, however, extraordinary!

In addition to our social events, each of the three days had a minimum three-hour class with a themed break.  Friday was Chapeaus and Chocolates, Saturday was Fans and Fresh Fruit, and Sunday's class was Parasols and Petit Fours.  The Historic Brookstown Inn was so accommodating and the breaks as well as the lunches, dinner, and Celebration Tea were delicious and memorable!


Our Parasols and Petit Fours class Sunday morning was rushed as we had taken more time to create our Garden Hats,


 our Victorian/Edwardian Fans,


and to laugh and share our time together in our themed breaks.  What an incredibly fun and learning experience it was!

Although this blog post will not be nearly as much as fun as our Sunday morning together during the Victorian Valentine Weekend, and you will have to supply your own Petit Fours, here is some of the information I shared in that class.

Parasol - from Latin parare meaning 'to shield, and sol meaning 'sun'.  If the covering is waterproof, it becomes an unbrella.  There is nothing so fabulous as a costumer strolling in full Victorian splendor with a coordinating parasol!  And nothing so useful on a hot sunny day!

I began my parasol journey with very inexpensive modern nylon parasols and embellished and eventually recovered and embellished.  This is a link to one of my early projects and has a lot of useful information regarding locating useful modern parasols, painting, recovering, and embellishing:


The next link will take you to my Facebook Album of parasols I have been inspired by, parasols I have embellished and/or recovered, and photos of extant parasols I have in my collection.


For those who prefer an available pattern, I brought and shared my personal copy of a parasol recovering pattern by Truly Victorian:


I also brought and showed attendees a parasol kit which I purchased from Vena Cava Design on Etsy and their own website which allows you to customize your handle.


And my absolutely favorite and highly recommended book, Sticks in Petticoats by Rachel E. Pollock.


Available in print-on-demand from Lulu.com and available in color, black and white, and a pdf version.


The method for recovering antique parasols is completely covered in Rachel's book.  While she provides options, I use what I feel is the simplest method - String Perimeter.  I had read several internet tutorials of this method and know that it has been taught at costume conventions.  Even if you can salvage one parasol panel from an antique parasol to use as a pattern, the stress that the fabric has been under during use has probably badly disfigured the grain and it is best to start fresh.

Be extremely careful with an uncovered parasol and wear eye protection.  In the String Perimeter method having a partner hold the parasol is very helpful.  With the parasol fully open tie a very strong thread (I use millinery thread) to one eye of one rib and knot.


Thread the thread through all other rib eyes until you reach the beginning.  In her book Rachel Pollock provides several ending knots for holding your thread firm at the end of the circle.  I choose to have my helper hold the circle closed while I spread the ribs out evenly along the thread circle.  You can pull the thread tighter or let it be looser for different looks.  Measure the distance between each rib and adjust so that your panels are equal.

Now you are ready to make a pattern for one panel.  Measure a piece of aluminum foil longer than the distance from the top of the parasol to the thread and lay the foil over two ribs covering one "panel" or "pie slice".  When you rub the foil on the ribs you will create a "pattern" on your foil.


Transfer that pattern to paper and use it to cut your mock-up panels following the instructions in my 'Modern Parasol Recovering' instructions linked above.  It may take several mock-ups to get the shape you like.  

This is a very light overview to parasols but hopefully enough to get you excited and started on your own journey.  Parasols are such a beautiful and practical accessory to both historical costume as well as beautiful modern use for protecting yourself from the sun.  Enjoy!


Friday, March 1, 2019

Historical Sew Monthly 2019 - February - Linen/Linens

FebruaryLinen/linens: make something out of linen, or that falls under the older definition of linens: ie: underclothes (lingerie literally means linen)
The Dreamstress

http://thedreamstress.com/the-historical-sew-monthly-2019/

After the marathon of January sewing for the Victorian Valentine Weekend in February and preparing for and hosting the educational and social weekend, I crashed.  It was such fun and I will write a blog post about it.  Meanwhile I chose something simple for the February Challenge, but something I will need for Costume College in July.

Jennifer of Historical Sewing will be at Costume College with a class of silhouettes from years in history important to the Suffragette Movement.  I'm providing the proper underthings for the year 1916.  Wearing History Archive Couture Patterns had just released recently an original 1913 Ladies' Bust Supporter pattern originally published by The Butterick Publishing Co., New York, London, Paris.


The pattern was available as an e-pattern.  I truly love the e-patterns from Wearing History as they are clearly marked in numerical order with very visible cutting lines and circles at the corners which guide assembly.


I still have in my fabric stash an ivory linen left over from creating these drawers and camisole cover for another Historical Sew Monthly Challenge in 2014.


The linen will be cool for the outer layer of the item, and a sateen cotton will provide modesty and a good place for boning channels as an inner layer.  Boning is placed at the mid-bust as well as the sides and center back on the cotton.  Boning as well as the front pleating is optional.


All pieces are sewn for both outer and inner layers.


At this point I had to decide how to assemble the layers as well as attach the lace trim as the original instructions did not specify.  Many of those original patterns assumed, correctly, that seamstresses had a basic knowledge of garment making.


I decided to sew the layers together with a narrow seam allowance right sides together leaving an opening at the bottom center.  Even with the boning I was able to turn the bra inside out and stitch the opening closed.


For the lace trim I hand stitched the satin ribbon in the trim to the linen layer.


The original instructions did not include closure options but Wearing History suggested hooks and eyes.  With satin ribbon straps tied into pretty bows, the 1913 bra is ready to wear.  With the boning it is perfectly supportive for this era and very very comfortable!


This is a Valentine postcard from February 1913.  Perhaps the sender or recipient was wearing a Ladies' Bust Supporter similar to this one I've sewn 106 years later!


Historical Sew Monthly

Challenge 2: Linen/Linens
What the item is: Ladies' Bust Supporter
How it fits the Challenge: Outer layer of linen/underclothes
Material: Linen outer, cotton lining
Pattern: Wearing History Archive Couture #AC106
Year: 1913
Notions: Bone casing, boning, satin ribbon, lace, hooks and eyes
How historically accurate is it: Created from a pattern originally published by The Butterick Publishing Co., New York, London, Paris and republishd recently by Wearing History. The directions for cutting and making were followed from the original pattern.
Hours to complete: 6 hours
First worn: July 2019 at Costume College in a silhouette lecture.
Total cost: $7 for materials, plus e-pattern.