Thursday, February 26, 2015

Historical Sew Monthly Challenge #2 - Blue

Have you ever looked at an inspiration and dreamed that one day you could wear such a gown?  As costumers I'm sure we all have that one special dream and this is mine.
This is an evening gown from Worth from the cover of Harper's Bazar March 17, 1894.  "This superb gown is of very light ciel-blue satin bordered with black fur.  It is further enriched with bead embroidery in iris design."  Sigh.  Wearing this gown is still my dream but much of the creation has come true.  Are you curious?  This will be the year and you will be told the whole story!  But in time....in time.

As I do have the blue satin and it is the only blue I have in the remnant pile, the Historical Sew Monthly Challenge #2 - Blue is the perfect time for me to make an accessory for this gown.  M'lady absolutely needs an evening bag and I shall make one for her.

From the moment I saw the inspiration I knew the gown should have crystals - Swarovski crystals!  The history is that Daniel Swarovski's father owned a small glass-cutting factory.  Sand, burnt limestone, and soda are melted together at extremely high temperatures to create glass.  If lead is added a stronger and highly refractive glass is created which can be cut and polished like any gemstone.  The secret to Swarovski crystals is in the cutting and polishing.  In 1892 Daniel Swarovski patented an electric cutting machine that facilitated the production of crystal glass and so it seems perfectly understandable to me that the lady having her Worth gown made in 1894 would have Swarovski crystals embroidering her gown.  And her reticule!

Like most things, purchasing in bulk is least expensive and 1,440 Swarovski crystals come in this envelope from Austria.  This envelope is approximately $75 or $.052 per crystal.
They are beautiful!
But when the light hits them (or the photo flash) they take your breath away!
The first thing I do is enlarge the inspiration and study the design.  This will be the design I use for the reticule.

In my online searches I locate a used purse frame.  It is bent and has lost some of its glow, but I feel that this is the perfect frame for my reticule.  With a blue satin remnant, a blue silk velvet fabric, crystals and the plan, I'm ready to begin.
First I do the crystal embroidery using a hoop, a beading needle, and clear bead embroidery thread by Clover.  I draw my design with a quilter's pencil and begin beading.

.
With 199 beads sewn, the design is finished.
 
My pattern for this reticule s a simple half circle.  I cut both the satin and the velvet on the fold.

With right sides facing, I sew both the satin and the velvet from the fold up leaving the tops open just slightly larger than the frame opening.  (1/4" seam allowances on the entire reticule)
I cut a small opening in the lining which is my velvet, right in the center of the fold.

The satin is turned right side out and slipped into the velvet.

The curved edges are sewn.  Then the satin outer layer is pulled through the hole that I cut in the velvet lining.


The velvet lining is then turned down into the inside of the satin outer layer.  I've pressed the upper curved edge and now that edge is ready to be sewn to the frame.  At one time the frame had holes for sewing the fabric onto the frame, but those were then covered with another piece of the frame.

I've found a thread that matches the frame and will sew the fabric directly to the frame design with tiny stitches.

Modern reproduction frames with holes work well and in this wild hot pink silk velvet reticule I made a while ago, I used seed beads inside and outside to anchor my fabric and thread.

Silk velvet is nice for a reticule and this was the same pattern I'm using for the satin.  I sewed running stitches along the bottom of the hot pink silk velvet and the gathering made for a pretty lower edge.
I tried the same technique for the lower edge of the satin but the look wasn't the same and the crystals were distorted, so I removed the stitching and created a box bottom by just pushing the lower corners inside and making a tack stitch.
The crystal and blue satin reticule is ready for the ball!


Historical Sew Fortnightly

What It Is:  Satin and Velvet Crystal Embroidered Reticule
The Challenge:  #2 Blue
Fabric:  Satin and silk velvet
Pattern:  Self-drafted
Year:  1894
Notions:  Used reticule frame, Swarovski crystals, bead embroidery thread
How historically accurate is it?  Completely hand drafted and hand sewn using historically accurate materials
Hours to complete?  6 hours
First Worn:  Costume College 2015
Total Cost:  Fabrics were remnants, crystals approximately $11, used frame $4

Love,
Jeanette

Monday, February 23, 2015

Historical Sew Monthly Challenge #1 - Foundations - 1920s Corset

They taught me well!  All those wonderful costumers that kept telling me that a good period impression starts from the inside out.  I listened and am trying desperately to follow the advice of those whose work I so admire.

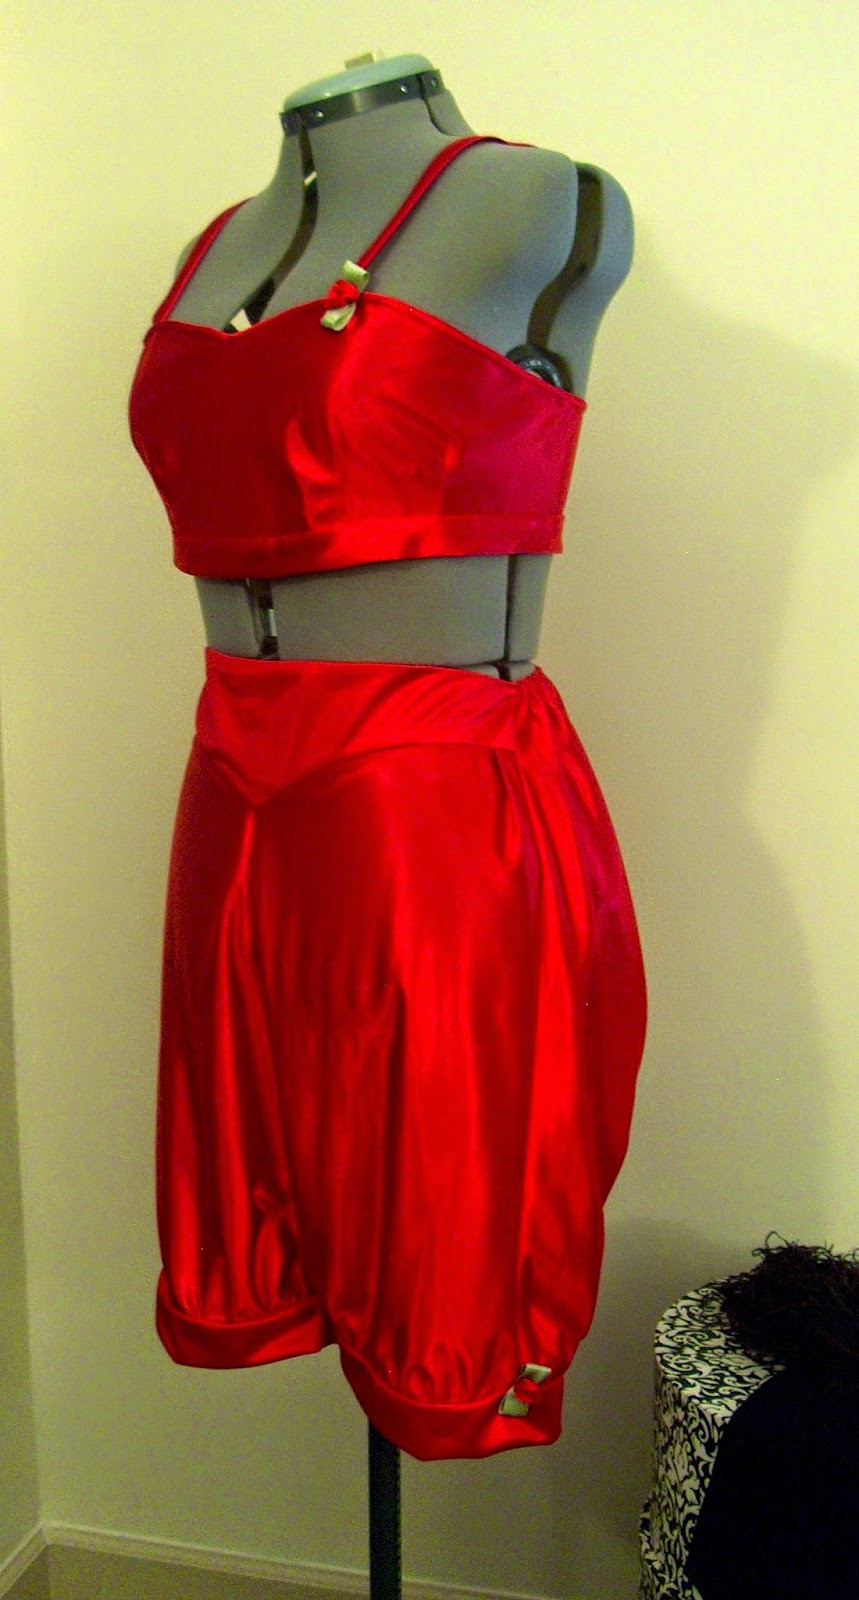
Last October, in preparation for creating a 1920s costume, I made a brassiere and bloomers and wrote this post:


The next piece I needed to create for the correct 1920s silhouette was a corset or corselette as it was sometimes called.  The purpose of this corset was to flatten the bust and control the hips while hiding the waist.  The silhouette was columnar and since the shape of the body beneath was downplayed, the clothing with its embellishments and sheer materials was allowed to take center stage.  It was a silhouette for those with a less than perfect figure.

The pattern I chose was from Reconstructing History.  Their RH1234 was available as a downloadable e-pattern which is wonderful when you don't want to wait for the mail.
Having previously made the Reconstructing History 1910s corset with great results I was confident in the sizing.  I printed the pattern scale, then printed the pattern, aligned the marks, cut and taped.
 Then I selected the size I would need based on the reference and cut my pattern pieces.
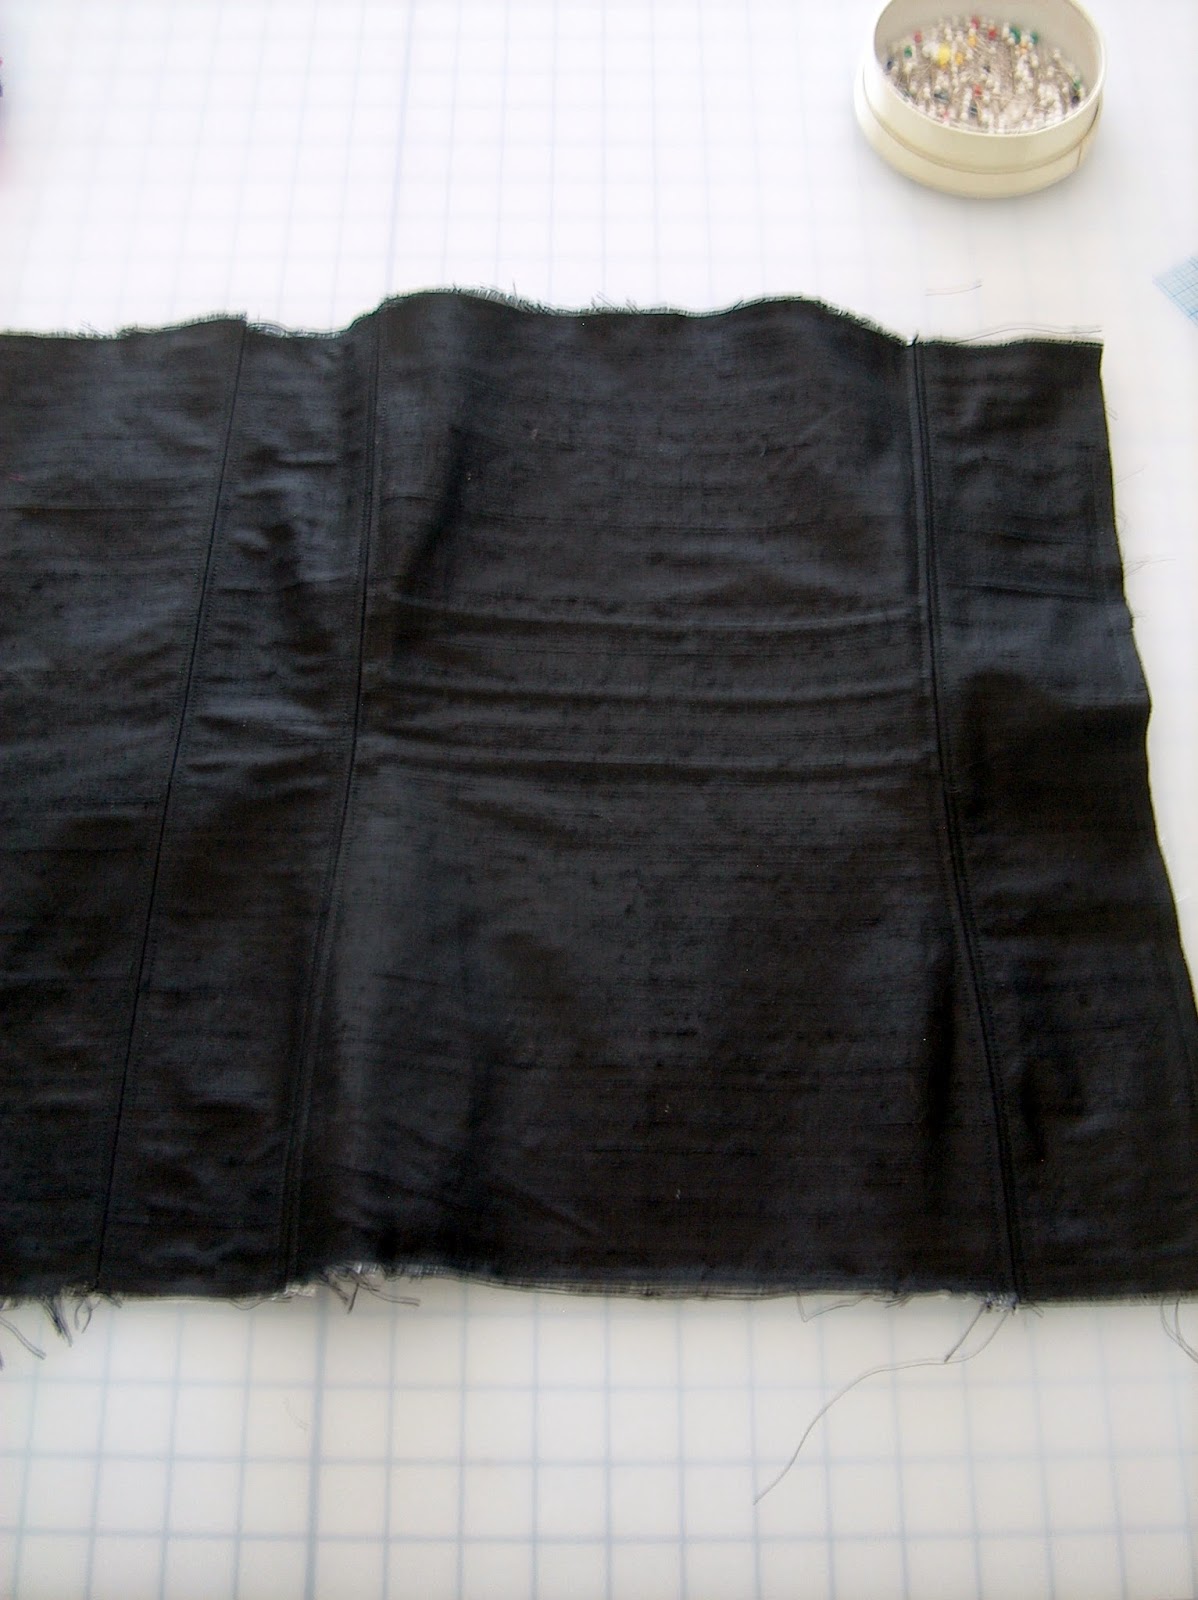
I used an inner layer of coutil and fashion fabric outer layer of black silk dupioni.  The pattern calls for elastic gores, but as I'm trying to use what I have on hand, I substituted with a black stretch lace.
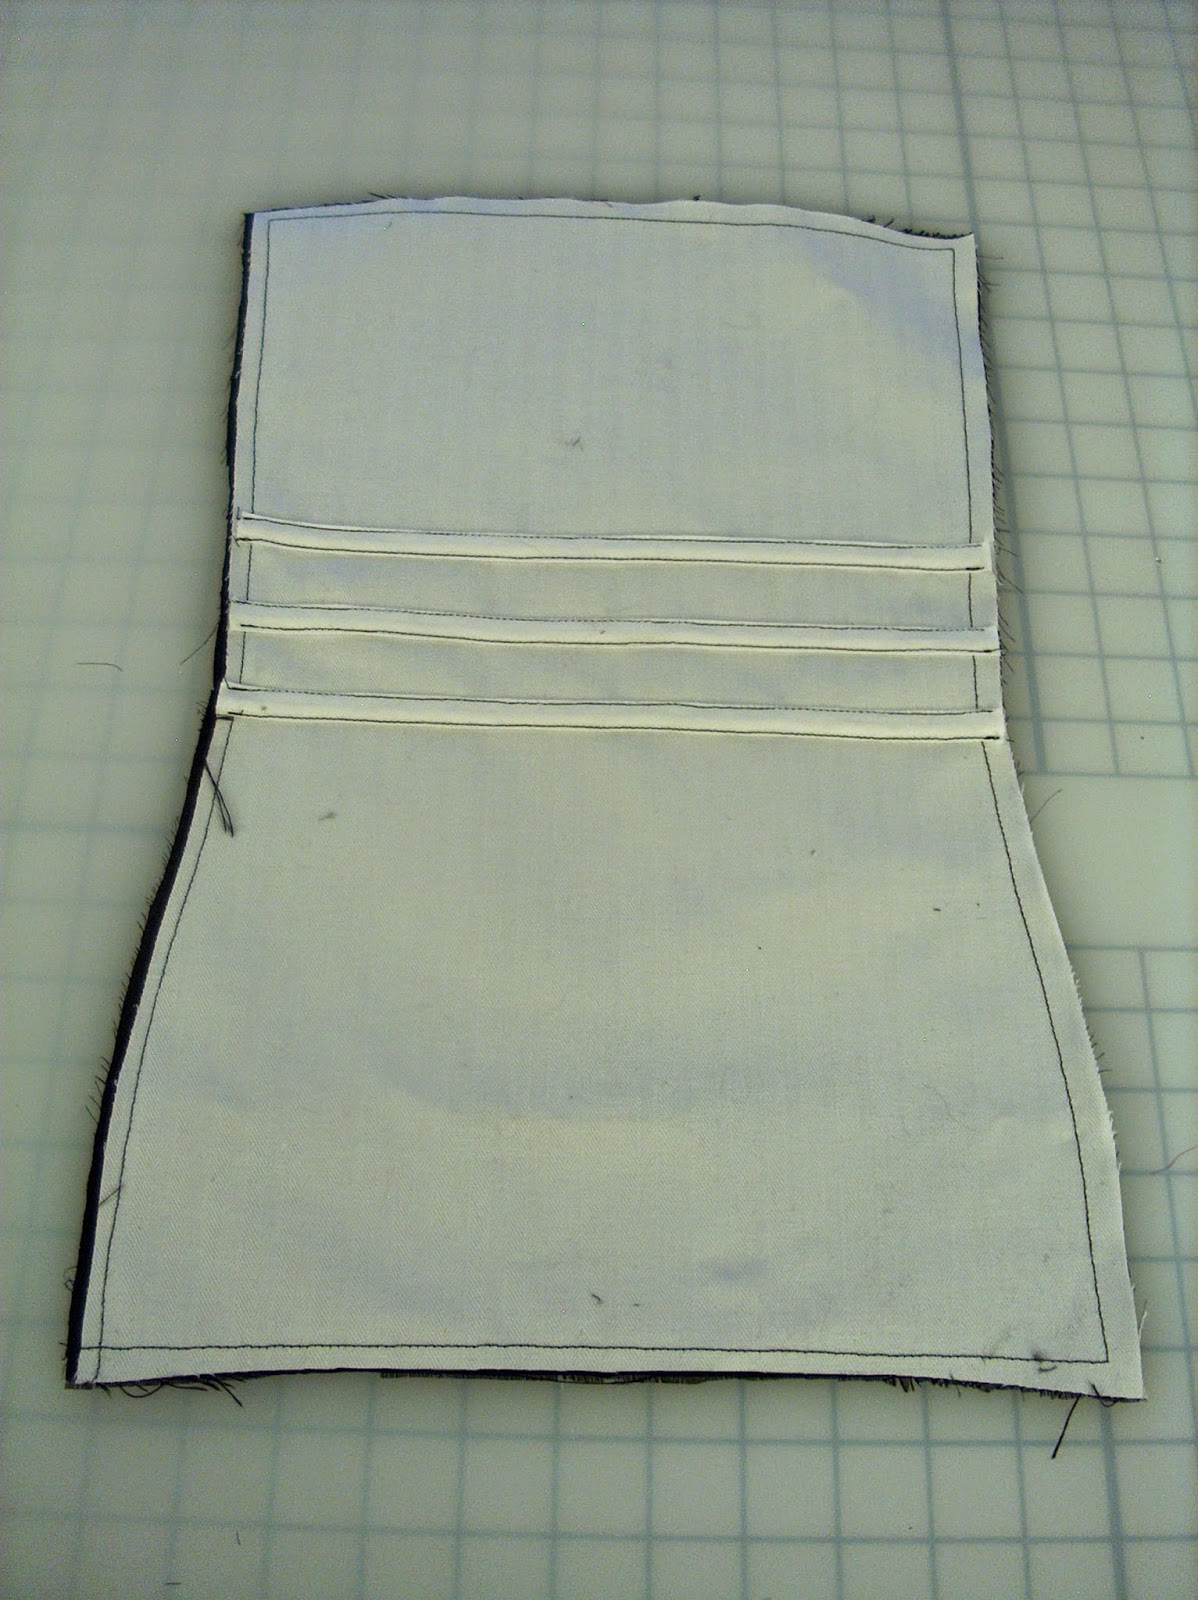
After flatlining the silk to the coutil, I assembled the sides to the back.
Then I added the gores.
 

It is optional to place three bones across the front which is what was in the original corset from which the pattern is based, so in historical correctness I added channels and boning to the front piece.
You've probably already noticed that I did not do a muslin mock-up.  My trust in the sizing of the pattern and the simplicity of the pattern, gave me confidence that I could miss that step.  But even before I pinned my pieces on the dressform I could see I was in trouble.  I still don't know what went wrong and I've doublechecked everything and written the pattern company, but the finished corset was going to be 5 inches too small.  To correct the problem I added a piece to each side of the front.
With the corset fitting perfectly now, I finish the corset with a silk bias strip on the top and bottom edges and both of the side closure edges.  I then made and added the straps which I made quite a bit longer and wider than the pattern recommended.  I had some hook and eye tape on hand and used it for my closure.


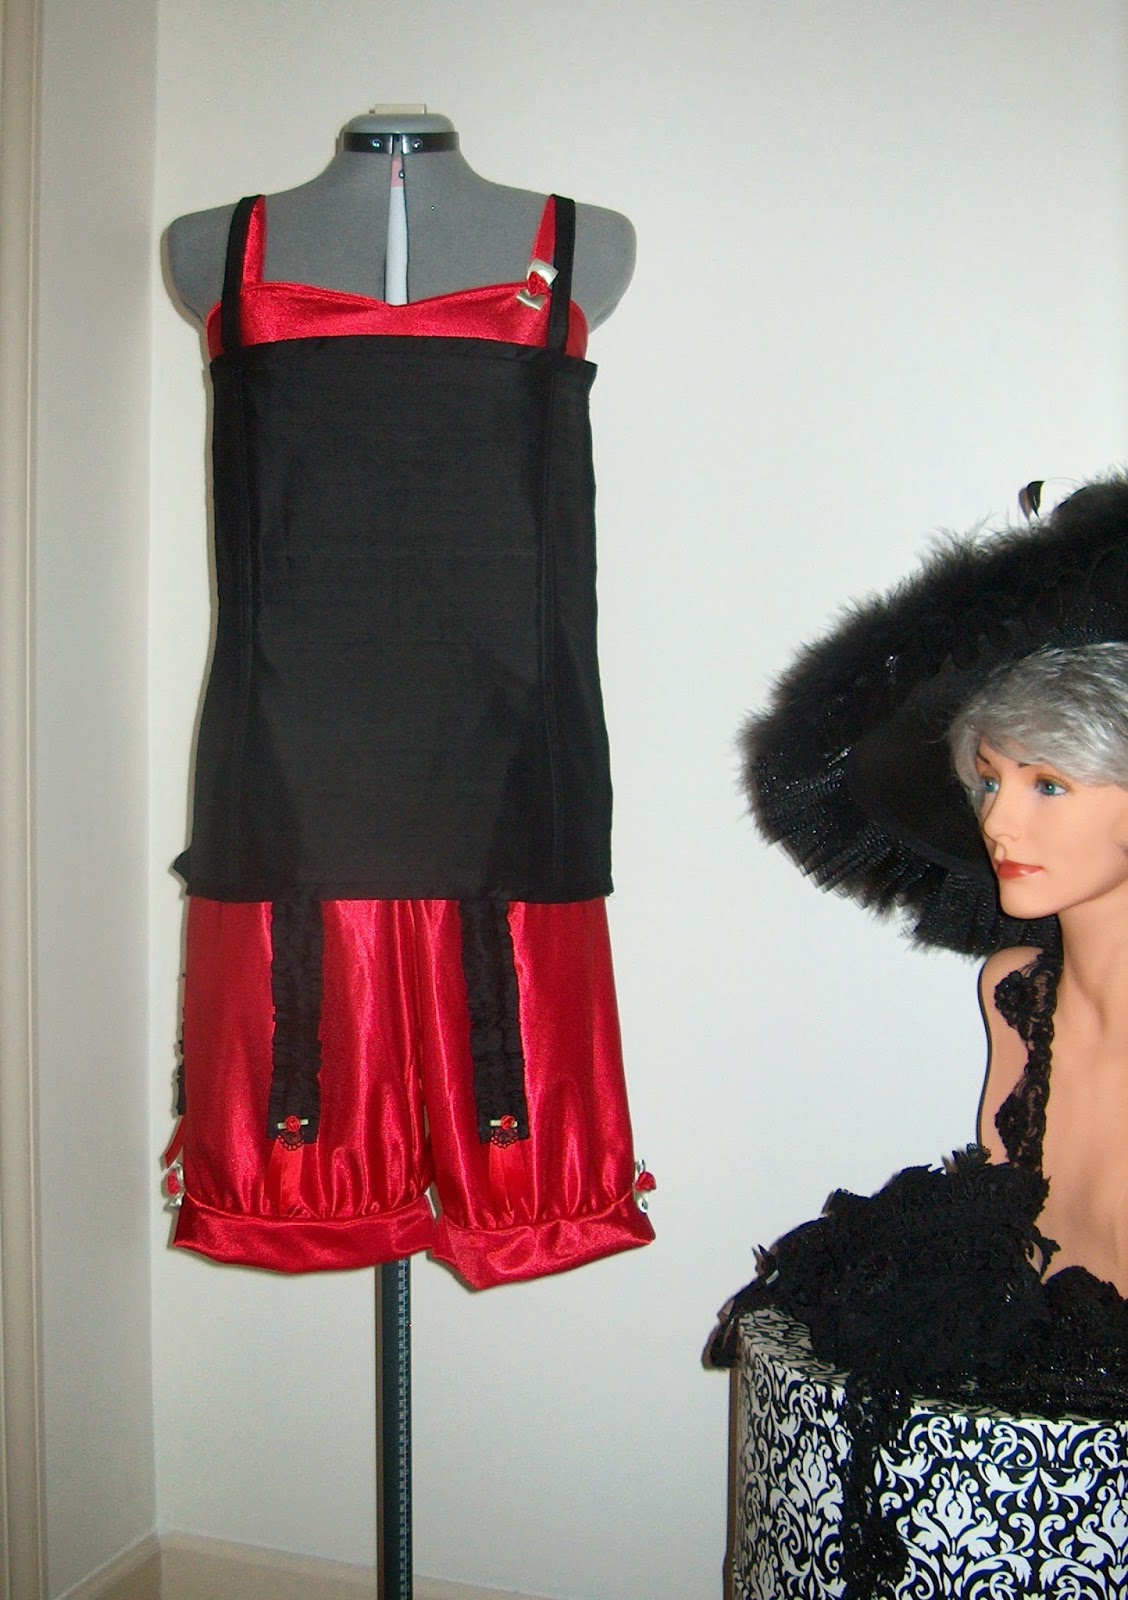
The corset is finished as far as the pattern instructions, but I want to create stocking garters.  When I made the 1910s corset I made simple garters by cutting four pieces of fabric 4" wide by 14" long.  I sewed a tube with a 1/2" seam, turned the tube right side out, pressed the tube with the seam down the center back.  I turned the lower edge in 1", then sewed 3/8" from each edge along both long sides.  I cut 1/2" elastic into 10" lengths, created a loop at one end, then sewed that end into the center opening 3/8" from the edge.  I followed those same instructions for this corset and embellished the garters with some satin ribbon, lace, and a red rose that matched the roses I had made for the brassiere and bloomers.
 
The finished corset truly does create the right columnar silhouette and is very comfortable.


While I don't have any photos to share of me wearing these underthings, I do have a video to share of some ladies in a 1920s ad.  In the video you can see how the stockings are held up by the garters slightly bunching the bloomers.
https://www.youtube.com/watch?v=GFqXXif8Rp0

Historical Sew Fortnightly

What It Is:  1920s Corset/Corselette
The Challenge:  #1 Foundations
Fabric:  Coutil, silk dupioni
Pattern:  Reconstructing History RH1234
Year:  1920s
Notions:  Elastic, stocking garters, satin ribbon, hook and eyes
How historically accurate is it?  The pattern was created from an original corset.  The coutil and silk are accurate, the stretch lace for the gores and the hook and eye tape are not.
Hours to complete?  6 hours
First Worn:  Party Like A Vanderbilt, Biltmore Estate Weekend, April 2015
Total Cost:  $39.00

Off to learn the Charleston!
Jeanette

Saturday, February 14, 2015

2015 Is Going To Be a Good Good Time!

But it's already February 14th, you say?  True!  I've been having such fun since we retired and part of that fun was sewing and wearing the costumes I've made and continue to make.

Mid-year 2014 I did a recap video of projects and I'll add to that and post again.  Family and friends enjoyed seeing it all together and it made me happy to see it all in one place.  But that will be a bit later as right now I have some catching up to do.

Catching up on blog posts!  I have to blog about the costumes for Steampunk unLimited in Lancaster PA last fall, the SASS Convention in January, and the Victorian Dance Cruise in January.  All fantastic events with wonderful friends!

Right now I'm planning the costumes for the event I've organized - Party Like A Vanderbilt at Biltmore Estate, Asheville NC in April Party Like A Vanderbilt Blog Post followed by the San Diego Vintage Dance Week in Asheville Vintage Dance Week Website.  Then Costume College a few months later.  I've submitted proposals to teach two classes at Costume College and I hope they are accepted!  Another few months and I'll be attending my husband's daughter's wedding and then a month after that the National Remembrance Tea and parade in Gettysburg, PA.  With luck, the SASS Convention again in December.  A very enjoyable year ahead!

So the short term planning is for the Biltmore Estate weekend and Dance Week in April which is 11 costume events.  Yes!!  11!!  Fortunately, many of these can use costumes I made during the Historical Sew Fortnightly 2014 Challenges so I'm a bit ahead.  Thank heavens for the Historical Sew Fortnightly!

Here's the plan (as always subject to change):

One of the first items for me is creating the attendees' badges so that we can all recognize each other over the weekend.  The Dogwood Blossom is the North Carolina state flower and this gold with Swarovski crystal blossom with satin ribbon is my plan.  These will go in the welcome bags for each of the 30 attendees for the weekend.


Friday evening Historic Trolley tour of Asheville -  The 1899 bodice and hat I made for two Historical Sew Fortnightly Challenges in 2014 and finally got to wear at the SASS Convention Victorian Silhouette Show.  This should be perfect as I play the Trolley hostess serving wine, champagne, and snacks.  I've found some small black tassels which I'm adding to the lower point of each of the bodice appliques.
 Saturday Biltmore Estate tour and Downton Abbey Costume Exhibit - Saturday will be officially known as "Biltmore Estate Black Beads Day" and you will understand shortly.  This is the tour suit plan - a black crinkled cotton for the bodice and large collar with a black/pewter plaid crinkled taffeta for the skirt, cuffs, and small collar using this pattern, right side view.
The best part?  Everything is in the stash!  Also from stash is a beaded hat bought on ebay long ago which is a bit over-the-top but I love it and haven't had a chance to wear.
I have a beaded shawl which I'll applique on the large collar.  It will be on the black fabric but I'm showing it on the plaid here just to show the detail.  Very Martha Levinson, don't you think?


Saturday evening 'Downton Dinner in the Champagne Cellar' - Based on Downton Abbey's series start of 1912 and using this pattern left side view.  I'll start with a silk fabric I found in the Fabric District during Costume College last year.  Those are shoes I won at auction for $15 and they are unworn.  I'm tickled!
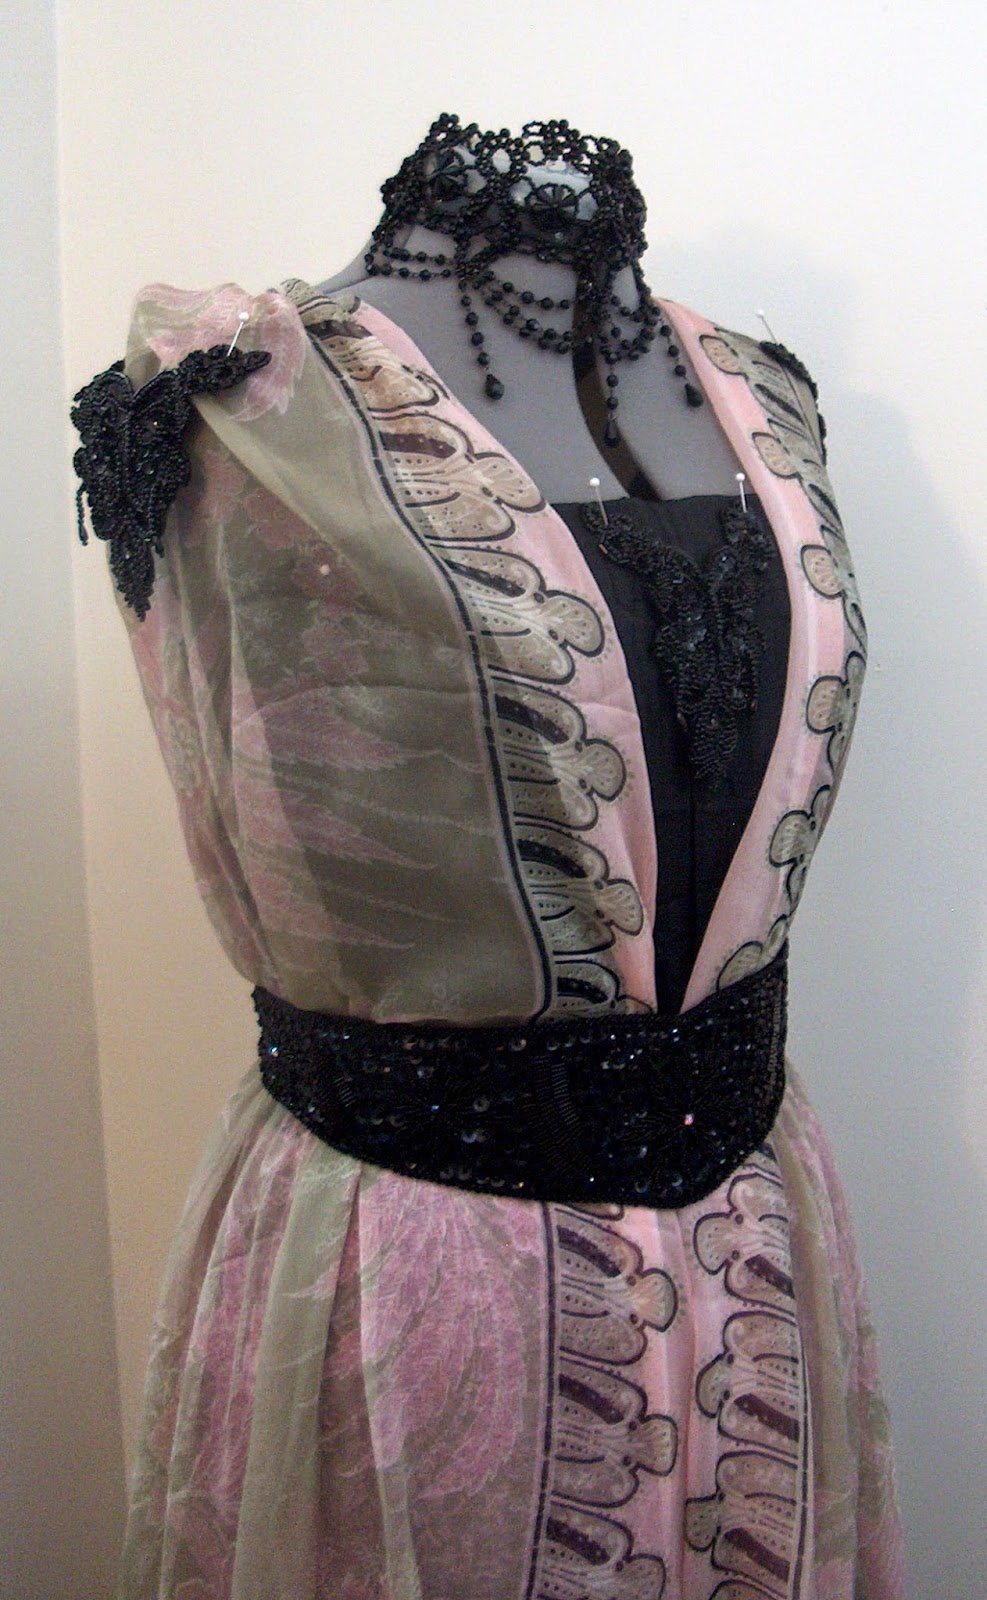
Using the same crinkled cotton fabric I used for the suit (at $1.00 a yard I bought a bunch), a pink mystery fabric, and my silk, this is a draped dressform to give me an idea of how the fabrics will make up.

Some additional black beading at the edges, some beaded appliques, and a black modern beaded belt and I think it will all pull together.  Today I found this $8.55 tiara and with a few additional jet beads it might be something even the Dowager Countess would wear!
Sunday morning Archery - On Sunday morning our group of 30 attendees have time to enjoy their chosen tour, carriage ride, leisurely breakfast, or sleeping late.  Nine of us have chosen to attend an archery lesson - in costume!  This is my chance to wear another Historical Sew Fortnightly Challenge, my Manet painting recreation costume.


Sunday afternoon - Time Traveler's Tea - George Vanderbilt lived from 1862 to 1914.  He opened Biltmore House in 1895.  We will celebrate his life with costumes from all eras in which he lived and enjoy the variety and color of the fashions while enjoying a fabulous Tea at the Inn on Biltmore Estate.  This is another chance for me to wear a Historical Sew Fortnightly creation - the Edwardian Tea Gown and hat.


Sunday evening - 1920s Reception - The Legacy Continues - A vintage dress purchased from a sweet lady for $5.00 will be the base for my costume.

Of course there will have to be a fabulous headpiece to match the sparkle of the dress and a beaded headpiece following this pattern will be my beginning.

On Monday our group divides into those that will head home and those that will stay for the Vintage Dance Week.  One day we will tour Biltmore House again and I will finally wear my "Downton Abbey" fabric dress made for an HSF Challenge last year.

The only gown still on the undecided portion of the plan is the Wednesday evening Belle Epoch gown.  So far this one is a good contender since I have 16 yards of this wonderful 19" wide lace already in the stash.
Meanwhile, I have plenty of creating to keep me busy for this beautiful once-in-my-lifetime event.  I really could use one of these:
Love,
          Jeanette