Showing posts with label Historical Sew Monthly 2020. Show all posts

Wednesday, February 3, 2021

Historical Sew Monthly 2020 - November - Go Green Glow-Up

 November: Go Green Glow-Up: Be environmentally friendly and celebrate how your making skills have ‘glowed-up’ as you’ve used and practiced them by taking apart an early make of yours that no-longer represents your making skills, and re-making it so you’d be proud to use it. It can be as elaborate as a total re-make, or as simple as getting the ribbons or buttons you didn’t have time to source at first. You could even take something from a challenge made earlier in the year, and fix the tiny things you weren’t totally happy with.

                                                                     The Dreamstress

In September of 2015 I wrote a blog post for the Historical Sew Monthly Challenge #6 - Out of Your Comfort Zone.

http://theperfecttouchvictorian.blogspot.com/2015/09/historical-sew-monthly-challenge-6-out.html

It was my first dip into the Regency Era and most definitely out of my comfort zone.  To help me with the uneasiness of appropriate undergarments and accessories for the era, I acquired the La Mode Bagatelle Regency Wardrobe pattern which included most everything I would need to feel comfortable creating this historical period fashion.


I made the bodiced petticoat, a trained gown, and a chemisette.


I wore this gown once at Costume College, later made a Spencer and reticule from the same pattern, and everything has been stored since as I haven't had a chance to participate in any Regency events.

The novel coronavirus brought many changes and challenges to our lives and also brought opportunities through internet costume events.  One of those events was to be in November, my birthday month, and it was being hosted by the Regency Society of Virginia.  I am a member just to learn from the events they bring to their members.  The November event was a presentation on the history of silhouette art and Charles Burns, a silhouette artist from the UK, would be in attendance to create our silhouette.  It was a perfect excuse for me to add to my very slight Regency wardrobe, use the last bit of a red silk, and attend an event that was just one week before my birthday.

I had purchased a hat pattern from a costumer's destash and found that the pattern designer had an overdress pattern for the same period and purchased that as well.  I had just enough of the red silk for the overdress and hat, and a small amount of gold silk for lining.

I didn't know anything about the fashions of the Regency Era when I first sewed for this period in 2015 and five years later my knowledge is no better.  I rely on portraits and costumers much more knowledgeable than me to guide me.  In this case I also depended upon the pattern designer.  I did, however, decide without any factual support to add gold piping to the bodice edges of the gown and to the trim I would add to the hat.  Is piping historically accurate?  Or historically acceptable for this period?  I still don't have evidence.  But it will bring a smile to me just adding that pop of color and I decide that is most important for my birthday gown.  I cut fabric strips at a 45 degree angle to the selvedge edge which is the bias of the fabric.  There is stretch in the bias which allows the pipinig to follow curves beautifully. The width of each strip is double the seam allowance of 1/2" plus the circumference of my 1/8" cord which in this case is 3/8" for a total width of 1-3/8".


The pattern is easy to follow and my fabric and bias strips are cut and ready for assembly.


The cord is sewn into the bias strip using the zipper foot.


Then I pin the bias with cord to the edges of the fabric pieces.  Because I cut the strips allowing for the seam allowance I can pin the strip even with the edge of the fabric piece.


The bias strip is sewn to the fabric using the zipper foot.


Then the adjoining piece is pinned over the bias strip.  I do this in two steps to be sure I follow the cord closely.


This is the finished back and side backs with the gold piping.  I really love the pop of color!


I add the bias to create piping along all edges of the bodice.


The lining is cut from the same gold silk as the bias strips and sewn.


The lining is sewn to the outside front edges of the bodice leaving the lower edge and belt front edge open.  The lined bodice is turned and pressed and the lining armholes hand stitched to the bodice armholes.


The lined bodice is now ready for the skirt and the buckle flaps.


The skirt is an easy assembly with long interior seams which I machine sew and hemmed front and lower edges which would be visible and I hem by hand.


Then the upper edge of the skirt is pleated according to the pattern instructions to match the lower edge of the bodice.


I machine sew the skirt to the outer bodice layer...


...and hand stitch the bodice lining to enclose the skirt/bodice seam.  The belts are added at the front edges and the skirt and bodice are aligned and hand stitched together.


Completed bodice and skirt interior and exterior.


I've had the most beautiful buckle from Ensembles of the Past on Etsy and with my gold accents I think this will be perfect for the completed Overdress.


The Overdress completely changes the look of the white gown and without the chemisette will make a beautiful evening gown.  I have a pattern for an evening turban also by Wingeo and if I ever have the opportunity to wear an evening ensemble I will create a matching turban with the few scraps of red silk I have left.  There may be enough for a petal reticule for the pattern from Out of a Portrait.

Here is a little peek at the next part of this project - the Gathered Day Hat.  It will be a separate blog post as I want to share all the steps I used including the buckram base and the curled feathers.


Thank you for being here!  I look forward to sharing the next part of this project including the party for which it was all created.  Until then,

Hugs,
                     Jeanette


Historical Sew Monthly

What the item is: Overdress
How it fits the challenge: The Historical Sew Monthly Challenge in June 2015 was Out of Your Comfort Zone. I made my first Regency white dress. This year I added the overdress with the technique of piping on all bodice edges.
Material: Silk
Pattern: Wingeo 1795 - 1825 #256 Overdress
Year: 1795 - 1825
Notions: Cord for piping, thread, buckle from Ensembles of the Past.
How historically accurate is it? Silhouette similar to illustrations I have seen, correct fabric, but the piping is my own touch.
Hours to complete: 24 hours
First worn: Zoom event November 2020
Total cost: $72


Monday, November 30, 2020

A 1924 Apron and Cap and Historical Sew Monthly February 2020 Re-Use


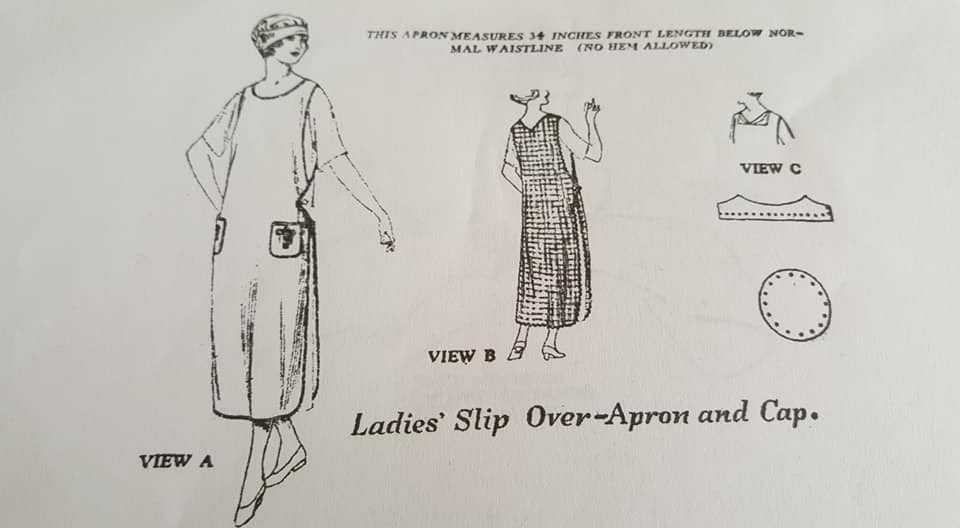
It's been a dream of mine to create aprons from many decades.  For no reason.  I don't wear aprons but I remember my grandmother who was born in 1897 always, always, wearing an apron.  Nothing fancy but she cooked on a wood stove and had 13 children and I imagine an apron came in very handy.  When I found this 1924 Apron and Cap from Repeated Originals on Etsy I immediately purchased the downloadable pattern.

Then I printed it, cut it for assembly, found a twin size sheet that had been on the guest room beds in a previous home, and immediately moved on to another project.  That happens sometimes, doesn't it?


And here I am many years later with a project that is perfect for this apron and cap.  I locate all my stashed items and it's time to sew this little beauty.  The February 2020 Historical Sew Monthly Challenge (we can do any of the 12 Challenges in any order) is called Re-Use:  Use thrifted materials or old garments or bedlinen to make a new garment.  Mend, re-shape or re-trim, an existing garment to prolong its life.  My 1924 apron and cap will be perfect for this Challenge and my project!

The downloadable pattern is easy to assemble.  Every piece is shown on a scaled diagram and the pieces line up easily and perfectly.


In a few minutes the pieces are assembled and cut.

The sheet is cut for front, back, pockets, and the crown and band for the cap.

Quite a few years ago I purchased some items from an historical costumer in a facebook destash group.  If you have read any of my other blog posts you have read that I'm a huge fan of these groups for buying, selling, and trading unused items.  When I received my package with my purchase the costumer had included two beautiful embellishments.  They were mirror images and I had set them aside for the cap for this project.  I was going to remove the pearls but just didn't have the heart.  I'm so glad I didn't and I'll tell you about that later.  I had bias tape for the edges and while not very elegant or colorful, it was in my stash and would work well.


Other notions included thread and snaps for the cap.  I had two unique and matching mother of pearl buttons in my stash and with the pearls on the embellishment I thought that would blend well and pretty up this otherwise plain apron and cap.


I started with the cap.  I always start with the headwear and am not quite sure why.  Maybe if it doesn't work I won't waste my time on anything else?  I don't know!  But starting with the cap I marked all the snap placements.  16 around the crown to attach the band, and 2 for the back of the band.


I was very tempted to simply gather the crown and sew the parts together.  But I thought about the purpose of this cap and realized how easy it would be to simply unsnap and wash and starch and iron both pieces.  So I stayed true to the 1924 instructions and continued with the snaps.

I hemmed the crown with a narrow hand-sewn hem, machine stitched the sides and lower edges of the band, turned the band right side out, and pressed everything.  Then I basted the top edge of the band.  Ready for the snaps.


The cotton fabric is light and I decided that sewing snaps through just one layer of the band would not be sturdy enough.  But sewing through both layers meant the thread would be visible on the outside of the band.  Inspiration hit and I remembered having a few leftover freshwater pearls from a previous project.  These would be beautiful to cover the thread on the outside of the band and add a perfect touch with the pearls on the band embellishment and the pearl buttons.

I tried my idea and loved it!


Now to settle in sewing snaps.

As I was sewing snaps I started to realize that the crown diameter seemed small compared to the band height.  I tested the fit on my headform and cut 1-1/2" off the band.

I like this better!


With the band height adjusted I again basted the top edge of the band and then sewed the bias binding along the top edge.  The fabric was just sandwiched between the bias tape with the shorter edge to the outside.  Then I sewed by machine with a zipper foot for a clean edge on the outside of the band knowing that since that was the shorter side I would definitely catch the longer inside edge of the tape.  I finished sewing my snaps and pearls to the band.


The cap is complete!  Outside of crown and back of band where snaps will meet.

And inside of crown and front of band.

When snapped together, even gathers are created in the crown.

Finished cap underside.

Finished cap front, back, and side.  A pretty cap for working in the kitchen, don't you agree?


Now for the apron.  This pattern is a sewing tutorial all by itself.  The Finishing page explains how to sew a French seam, how to sew snaps, how to finish the edges with bias fabric or bias tape in several methods, and even directions for hand sewn buttonholes.  A very inexperienced seamstress could be successful with this pattern.

First step is French seams to attach the front and back at the shoulders.

Using the same method for binding the upper edge of the cap band I added bias tape to all edges of the apron and the pockets.  The pockets are sewn to the apron where they seemed natural for me.  Lastly  I sewed two buttonholes on the back sides of the apron and added the pearl buttons to the front.


The 1924 apron and cap are ready to wear!


Time to wear this fun apron and cap in the kitchen.


I hope you enjoyed this little project!  Thank you for being here!

Hugs,
           Jeanette  

Historical Sew Monthly

The Challenge:  February - Re-Use
How this fits the Challenge:  Made from bedlinen
Material:  Cotton
Pattern:  Repeated Originals
Year:  1924
Notions:  Bias tape, thread, snaps, buttons
How historically accurate is it?  Created from an historical pattern with period appropriate techniques as outlined in the pattern.
Hours to complete:  5 hours
First worn:  This past week to create a video
Total cost:  Bias tape $4.50, snaps, $1.50, thread.  Under $7.00 total.