.jpg)
.png)
I'm very supportive of the businesses who create and offer patterns for historical and vintage fashion. So when Burnley & Trowbridge announced they were seeking pattern testers for a selection of patterns they were developing, I quickly submitted my info for consideration.
.png)
While Burnley & Trowbridge provides goods for many eras of historical fashion, they are, to me, experts in the fashion of the 18th century. My experience in that era is very limited in both quantity and quality of garments. I made an 18th century pocket, completely hand sewn.

Then I made a linen shift, pocket hoops, and stays in varying degrees of historical accuracy including machine and hand sewing.


Then a linen night cap, completely hand sewn.

And, most recently, a Habit Shirt which was 98% hand sewn and I wished I had sewn the other 2% by hand as it would have been much easier!


I know many costumers who don't have a home printer or aren't really comfortable with pdf patterns. I have a blog post about printing and assembling pdf patterns and I'll share that link.
The Pattern
I use my electronics until they die a natural death. And I did that with an HP printer purchased in 2011. When I replaced it this year I researched and purchased an HP Envy 6000 series which works with all my devices through wi-fi and an app. Any of my devices can print to the printer and that is what I do now with pdf patterns. It's amazing! For this pattern I print the first page to make sure I am printing to the correct scale.

After checking that I will be printing correctly I print both the pattern and instructions. There are instructions for printing and assembling the pattern and the actual garment. If you have a computer in your sewing area the instructions don't need to be printed as you can just read them off the computer.

The pattern assembles with an overlap at the right and lower edges and those are trimmed from each of the pattern sheets.

Then the pattern is assembled. I use very minimal tape as I'm first laying out the pattern and only tape within the pattern pieces. After everything lays correctly I will add additional tape within the pattern piece. I don't tape outside the pattern piece as I will be cutting that away and can use any scrap paper for notes.


Now that I have a visual of the pattern pieces I read the instructions carefully and thoroughly. There are choices to be made regarding sleeve style, no lining, or choice of lining construction style, and I make my choices and highlight the steps that I will be using for my choices.

The Fabric
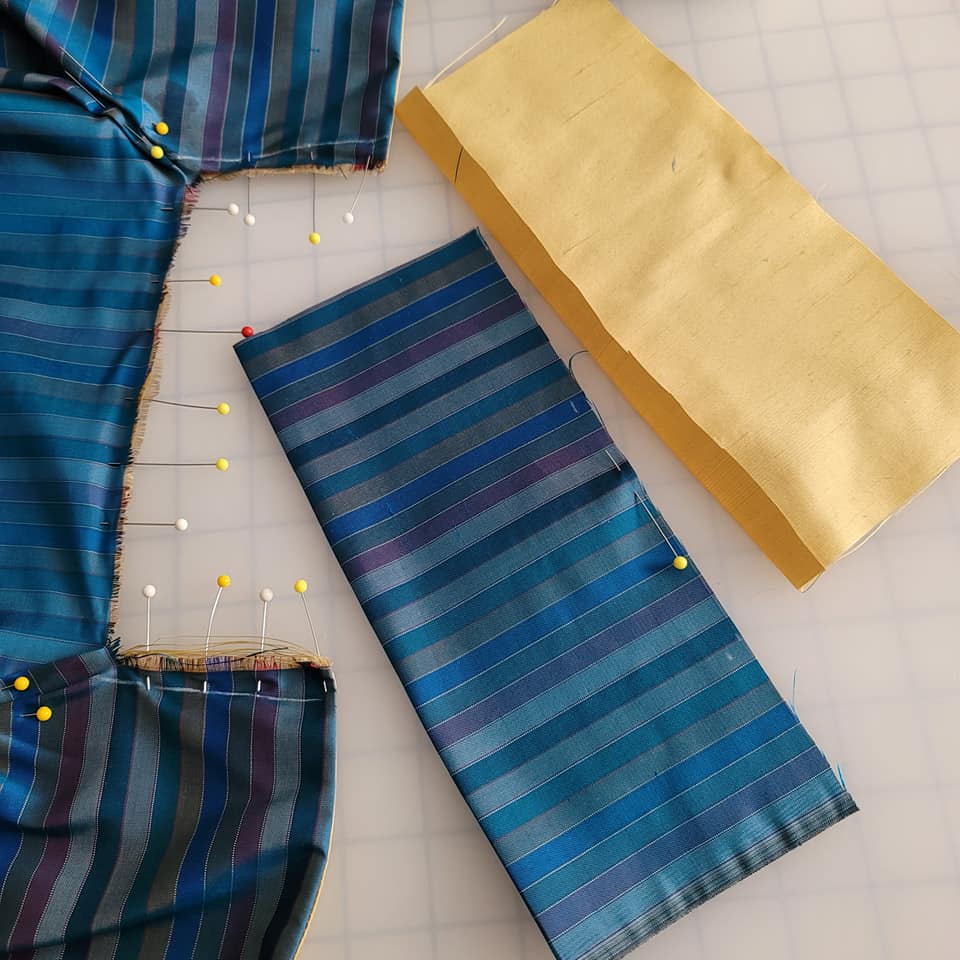
Noelle of the YouTube Channel Costuming Drama included the most gorgeous blue striped silk taffeta in her #stashswap2022 swap with me.


The blue stripe has a tiny gold thread outlining some of the stripes and the stripes themselves are red, green, blue, brown, and black and gold. I still had some gold silk purchased from a friend who was leaving costuming and it seemed like a perfect lining and accent to Noelle's fabric.

The Test
As this wrapping gown pattern is being tested by myself and others, changes will most likely be made through the process. So I can't share detailed construction steps as those may change, but I will share a few of the highlights. I cut my pattern and followed the directions for creating the main body and lining. I traced my pattern on the fabric with chalk.

I cut both the stripe and gold fabrics and let them hang for a few days to allow any bias cut edges to relax.

My fabric was not wide enough for the complete pattern but that allowed me to make a design decision. I had chosen the wide tapered sleeve. I added the necessary length to the sleeve with the gold silk which I thought would be a fun cuff illusion.

The neck pieces are cut from both the exterior and lining fabrics.

The instructions call for different stitches in different areas and I refresh myself with the Burnley & Trowbridge YouTube videos for each stitch.
.png)
Stitch, stitch, stitch.


.Now the lining and exterior pieces are laid right sides together and some seams are sewn. Then with an ingenious turn the remaining seams are sewn leaving the neck opening free.


.jpg)
The entire garment is now turned right side out through the neck opening.


All edges and seams are pressed and a nice chevron is created at the side seams by the fabric stripes.

The next step is the collar. The pieces had been cut from both the outer and lining fabric. They are prepared by pressing under the seam allowances.


Both silk fabrics frayed badly at the neck opening. I trimmed the frayed edges and sealed them with Fray Check. I also recut the neck pieces to allow for wider seam allowances and the extra fabric needed because of the fraying. I think that next time I would seal the neck opening prior to construction.
Then I begin to sew with top stitches. I wasn't concerned about my wonky stitching throughout the process but find I'm very nervous about these stitches that will show. But as I sew I realize that anyone this close to my neck to see these stitches better be a very very close friend. ;)


The last step is to pleat with one or two pleats at the top of the shoulder. I pleat with one to keep the stripes uninterrupted at the very front of the wrapper and stitch the pleat in place.

The Finished Wrapping Gown!


I've learned so much about 18th century garment construction and this pattern held my hand every step of the way. Thank you, Burnley & Trowbridge for a wonderful experience and pattern! Now I have my first garment for my 18th century event in October 2023.
Hugs,
Jeanette
Companion YouTube Video: https://youtu.be/KosXltXKI7U
Historical Sew Monthly - 2022
The Challenge: July: Geometry: Make something with pattern pieces based on basic geometry, or that somehow incorporates geometric design elements.
18th century garment construction was necessarily based on rectangular fabric pieces to economize on the use of fabric. This wrapper is entirely made with rectangles and minimal angles and fitted with pleating.
Material: Silk taffeta and silk dupioni lining
Pattern: Burnley and Trowbridge 18th Century Wrapper
Year: 18th c
Notions: Thread
How historically accurate is it? The construction and exterior fabric are accurate. The lining fabric is not.
Hours to complete: 18 hours
First worn: Sewn for a pattern test
Total cost: Approximately $200 if fabric were newly purchased but the exterior fabric was received in a stash swap.


No comments:
Post a Comment