.jpg)

It's time!
Time to share with you the third and final part of this series for #historicaldisneycostume! The worldwide collaboration has extraordinary costumes from extraordinary creators and I will link a Playlist for you to view to your heart's content.
First in my series was The Plan:

Video: https://www.youtube.com/watch?v=nk23a2hI9kk
Next in the series was Part 2 - The Dress `a Corselet:

Blog Post: http://theperfecttouchvictorian.blogspot.com/2021/07/an-edwardian-mistress-of-evil-part-2-of.html
And now here is the last in the series. Part 3 - The Coat, The Turban, The Finale.

I'm so excited to share the final details with you and, honestly, I'm a bit sad at the same time. I was inspired to create an historical Maleficent in Edwardian attire with this Disney image and put the first ideas on paper on April 12th. As I'm writing this it is August 12th and this project has been dominating the sewing room for all those four months. Historical costuming takes time and it is bittersweet when the project is finally and thoroughly complete. I truly love creating and sharing these costumes with you and hope you enjoy being with me on this journey!


I created a sparkling velvet coat, wore it on the Red Carpet at Costume College and enjoyed being a newly liberated lady with my rose design Meerschaum pipe.


http://theperfecttouchvictorian.blogspot.com/2018/07/historical-sew-monthly-challenge-7.html
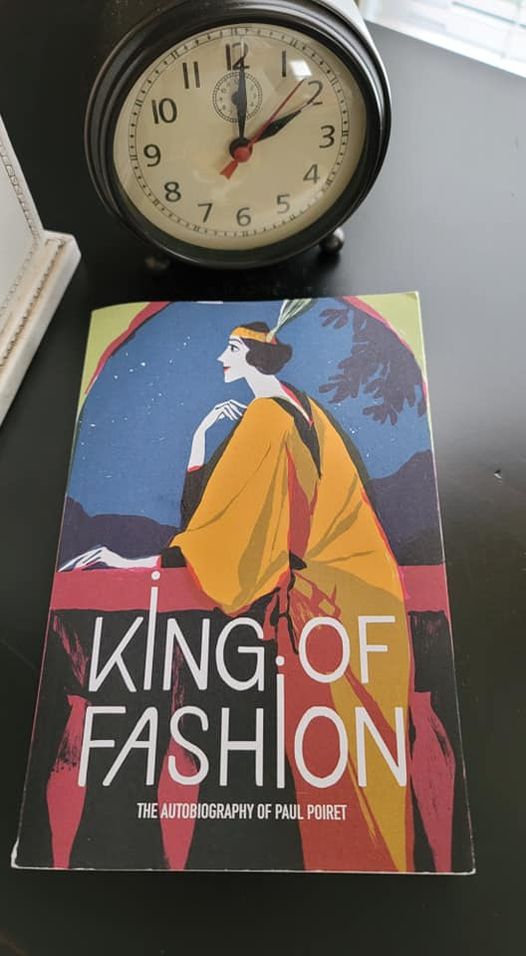
I've recently read the V&A publication of Paul Poiret's autobiography, King of Fashion, and highly recommend it for insight into the gentleman and his innermost feelings about his life and creations. This is the cover of the book and a list of other titles in the V&A Fashion Perspectives series.

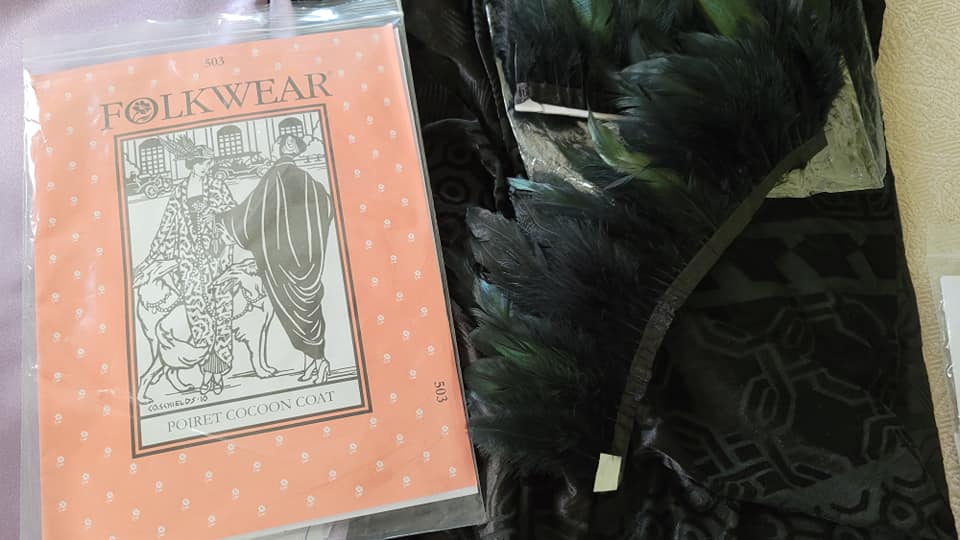
I will use the same fabrics used in the smaller details of the Dress `a Corselet. The Black Geometric Burnout Velvet:

And the Dusty Lilac Crepe Back Satin.

To trim the outer edges of the collar/neckband I'll use a beautiful iridescent coque feather trim found on Etsy.
The coat pattern piece is huge and I roll up the area rug, layer both the velvet and satin, and cut them at the same time. I turn the pattern piece over and repeat for the opposite side.

The two neckband pieces are cut from the burnout velvet. But in my effort to mirror the pattern I made a mistake and had to cut one side twice. But it was worthwhile so I could sleep at night. :)

The main coat and lining seams are quick and easy. First along the center back to bring the two halves together. Then along the inner sleeve through the mid chest.


The same seams are sewn for the outer fabric.


Both layers are left to hang on the dressform for several days to allow for any fabric stretch.

Meanwhile, it's time to sew and trim the neckband/collar. There is a single seam at the center back.

Some black velvet piping left over from a previous project is stitched to the outer edge.


Now is the time to add the luscious feather trim! But, heavens, I had no idea how difficult that was going to be! The feather ends are encased in a ribbon and to hold them in place is an adhesive. I place the velvet piping over the the feather edge enough to cover the ribbon and then have to sew, by hand, through the two layers of velvet piping, the layer of burnout velvet fabric, and the feather trim ribbon with adhesive. It is tedious! The adhesive cakes my needles and pins and my hands take quite a beating! But in the end it was so worthwhile and I would do it all again! Just not very soon!


The neckband/collar is machine sewn to the outer edge of the coat body, and hand sewn to the coat body just at the inner edge of the velvet piping. Again, adhesive and yucky pins and needles! But, oh my, I love it!!

The feathers are a nod to Maleficent and the story behind losing her wings to Stefan which gave him the right to become King Stefan. I have this t-shirt and I also had in my stash an applique of beaded wings. It's been in my stash forever and I have no idea why, but it seems a perfect touch for this coat.


I position the wings the way I see Maleficent's wings in the movie, and hand stitch them to the burnout velvet.


There is just a bit of velvet piping left over and I add it to the sleeve edges.

With all embellishment on the outer layer it is time to place the layers right sides together, pin leaving a gap on the lower edge for turning after sewing, and sew with care to prevent feather damage.

The coat is turned right side out, the opening stitched closed, and the lower edges of the feathers on the neckband/collar hand stitched to fit, and the sleeve lining sewn to the outer layer at the piping.


There are instructions in the pattern for closures but I decide to leave the coat open to show the beautiful lilac lining. And the Poiret Cocoon Coat is finished!


Now it's time to create the last piece. A Poiret-inspired turban. I'm using a pattern by Lynn McMasters, Out of a Portrait, for Early 20th Century Turbans, View A in the lower left corner.

The pattern offers options for the crown, the front shape, the tie in the front or back, a soft crown, and has instructions for creating the embellishments. To create a crown that fits my head with my hair pulled into the crown, I need to pad out a styrofoam head to my own head diameter using polyester batting.

Then the padded form is covered with plastic wrap to keep it dry.

Now I will need two layers of buckram, a spray bottle of water, and rubber bands that will stretch around the head at the point where I want the crown to end.

A single layer of buckram is wet and draped over the styrofoam head. Since I'm creating a turban and not a smooth crown hat, I do not smooth all the buckram but only make sure that the front is smooth.

Another layer of buckram is sprayed with water and draped over the first layer at a 45 degree angle. The rubber band is placed exactly where I want the crown edge to fit on me all the way around. I can always cut away, but I can't add so I fit the rubber band slightly lower than I might want.


Once the buckram is dry I can remove the rubber band and the crown slips easily off the form.

The excess buckram is cut from the crown and with another water spray and smoothing I will reuse the scrap for the backs of ribbon flowers and other embellishments.


Using the same fabrics I used for the dress and coat, I line the outer crown burnout velvet with the dusty lilac satin, and cut the black satin for the lining. Some more poly batting will create the front roll on the crown. The triangle scarf should have been cut on a bias fold as one piece. But there wasn't enough fabric so I cut two pieces from the burnout velvet and the lilac satin and sewed them into a single triangle.


The center front and center back of the crown are marked. The two layer outer crown fabric is clipped to the smooth crown at the front and pleated as necessary around the sides and back.

The seam allowance is folded under for the lining and clipped to edge of the crown smoothing and pleating similar to the outer layers.

The clips are replaced with pins so avoid creating dents in the velvet and the lower edges of both outer and inner fabrics are whip stitched slightly inside the crown edge.

The covered crown is complete.

The poly batting piece is rolled according to the pattern instructions and placed at the front of the crown and stitched in place on each side. This is slightly different than the instructions but experimentation gave me the result I wanted to highlight the center ornament which matched the necklace and earrings.

The triangle is placed around the poly batting roll and tied in the back of the crown. The lilac satin back of the triangle just peeks out when tied and is exactly what I was hoping for when I chose the color over a plain black.


Some feathers from the coat trim are added at the silver filigree ornament and that completes the turban!


Time to wear the 1914 Maleficent Dress `a Corselet, Poiret Cocoon Coat, and Poiret-Inspired Turban!
Dress and underpinnings:

Shoes, stockings, purse:

And jewelry:

And the completed 1914 Maleficent #historicaldisneycostume.


Creating an #historicaldisneycostume was magical! But it wouldn't be truly magical or truly Disney without also portraying the Mistress of Evil herself - Maleficent!


"Well, well, what a glittering assemblage, King Stefan."


"The Story is not quite as you were told."
Maleficent
"Never let your wings be stolen from you."
Maleficent
and
Jeanette
Companion YouTube Video for this blog post: https://youtu.be/LNxKXEZJOf8
Historical Sew Monthly - February 2021
The Roaring 20s - Make something from the 20s (any century) or that somehow incorporates a number in the 20s.
What the item is: Poiret-Inspired Turban
How it fits the challenge: A popular design of early 20th century fashion.
Material: Satin and burnout velvet.
Pattern: Out of a Portrait Early 20th Century Turbans
Year: 1920
Notions: Buckram, batting, feathers, silver filigree pin.
How historically accurate is it? The impression is accurate but the method may have more structure than an historically accurate turban may have had if it was simply a wrapped fabric.
Hours to complete: 10 hours
First worn: August 2021
Total cost: $30
Historical Sew Monthly - December 2021
All The World's a Stage - Make something inspired by theatre, opera, or modern stage: films & tv. Recreate an accurate cstume or make an inaccurate costume accurate!
What the item is: Poiret-Inspired Cocoon Coat
How it fits the challenge: Inspired by the Disney Maleficent character and those gorgeous flowing sleeves, I created this coat for a historical Disney impression.
Material: Satin, burnout velvet
Pattern: Folkwear 503
Year: 1913 - 1919
Notions: Velvet piping, coque feather trim, beaded wings
How historically accurate is it? The pattern design is brilliant and very much inspired by the original designer.
Hours to complete: 21 hours
First worn: July 2021
Total cost: $90


No comments:
Post a Comment