.jpg)

I've been so inspired by costumers the world over who are creating #historicaldisneycostume and it was just a short step from my project of A Wicked Witch to creating an Edwardian Maleficent - The Mistress of Evil. The details for this journey are outlined in Part 1 and I will include a link for that blog post and video.

This blog post is Part 2 of the 3-part series and shares the details of creating the 1914 Dress `a Corselet. A

The inspiration for the colors comes from various images around the internet showing a beautiful black with lavender touches.

I've chosen fabrics of crepe back satin in both a black and a dusty lilac...

...and a black burnout velvet.

I will be using all three fabrics for the 1914 dress and have a plan in mind which is, as usual, subject to change. If you have followed me here or on YouTube, Facebook, or Instagram you already know when it comes to my costume hobby I lead a Whim-Directed Existence.

The pattern for the dress is from Depew Patterns on Etsy, #3123 1914 Dress `a Corselet.

The pattern is directly copied from a 1914 French pattern sheet. The original French instructions were brief and are more translated notes. As with many patterns of that time it is assumed that basic dressmaking techniques are known with just a few steps for instructions and pattern numbers for matching construction. Seam allowances also have to be added.
¹
I designed a fabric at Spoonflower that coordinated with the brocade on the shoes I would wear and then embellished the fabric with pearls and gold fabric paint.


Then I layered on the pearls and went to an event celebrating the release of the first Downton Abbey movie.


My impression was of Lady Rosamund Painswick, the Earl of Grantham's widowed sister who resides in London and is very close to the family although not always resulting in the best of actions.


Back to the current project....
Cutting the Fabric
When I created the chocolate satin gown in 2019 I wrote notes for the construction steps I used and adjustments I had made for the one-sized pattern to fit me. Without needing a mock-up I was able to move into immediately cutting the fabric.


The back should also have been cut on the fold but I didn't have enough fabric to do that so I cut two pieces with a seam allowance added for center back.


The bodice pattern piece is large as the sleeves and bodice are one piece. I cut this on the fold for the back and it will be sewn at the front below the neck opening.

The corselet attached to the bodice front only. I was going to line the burnout velvet with the dusty lilac satin but decided to line it with the black satin instead which made the pattern really pop.

Tabs for a belt wrapping from back to front on the corselet.

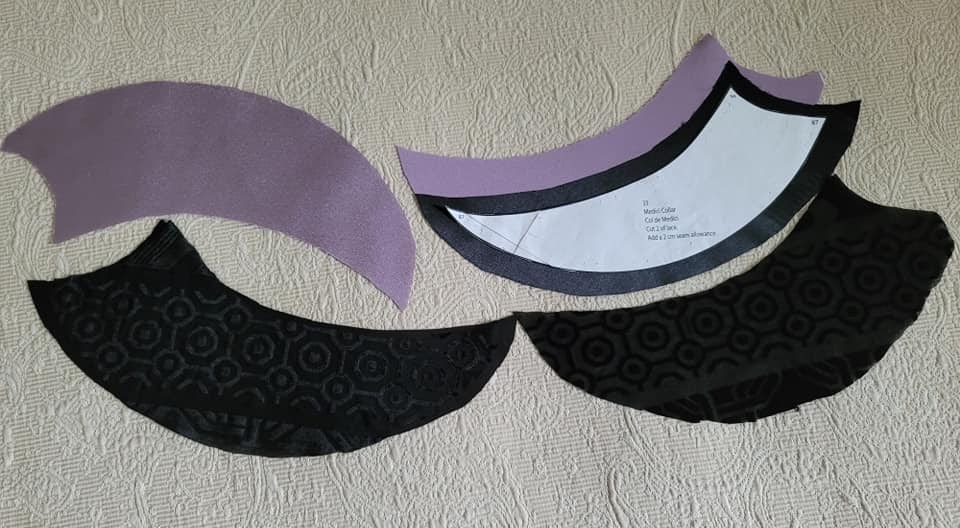
The standing Medici collar with an underside of the burnout velvet lined with black satin and an inside of the dusty lilac satin.
And the last pattern piece for the revers, lapels, cut from the burnout velvet lined with black satin and a black satin underside.


The illustration for the pattern indicates a gathered area at the hipline. I didn't use that technique on the chocolate satin gown as I wanted to keep the focus on the embellished corselet, but I decide to try it on this gown. I have some beautiful pleated satin trim with a velvet ribbon center and think that will be just the look to cover the gathering threads.


I determine where the gathering and trim placement should be on the tunic, sew gathering threads, gather to 2" larger than my hip size, then attach the trim.


Sewing the Bodice
Choosing the pleated satin and velvet trim for the tunic has now given me inspiration for trimming the rest of the dress. I sew the lapels and pin the collar on the dressform.


With the details finally planned I can see what it will look like on the finished bodice.


The sleeve darts are sewn. The bodice front edge is sewn with a French seam. A gathering stitch is made along the front lower edge of the bodice to create the fit to the upper edge of the corselet.

The wrist edges are hemmed and the pleated satin and velvet trim added leaving the ends free to close the underarm seam.

The bodice is gathered to fit the corselet upper edge and sewn and then the narrowed trim is hand sewn to the upper edge of the corselet.


The underarms seams are finished with a French seam leaving the left side open to the top of the corselet and the sleeve trim is finished with the join covered with a velvet self-covered buttons.

Sewing the Collar

I basted the burnout velvet and black satin layer together and then sewed the dusty lilac inside collar to the black outer layer. A piece of #19 millinery wire is tucked inside that seam allowance and hand stitched close to the machine stitching through both seam allowances.

Also using #19 millinery wire and a jewelry tool, I created collar stays. The wavy wire allows the stay to be pulled or contracted changing the length of the wire and when stitched to the collar make the collar stand beautifully.


The collar and lapels are arranged and then stitched to the bodice opening and a length of lace sewn over the seam allowance. The front of the bodice opening is also finished with the narrowed trim and lace and three velvet self-covered front buttons finish the bodice front.


The bodice is just one step away from being attached to the skirt but first I have to choose a method of belting to cover the back join of bodice to skirt. For the chocolate satin gown I created long ties that extended from the corselet edges, wrapped around the back of the dress and overlapped at the side. I finished the ends with premade tassels which I further embellished with pearls.


For this gown I realize I don't want anything that wraps to the front because it would cover the corselet pattern and trim. So I decide to again create ties that will simply overlap in back. Inspired by the silver necklace I will wear with this dress I make tassels for the ties, the dropped sides of the skirt tunic, and an even longer one for a kickpleat at the back of the hobble skirt. Without any premade tassels or silk thread in my stash I use the necklace as inspiration and create tassels from items on hand - beads and black jewelry chain. I really love them!


With the ties sewn to the corselet edges, the bodice is sewn to the skirt gathering the lower edge of the corselet and back of the bodice as necessary. The narrowed trim is sewn to the lower edge of the corselet and closures sewn on the left side opening.

The Edwardian Underthings
I'll link several blog posts for Edwardian underthings I've made to create the right silhouette for this gown.
1913 Bust Supporter: http://theperfecttouchvictorian.blogspot.com/2019/03/historical-sew-monthly-2019-february.html
Edwardian Drawers, Petticoat, Corset Cover:
1910s Corset: http://theperfecttouchvictorian.blogspot.com/2014/06/historical-sew-fortnightly-challenge-12.html


Silk stockings, shoes,, and a purse.


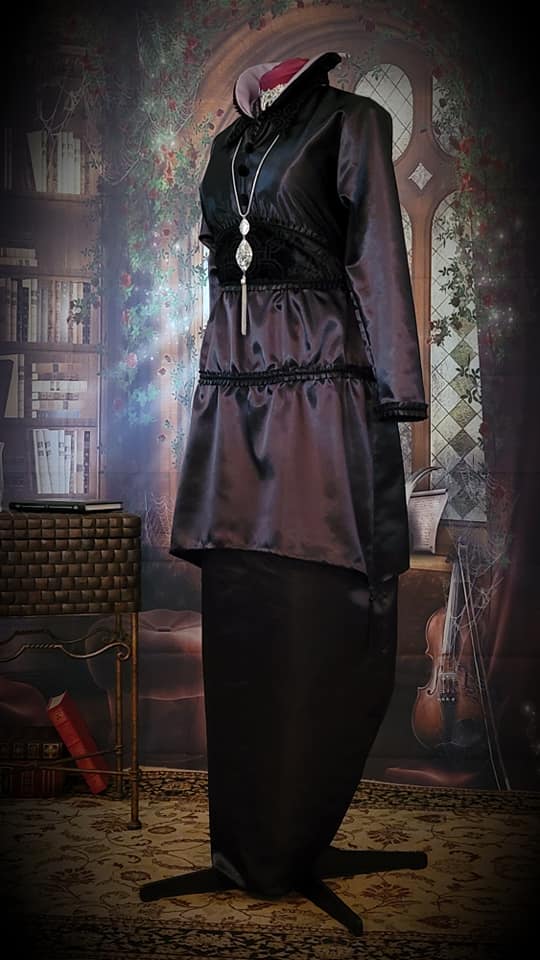
With everything ready it's time to dress and take some finished photos!


Hugs,
Jeanette

The YouTube link for a companion video for this blog post: https://youtu.be/BRMRjIe5JCs


No comments:
Post a Comment