.jpg)

YouTube Companion Video:
Hallmark.

Founded in the early 1900s by Joyce Clyde Hall.

Barbie.
Introduced to the world by Ruth Handler, President of Mattel in the mid-1900s.


In the late 1900s Hallmark and Mattel collaborated and offered a series of Special Edition Barbie dolls. These were especially created for Hallmark Cards based on antique greeting cards from the Hallmark Archives and Design Collections.

In 2020 I began what would become a tradition and made my first wearable-sized recreation of a Hallmark Special Edition Barbie doll, Holiday Memories in Edwardian attire.


That was fun! And so there followed The Holiday Homecoming Collector Series in 2021, 2022, and 2023, creating and wearing these historical ensembles.

Holiday Traditions in Victorian attire:


Holiday Voyage in 1920s attire:


And Holiday Sensation in 1930s attire:


Holiday Barbie 2024 - Yuletide Romance
The choice for 2024 is Hallmark Special Edition Yuletide Romance Barbie.


Yuletide Romance Barbie is third in a series where my 2020 make was second in that series. Embossed cards were also available for that series. What about the first in the series? More on that later!


Yuletide Elegance Barbie is a 1996 release based on a body form from 1966.


Planning and The Pattern
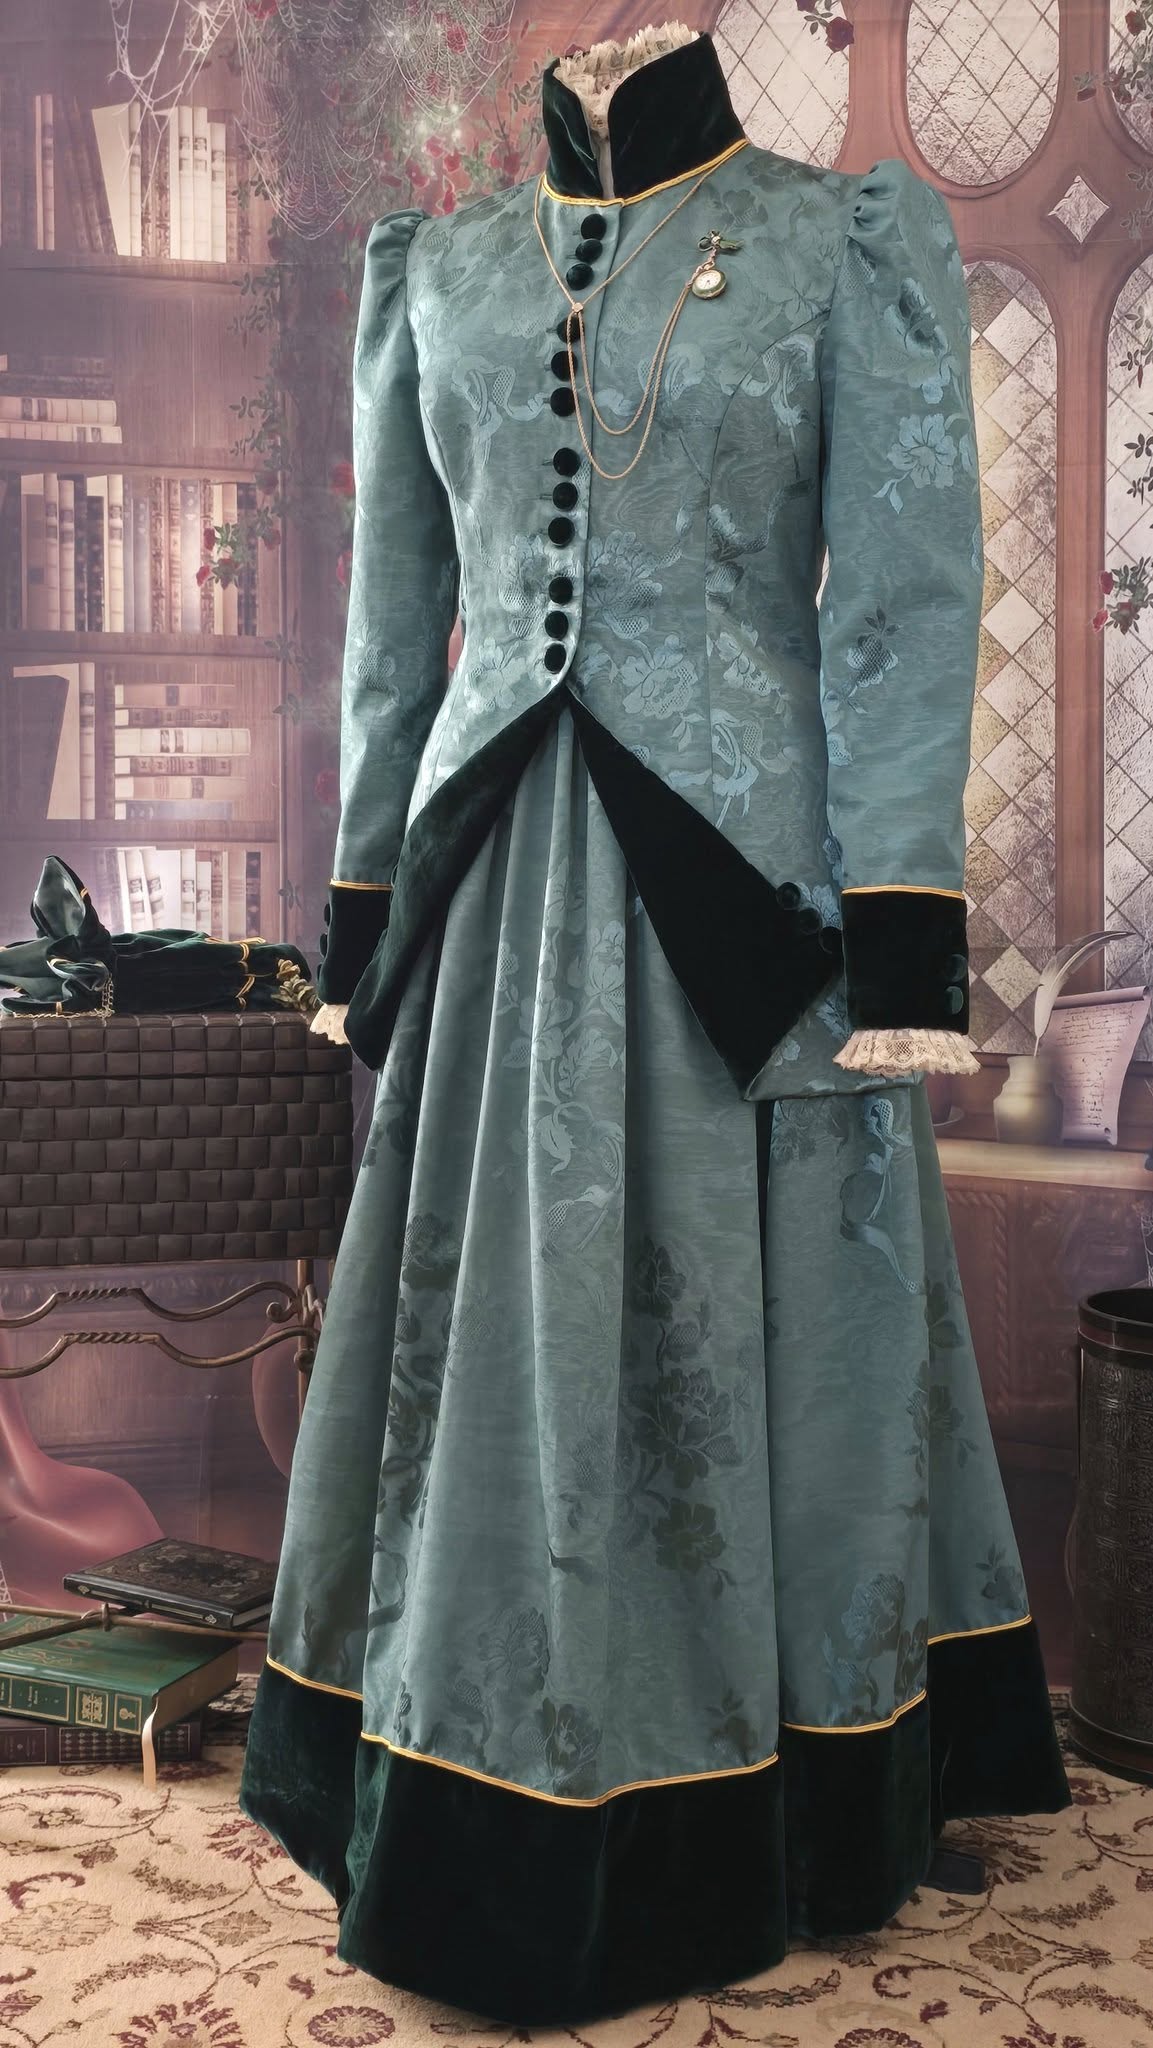
The illustration on the packaging shows a couple in a gentle embrace and Barbie is "dressed elegantly for the holidays in an emerald green velvety gown. The fitted jacket is trimmed with golden embellishments."


The Barbie doll, however, is dressed differently. She does have a fitted and velvety emerald green jacket with golden embellishments, but she wears a very different colored, almost turquoise, satiny skirt embellished with a golden braid similar to that on her jacket sleeves. This gives me some options when sourcing fabric for my wearable recreation.


The similarities, however, are the gold embellishment, the fitted and long jacket, and the Victorian silhouette with the puffed sleeve. I have the perfect pattern! Butterick Making History B4954.

Although I don't have my fabric yet, I can prepare my pattern, study the fit and instructions, make mock-ups and modifications as necessary, and begin my search for the perfect fabrics at the perfect price.

The pattern pieces are a Front and Side Front.

Back and Side Back.

One-piece Sleeve.

Collar, Pleat Underlay, Buttonhole Template.

Skirt Front and Waistband.

Skirt Back. The pattern has an upper and lower portion which are taped together before cutting the fabric.

The Fabrics
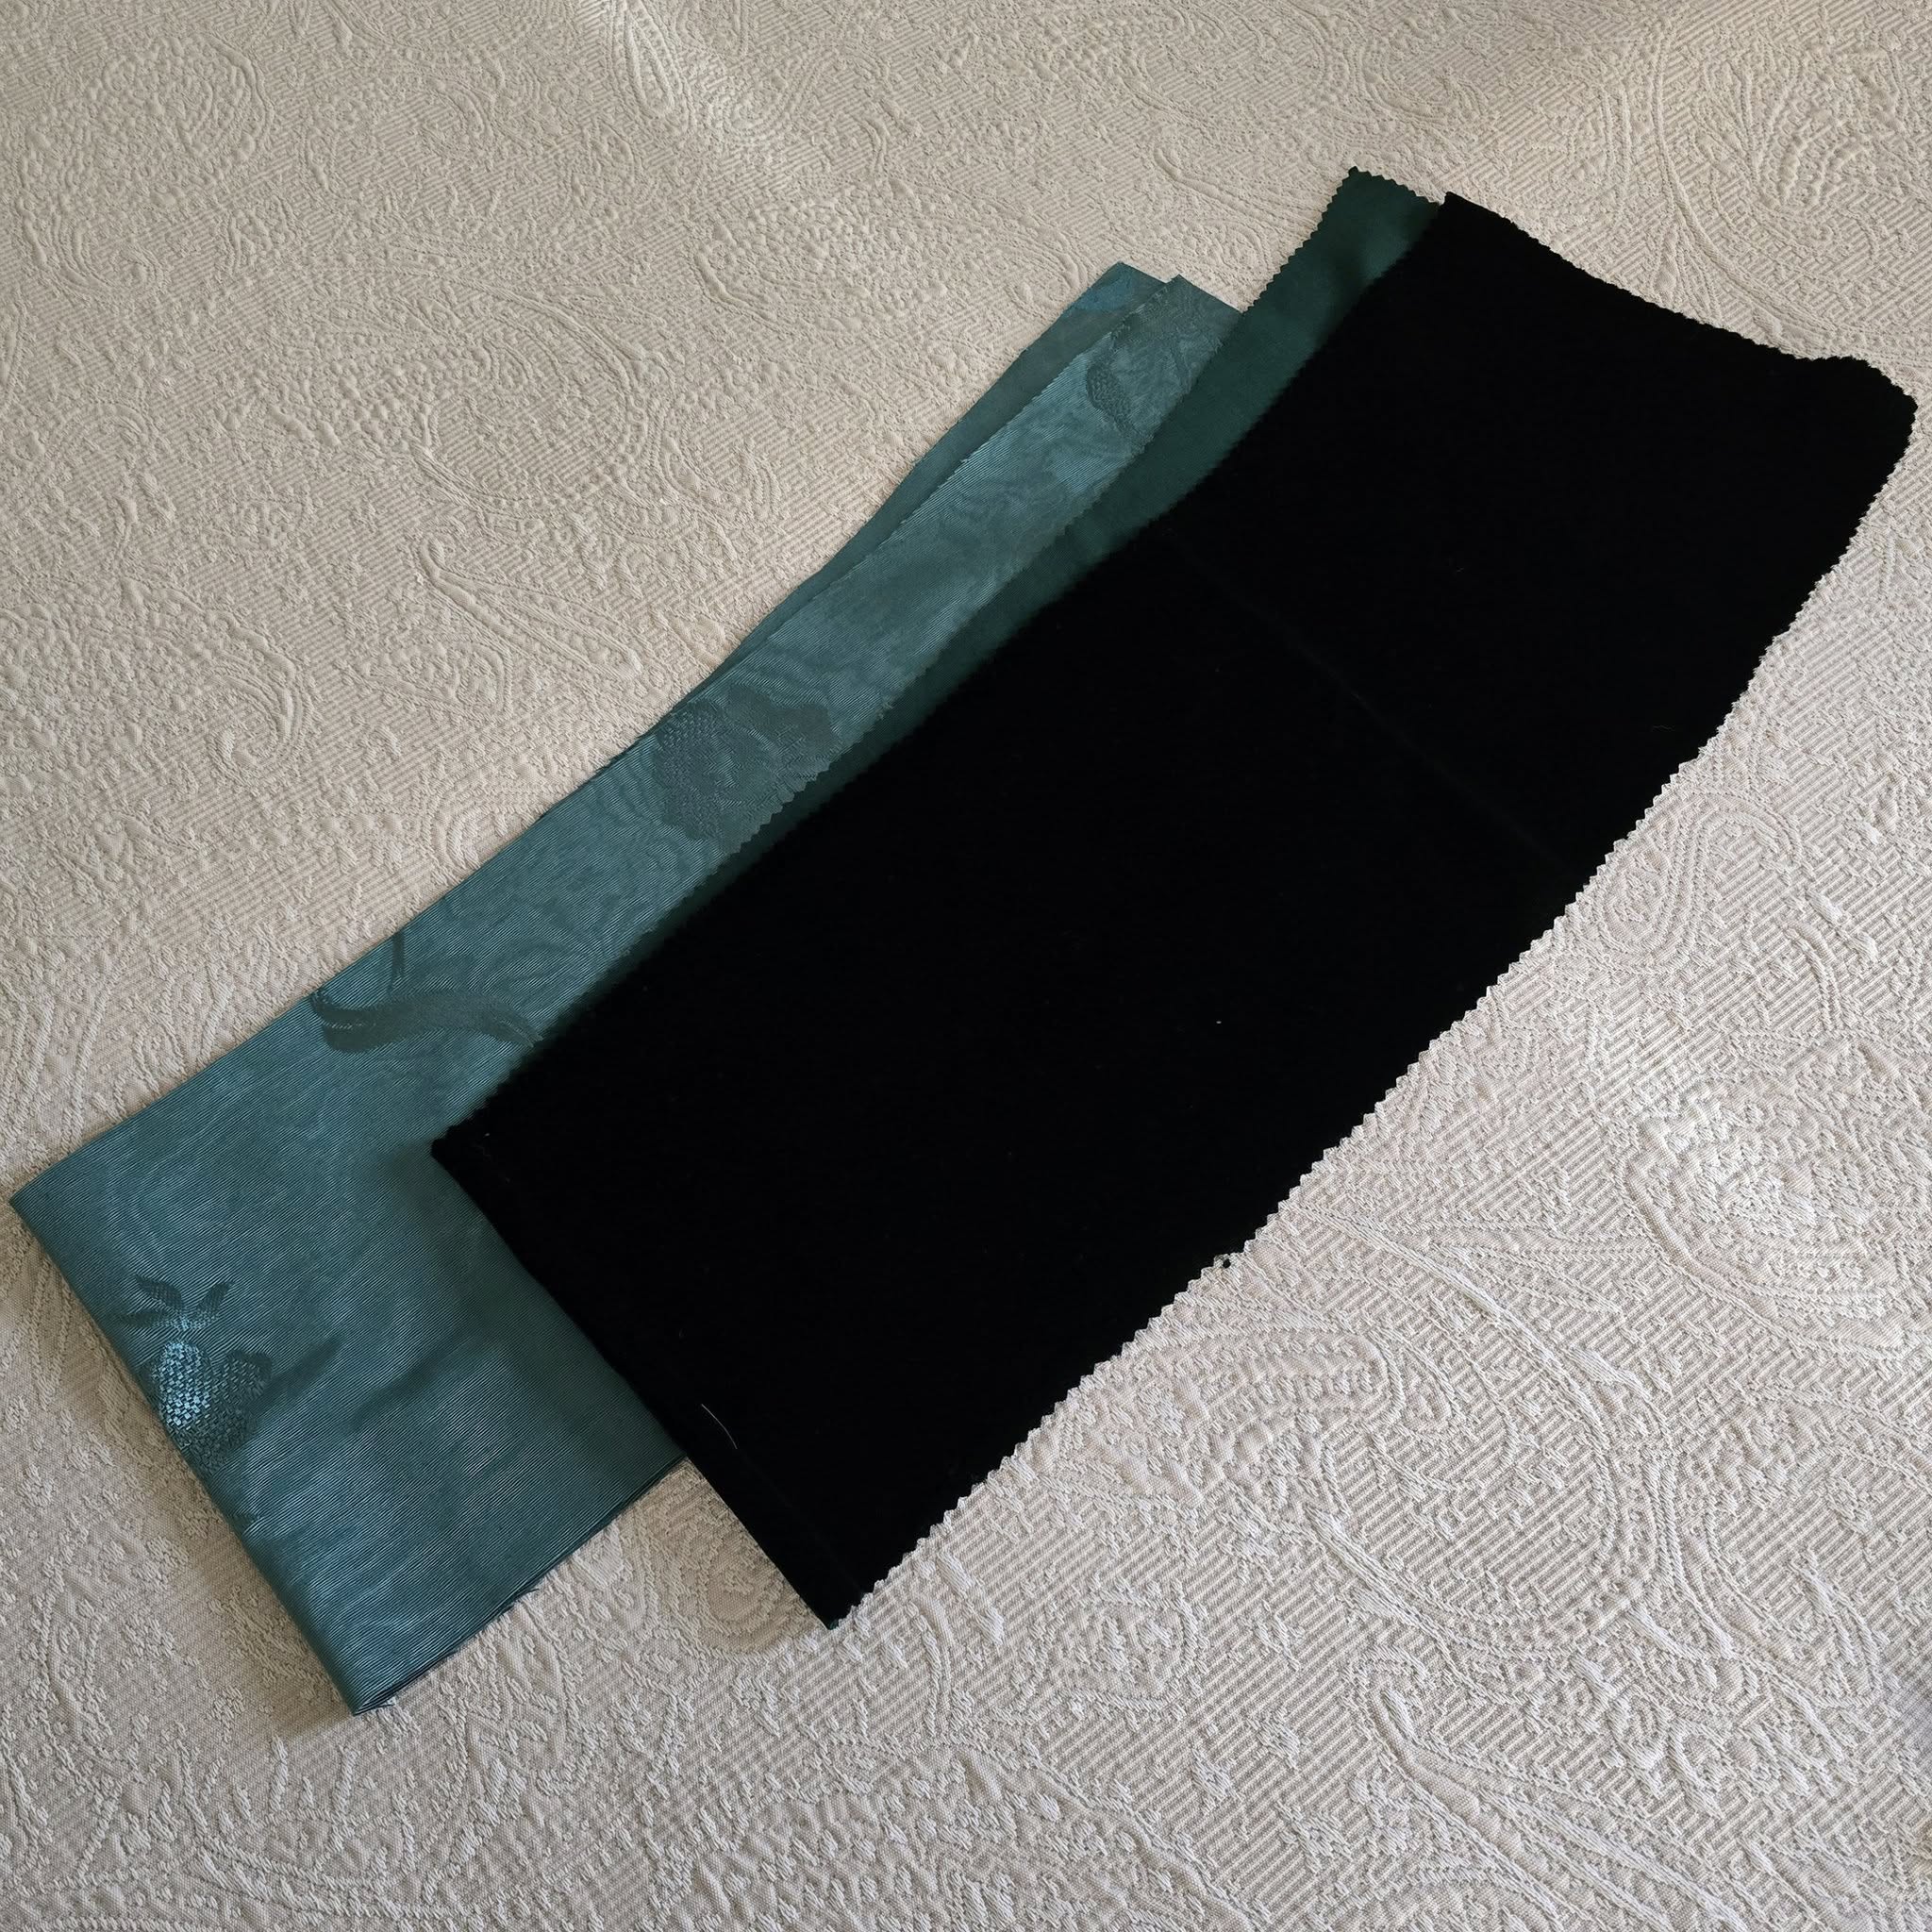
I try to plan my sewing projects far enough ahead to find fabrics at prices within my budget. At this point of the project I'm getting ready for a 2-week trip in July and it turns out to be pure luck that the fabrics for this ensemble come home with me. My Costume College roommate has the most amazing stash of the most amazing fabrics and she welcomes me to search her stash for my project. There it is! A glorious green moire damask! And enough fabric to create the skirt and jacket which will take 7-1/4 yards for my size. I'm thrilled and in tears! And then she pulls out an emerald silk velvet left from an incredible gown she made and I've just admired in her costume closet. I'm in heaven! It's perfect!

Using the moire damask for the jacket and skirt, I design, measure, redesign, remeasure, and finally come up with a plan to use the silk velvet as accents on both the jacket and skirt.

Since Yuletide Barbie has a cute reticule, I plan to create that from the silk velvet.

The Soutache
Now that I have fabrics I begin researching the "golden embellishments". I have some trims and want to see what sizes and designs are appealing.

I appeal to my costuming friends and the consensus is gold soutache. I research sizes and plan for a design for the lower 6" of the skirt which I have decided will be the width of the velvet trim.

I find a seller offering 5 yard lengths in 3 gold colors and a sale is in progress!


The soutache arrives and it has a gorgeous color, beautiful feel, and curves and handles well.


Since we're talking about the soutache I'll tell you about that part of this project. Before I began to sew the jacket and skirt I made the reticule as planned and as part of the Yuletide Romance Barbie doll. I loved the gold soutache on the velvet and learned how to sew the soutache to prevent the velvet from being crushed.

I had a plan for the jacket and skirt soutache and had many trials and redesigns through sewing both. In the end I loved the soutache as a border between the damask and velvet highlights. It seemed to call attention to the velvet without being the center of attention on the velvet. And it left the damask pattern clear and beautiful. If I choose I can add more soutache one day or create this entire ensemble in silk velvet and soutache when I win the lottery. I'm happy with the outcome. Let me know your thoughts! What would you have done?


Cutting the Fabrics
The damask fabric had a beautiful mirrored design and I wanted to use that design to best advantage. I would cut one piece from the pattern and then lay that cut piece right side down on the uncut fabric, position the design for a mirror image, then cut the second piece.


These are the upper portions of the bodice Backs.

I repeated the process with the Bodice Fronts, Sleeves, and Skirt Backs. I cut the remaining bodice and skirt pieces where it seemed like a nice fit with the damask pattern.


The collar is cut from the silk velvet. An interfacing and lining are also cut.


The lower portion of the sleeve will have a velvet overlay resembling a cuff and those are cut.

The lower edge of the skirt will have an interior lining of the damask fabric and a velvet overlay. Those are cut for both the skirt front and skirt backs using the lower edge of the pattern as a guide to create the proper curves.

A cotton is cut for the bodice lining but as there wasn't enough of the green cotton, a gold cotton is cut for the sleeve linings.

Sewing the Skirt
Finally! It's time to sew! I'll start with the skirt. To create the velvet overlay on the lower edge I lay the velvet on the damask right sides together so that when I sew 1/2" from the velvet edge and turn the velvet wrong side to the right side of the damask, the lower edges will align.


The edges are pinned and machine basted in place.


The skirt panels with velvet trim are sewn together. The center back seam is sewn leaving an opening for the closure. Then the side seams are sewn to attach the front panel to the back. I love the velvet at the lower edge and the damask pattern!

Here is where I tested many of the soutache options thinking I would attach the soutache before sewing on the skirt facing. Having decided a single width soutache embellishment just above the velvet was a beautiful option, I attached the soutache. The seam is opened on one side of the skirt, the soutache ends threaded to the interior, and the seam sewn closed.


Now the skirt facings can be sewn at their seams and the upper edge seam allowance pressed under 1/2".

The facing is sewn to the lower edge of the skirt with a 1/2" seam and then turned to the inside of the skirt.


The fold at the upper edge of the facing is hand sewn to the skirt.


The skirt facing is finished.

A placket is made and sewn to the skirt back opening. The opposite edge is simply sewn in place at the fold.


Two gathering stitches are sewn at the upper edge of the skirt.


The waistband is pinned to the skirt right sides together matching markings, the skirt gathered as necessary, and stitched. The seam allowance is trimmed. With right sides together, the ends are sewn, clipped, and turned. The seam allowance on the waistband inside lower edge is turned in and handstitched to cover the gathers and stitching. A tailor bar and hook is sewn to close the waistband. All those instructions are very very clear in this pattern.


A finished skirt!


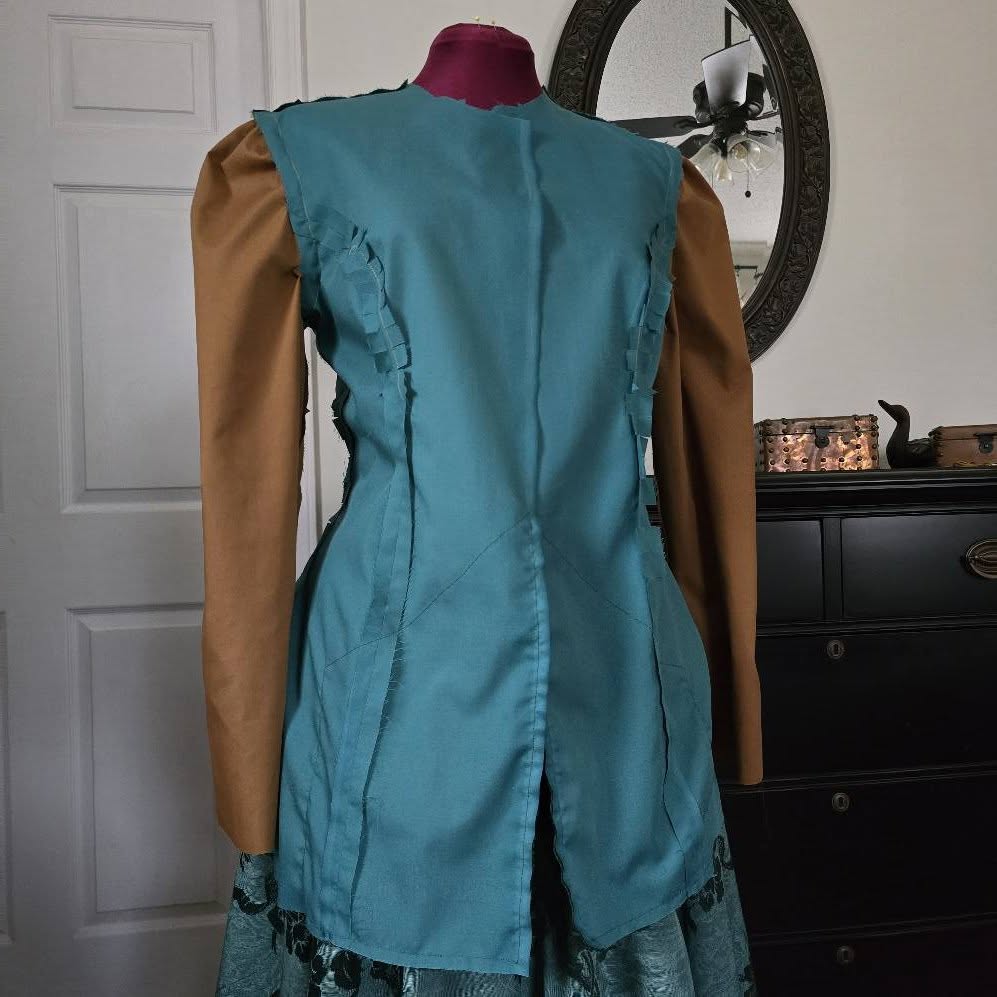
Sewing the Jacket
The pattern instructions recommend interfacing the jacket fronts but as this damask is a heavier fabric I'm omitting interfacing and flatlining. The Front side edge is staystitched between the notches where the fabric curve creates the bust curve and eliminates the need for darts.

The Fronts are stitched to the Side Fronts.


I'm so glad I had enough fabric and took the extra time to mirror the pattern on the jacket front.

The Backs are sewn together from the top down to the point where the pleat will be inserted and then basted from that point to the bottom edge.


The lower edge of the pleat underlay is sewn with a narrow hem. The pleats are folded as marked and pressed.


The pleat folds are basted together to hold them in place during the rest of the jacket construction.

The pleated underlay is placed face down on the jacket back extensions ensuring that the lower edge of the underlay is above the lower edge of the jacket where the lining will be stitched later.

The underlay and extensions are stitched together at both edges of the extensions. The pleats and the jacket back are not included in this stitching. The upper edge of the pleated underlay is left free until later. The jacket basting and pleat basting is left in place.


The Side Backs are sewn to the Back and then to the Side Fronts. The shoulders seams are sewn.


The jacket has a beautiful length and really shows off the floral damask pattern.

The interfacing is sewn to the collar lining just outside the seam allowance and trimmed.


The velvet and lining are sewn right sides together along the curved edge, the seam allowance trimmed and clipped, and the collar turned right side out.

The neckline on the jacket is staystitched. The right side of the collar is pinned to the right side of the jacket matching markings and clipping the jacket neck edge as necessary, and basted in place.


Love a standing collar! And here you get an early peek at an idea in progress.


Two rows of gathering stitches are sewn at the top of each sleeve between the marks transferred from the pattern.

The sleeve seam is sewn.


The sleeves are pinned to the jacket matching markings and gathering as necessary. The sleeve is sewn at the seam allowance marking, then again 1/4" inside the seam allowance. The seam allowance is trimmed and pressed toward the sleeve.


The beautiful silk velvet used for the reticule, the skirt and sleeve trim, and the collar, has some oddly shaped pieces remaining and it seems a perfect use for buttons.


The velvet buttons and remnants give me another idea which was in no small part inspired by the pattern - revers on the jacket front.

Thinking of velvet buttons holding the revers in place, I make some more buttons.


The jacket lining is sewn together and the velvet pieces for the revers are sewn to the right side of the lining where they will show when the jacket lower edge is turned up.


The basted seam is opened on both the jacket and the lining where the pleated underlay has been sewn.


The jacket and lining are pinned right sides together and sewn at the front and neck and lower edges. The seam allowances are trimmed, and the jacket and lining turned right side out and pressed well.

The seam allowance is turned under on the lining extensions and hand stitched to cover the seams which attached the pleated underlay to the jacket extensions.


The top edge of the pleats are sewn together. This can then be stitched to the lining only. I left it loose because I had an idea for later.

The lining and pleat construction and finishing is complete and the basting can be removed. A beautiful triple box pleat!


The sleeve lining and jacket sleeve lower edges are turned in at their seam allowances and stitched together.


I create a template for the button/buttonhole spacing and sew the buttonholes.


The 3-button design seems like it would also work well for the sleeves, the revers, and the back to hold the pleated underlay in place. Time to make more buttons!


Soutache sewn at the collar edge.

A Perfect Touch - The Watch
Won at auction ages ago, this watch has been a treasure and worn with many of my Victorian impressions. It is a green enamel guilloche over gold. It has a bow brooch and a long gold chain. The enamel has been chipped at the lower edge and research told me that as ladies wore these while holding their babies, the babies would sometimes teethe on the watch. A sweet thought for what might have happened to this watch. I've included here some photos of how this type of watch might have been worn.


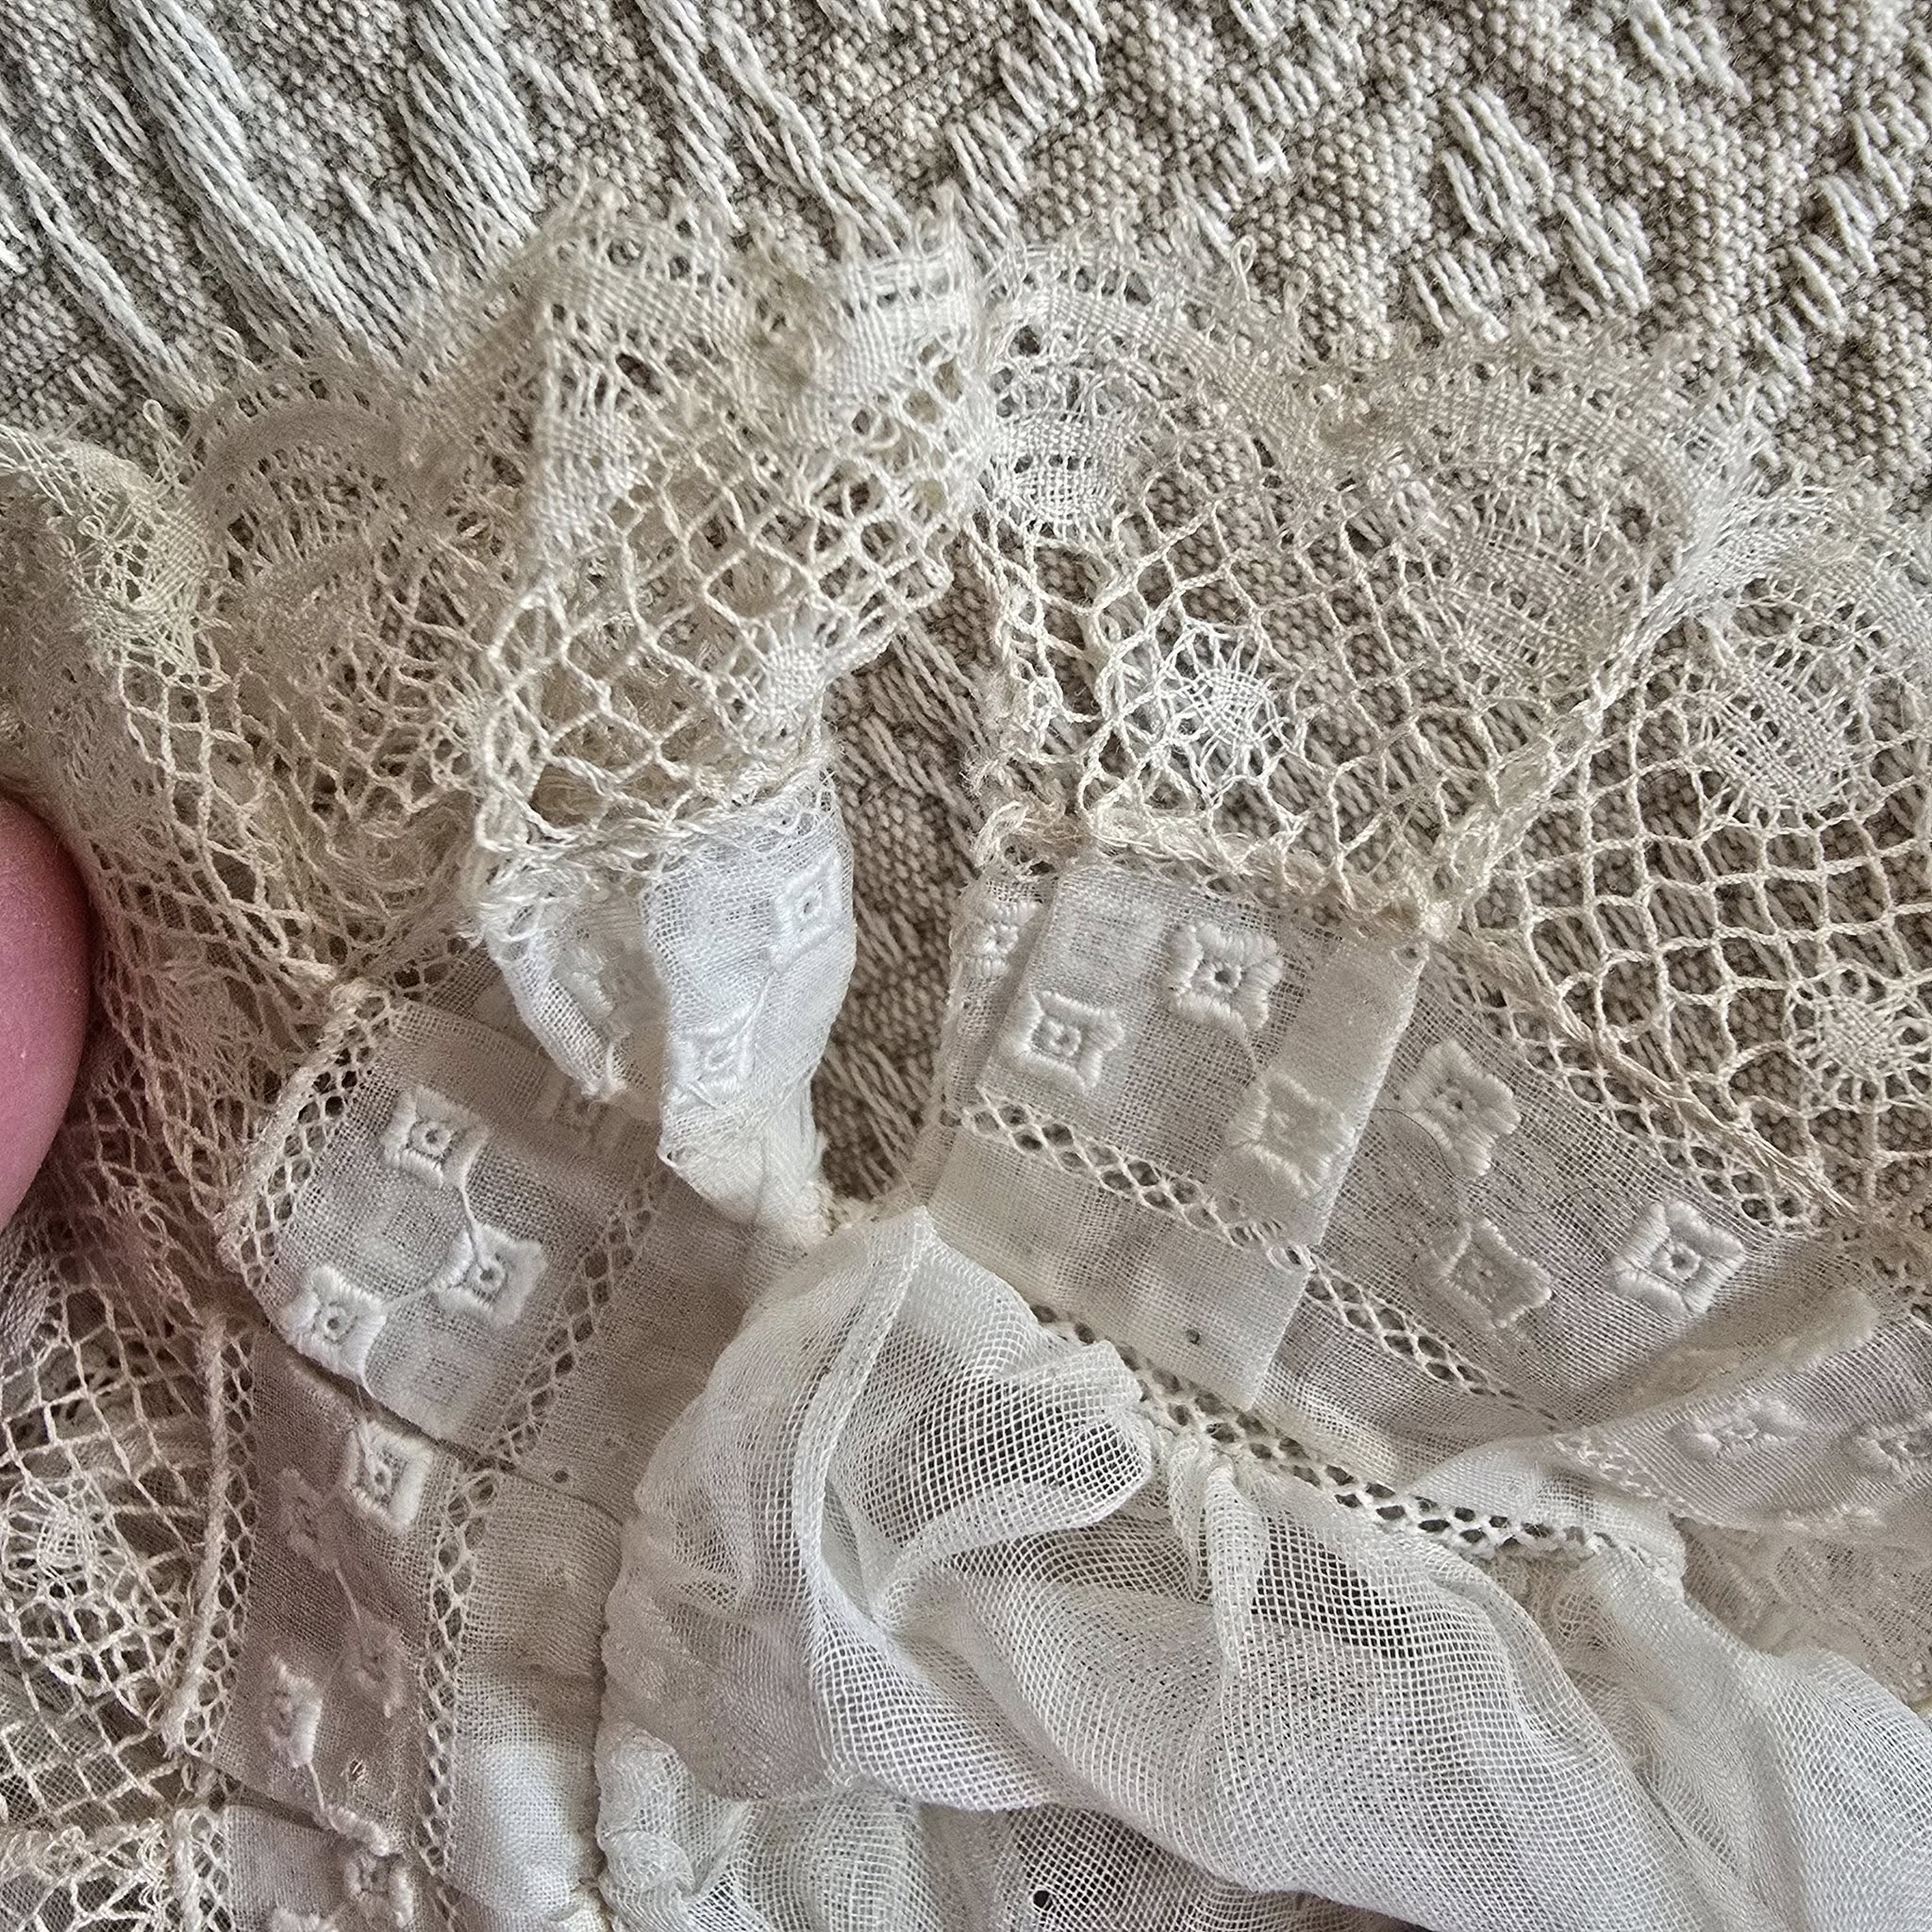
Another auction find was a matching set of chemisette and undersleeves. Again, I've worn this set several times for a Victorian impression and thought it a beautiful addition to the Victorian jacket and skirt.


The Finished Yuletide Romance Barbie


A beautiful holiday gift from my sweet friend, Amy. Thank you so very much, Amy!!


Thank you for sharing this journey with me!
Hugs,
Jeanette
February: Seasons of Fashion: Make something designed for a specific season, whether that be a meteorological season (ex: winter of summer, or the dry/rainy season) or a cultural season (ex: Carnival, the London social 'Season').
What the item is: Holiday Jacket and Skirt
How it fits the Challenge: The 2024 Holiday Season is the fifth year I will have created a vintage or historical wearable-sized garment inspired by a Hallmark Special Edition Barbie doll. This is my interpretation of Yuletide Romance Barbie.
Material: Moire damask, silk velvet, cotton
Pattern: Butterick Making History B4954
Year: 1890s
Notions: Soutache, interfacing, thread, button blanks
How historically accurate is it? Appropriate fabrics and design. The pattern reflects the silhouette of the period.
First worn: For a Holiday day event.
Total cost: Difficult to determine as the moire damask and silk velvet were a gift. Without this wonderful gift this project would not have happened.


No comments:
Post a Comment