.jpg)
.png)
YouTube Companion Video: https://youtu.be/HNxafK2Kks4
Barbie Millicent Roberts. From Willows, Wisconsin, USA. With a prominent career as a teenage fashion model. Introduced to the world March 9, 1959 at the American International Toy Fair in New York.

Barbie was the dream project of Ruth Marianna Handler, a co-founder of Mattel. The company name was a combination of the other founders - Harold "Matt" Matson and Elliot Handler - Matt El. Ruth Handler was Mattel's President from 1945 to 1974.
.png)
Barbie was named for Ruth's daughter Barbara. 351,000 dolls were sold the first year and over 1 billion have been sold to date. Although Barbie was introduced with blonde or brunette hair, by 1961 she could be found with red hair and a friend, Ken, named after Ruth Handler's son.


As a costumer, its been wonderful to find a few of those billion Barbie dolls on eBay or Etsy and recreate the historical or vintage costumes in wearable size.
In 2020 I found and created an Edwardian Holiday Barbie:


In 2021 I found and created a Victorian Holiday Barbie:


Those were very fun projects and I'll share blog post and video links if you are interested in the patterns and construction and some special extras.
The Edwardian Barbie: https://theperfecttouchvictorian.blogspot.com/2020/12/an-edwardian-barbie-plan.html
The Victorian Barbie: (all links for both blog posts and videos are in this link): https://theperfecttouchvictorian.blogspot.com/2022/02/bringing-victorian-barbie-to-life.html
The #holidaybarbie YouTube Playlist: https://www.youtube.com/playlist?list=PLSKRJ01xNNbn1mwIov4yDd6uR0Op1D-IH
With all of the 1930s vintage sewing I had been doing in 2022 it seemed right to choose a vintage Holiday Barbie and I found one that would not only allow me to follow my annual Barbie life-sized creation but make a gown that would fit in the 1930s wardrobe. Etsy offered a Holiday Sensation Barbie Doll, Hallmark Special Edition, from the Holiday Homecoming Collector Series.

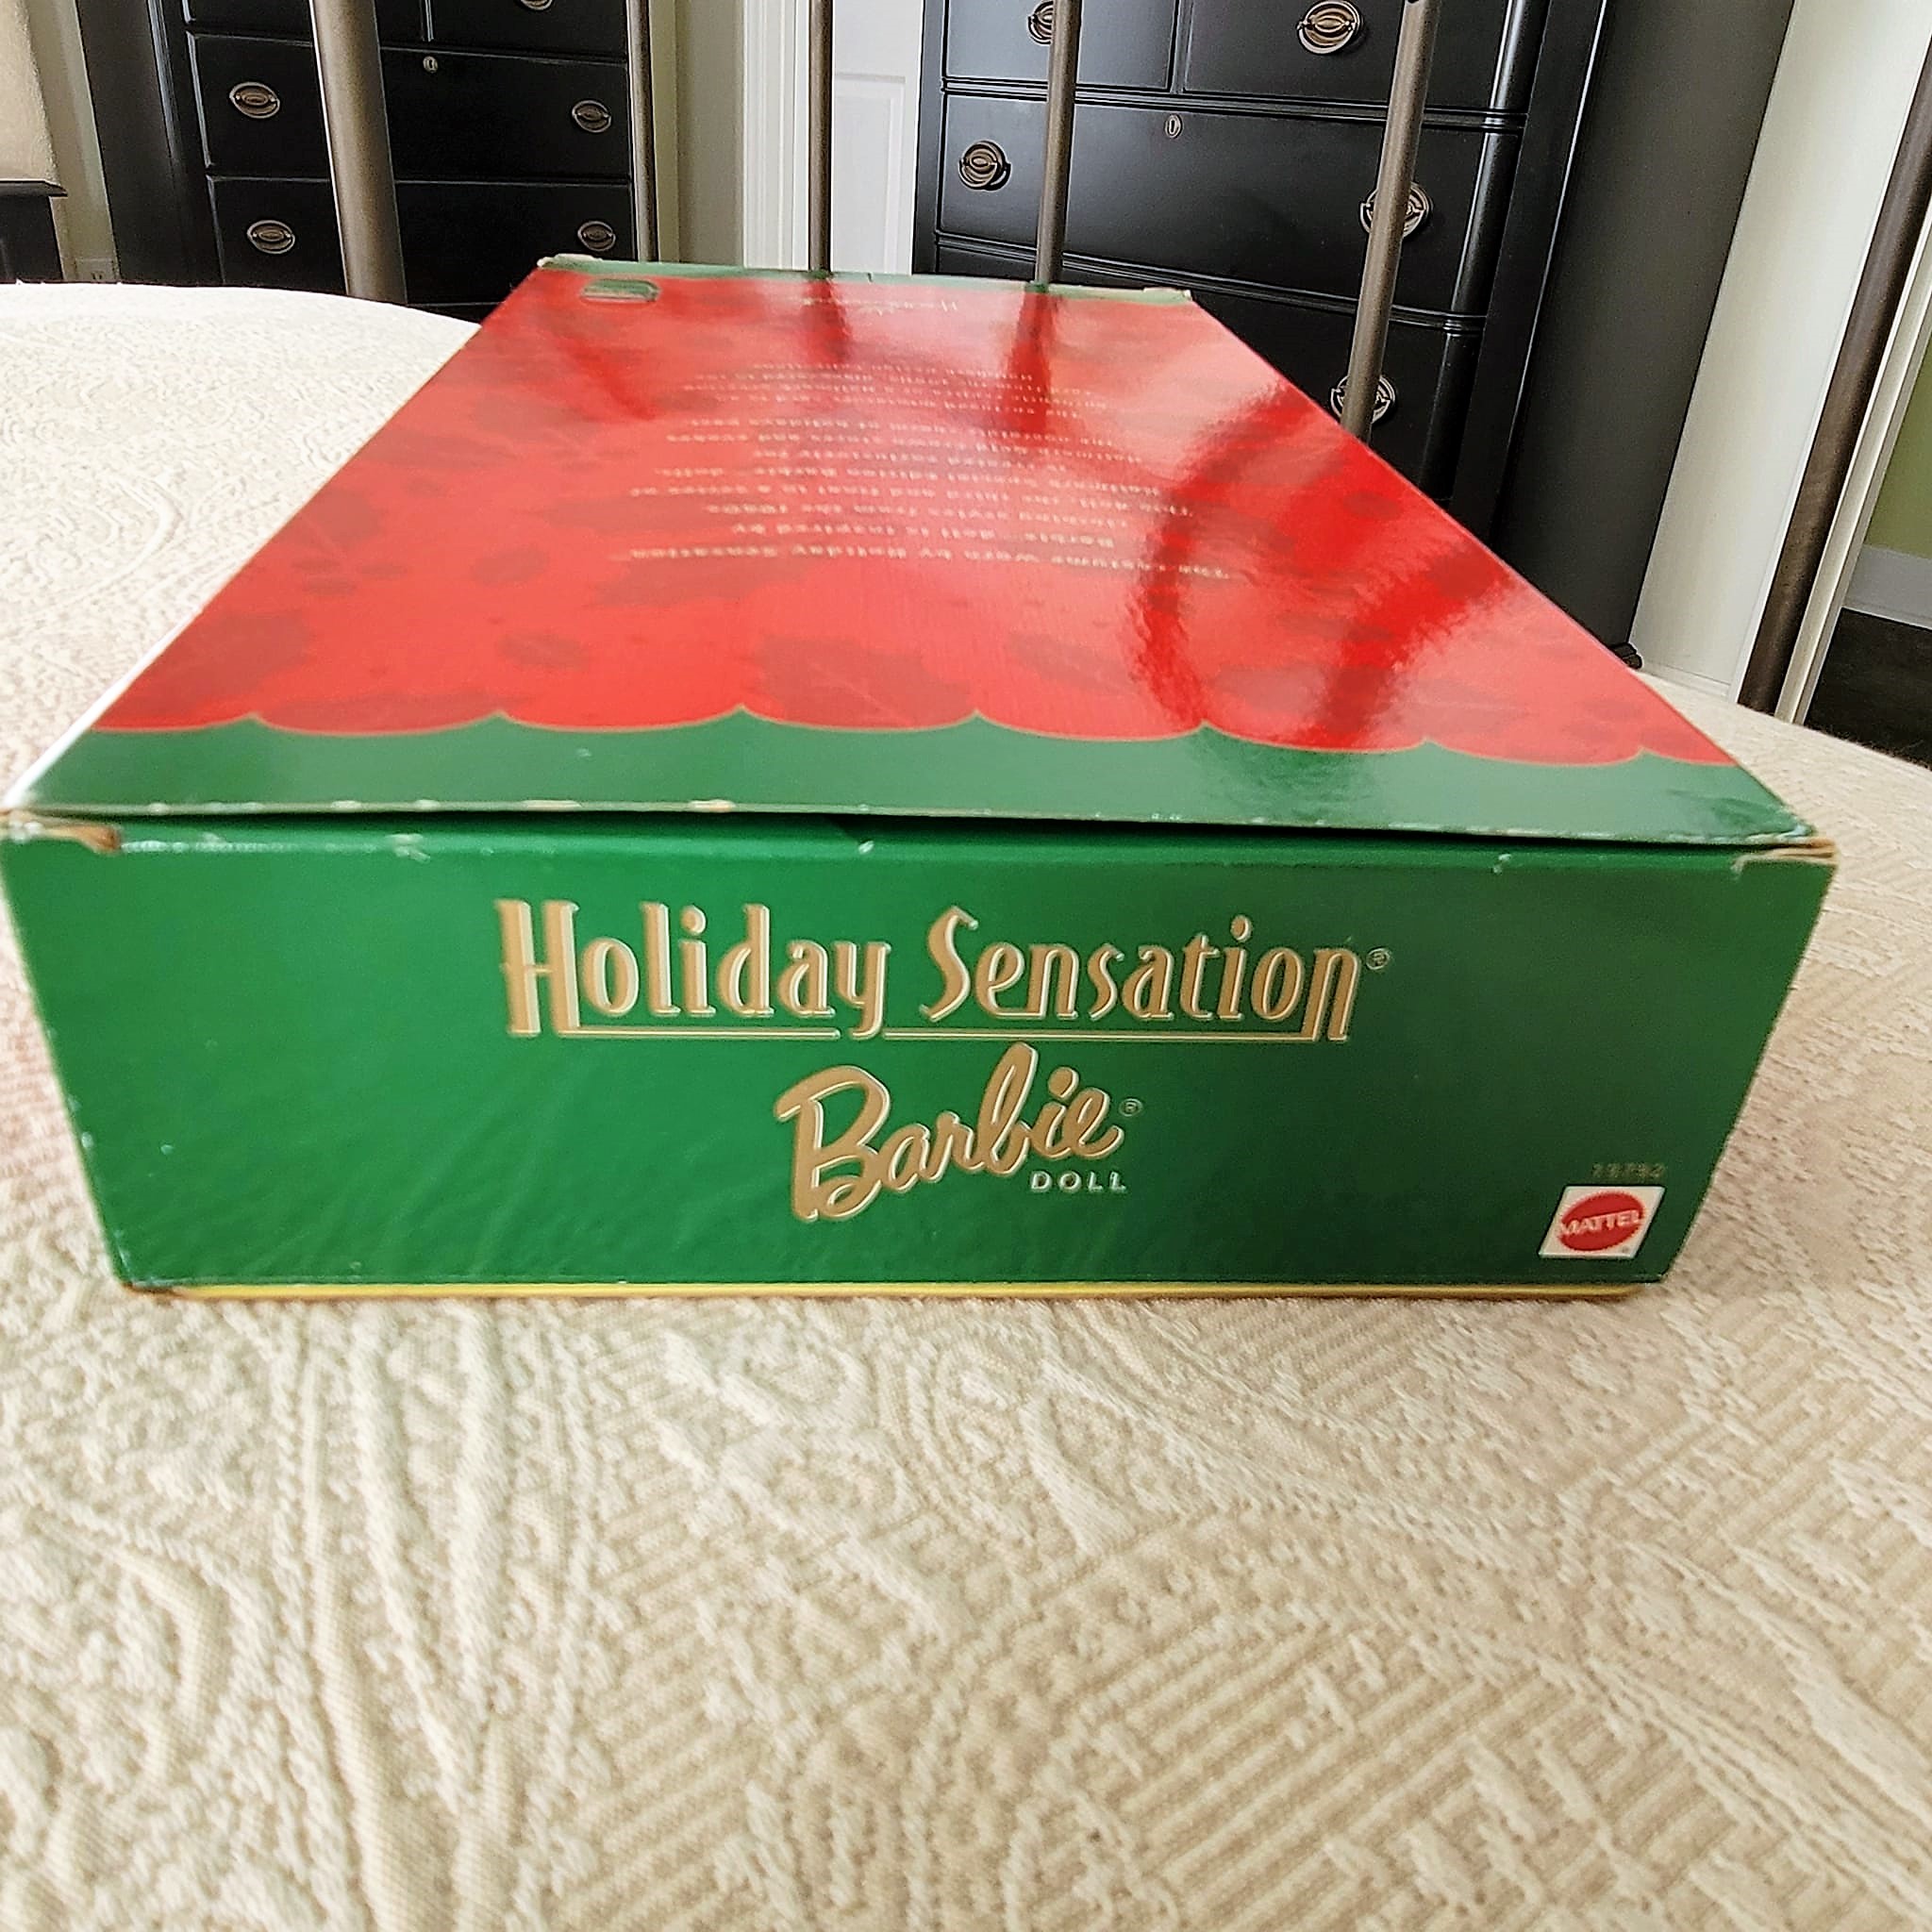
This Barbie was manufactured and sold in 1998 and is the third and final in the series. The Victorian Barbie I created in 2021 is from that same series. The costume worn by the doll is inspired by 1940s style. The miniature card in the box is a replica of a 1940s greeting card from the Hallmark Design Collection.


Now it's time to study the details of the 1940s Barbie and recreate her costume in wearable life size.


The Pattern
Simplicity 4270 is a 2008 Retro Vintage reprint of their 1930s pattern. It was easily located on Etsy.


The bodice front lining neckline is staystitched. The darts are sewn and center front sewn.


 7th
7th


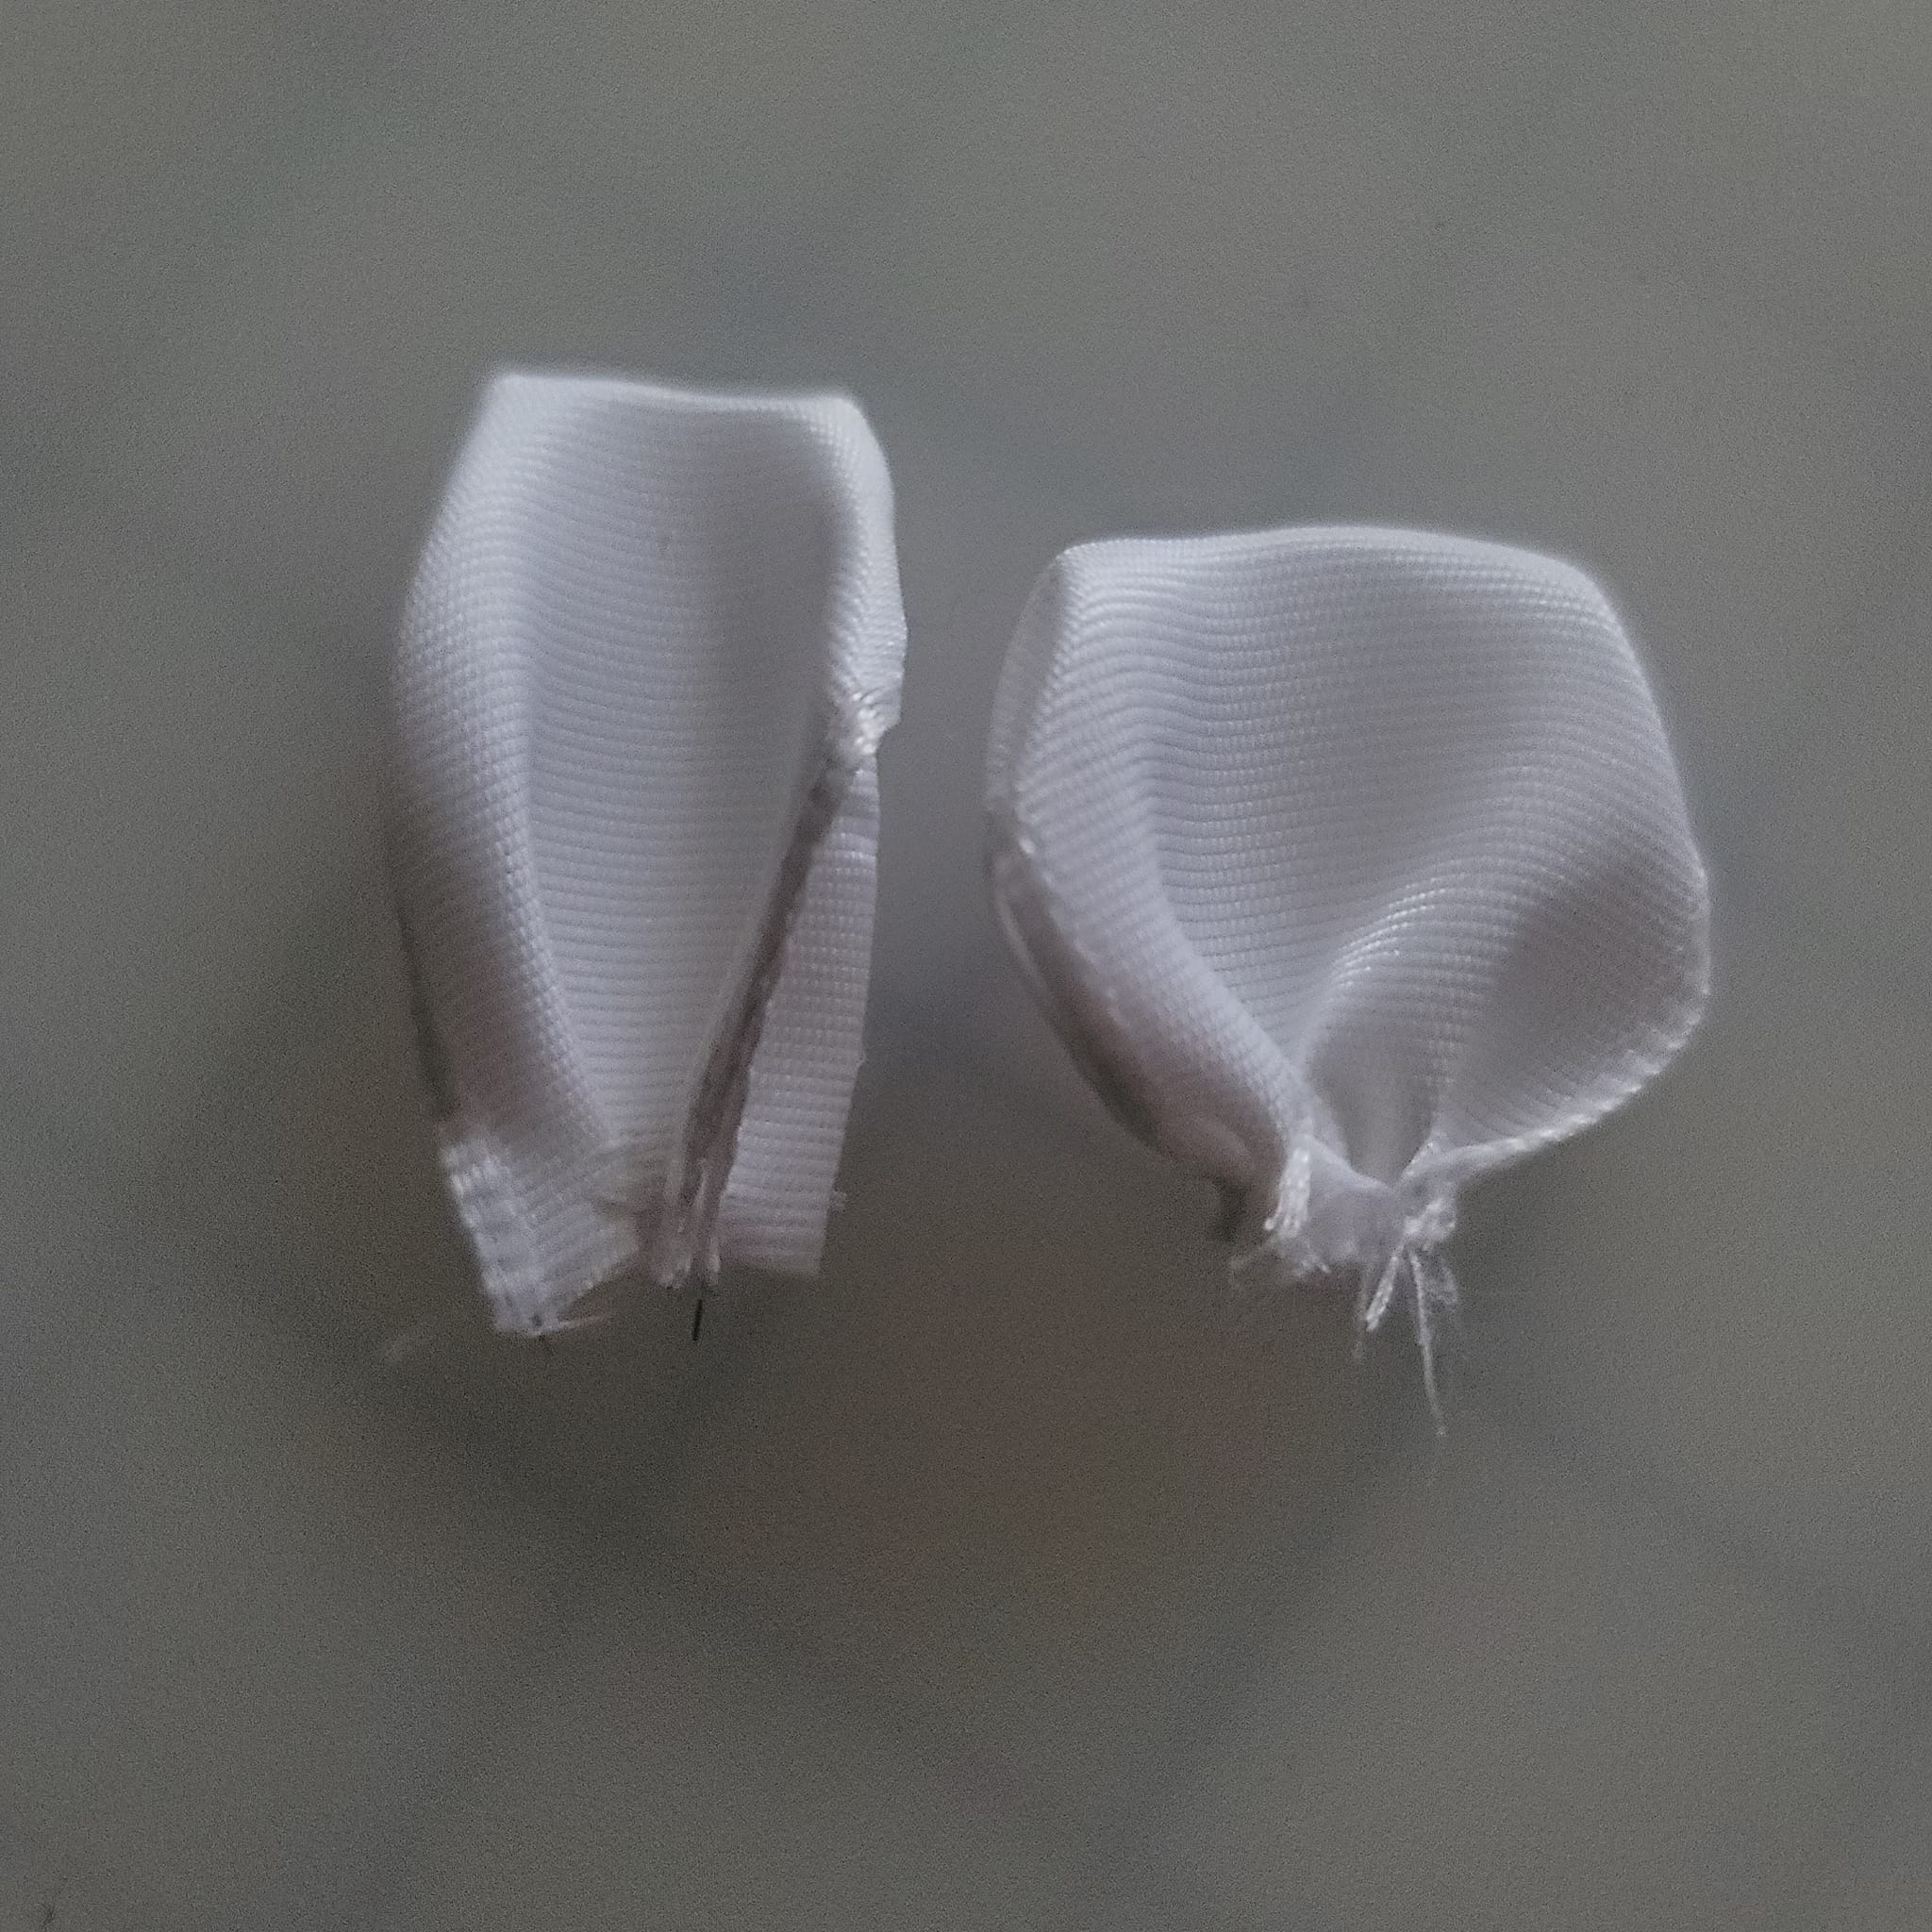
Step 1: Cut a length of ribbon twice the length of the finished leaf you want plus extra for the gathering. I've cut 10".


 a
a


But while I love this cap, all the darts and pleats took so much volume out of the cap that it doesn't look like Holiday Barbie or the caps and snoods I see in vintage photos and ads.


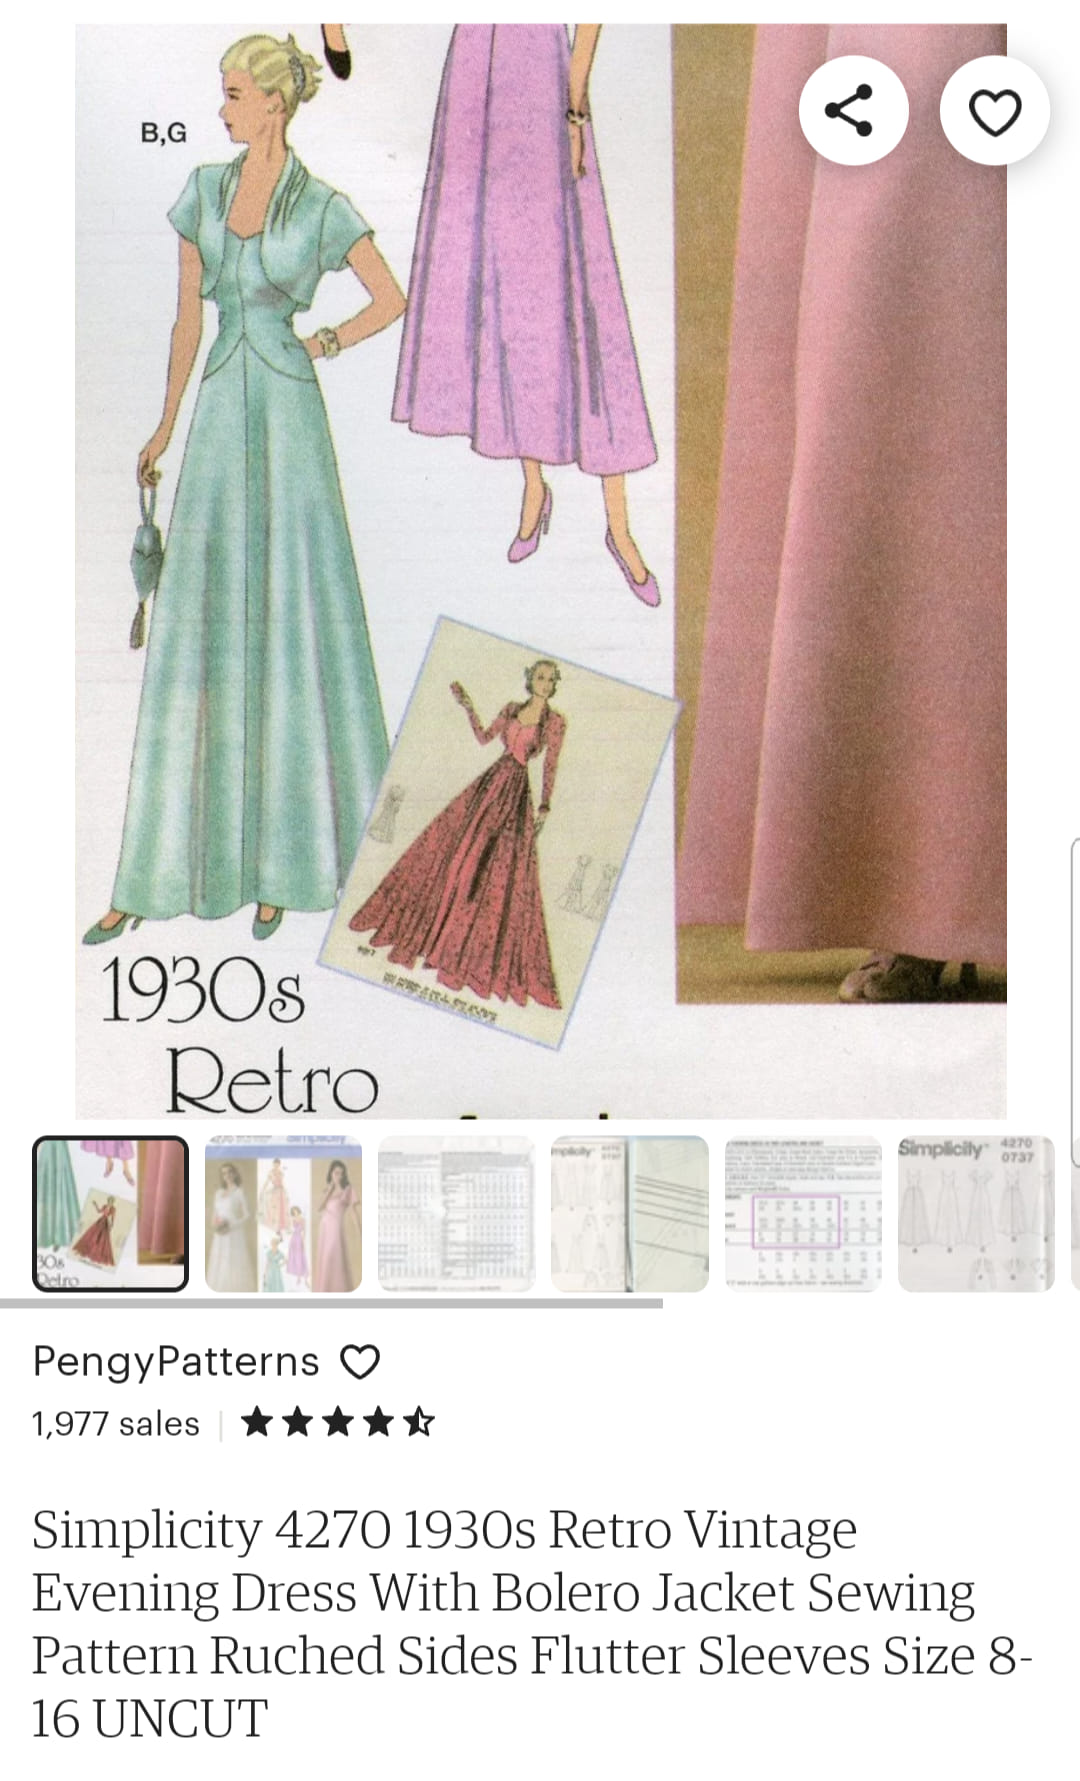
The pattern has options for a mid-length or floor-length gown with or without sleeves. There is an additional pattern for an overskirt. The bolero jacket can be made with long or short sleeves.


A lot of pattern paper and instructions!


The bodice pattern consists of a front, back, and front lining.

The skirt is in two pieces - front and back.

The jacket pattern has a front piece which also creates the collar, a back, a sleeve, and a loop.

Fabric and Notions
Although I'm using a 1930s pattern I want to create this Holiday Barbie is her classic red and green with black accents. I find an affordable faux taffeta in the perfect green on Etsy.


A black Swiss Dot Veiling Point d'Esprit with extra large dots is also available on Etsy. I order enough for the bodice trim, the hair cap, and a second bolero jacket.


I have just a bit of red satin left over from my Edwardian Holiday Barbie and some red satin piping from an ages ago project. All the fabrics are ready. Some silver metallic ribbon and silver beads will be used for the poinsettias.

The Bodice
The pattern pieces are pressed smooth with a warm, dry iron.

Two front and two back pieces are cut from the faux taffeta. Two front lining and two back lining pieces are cut from a black cotton.

The bodice front and back neck edges are staystitched.

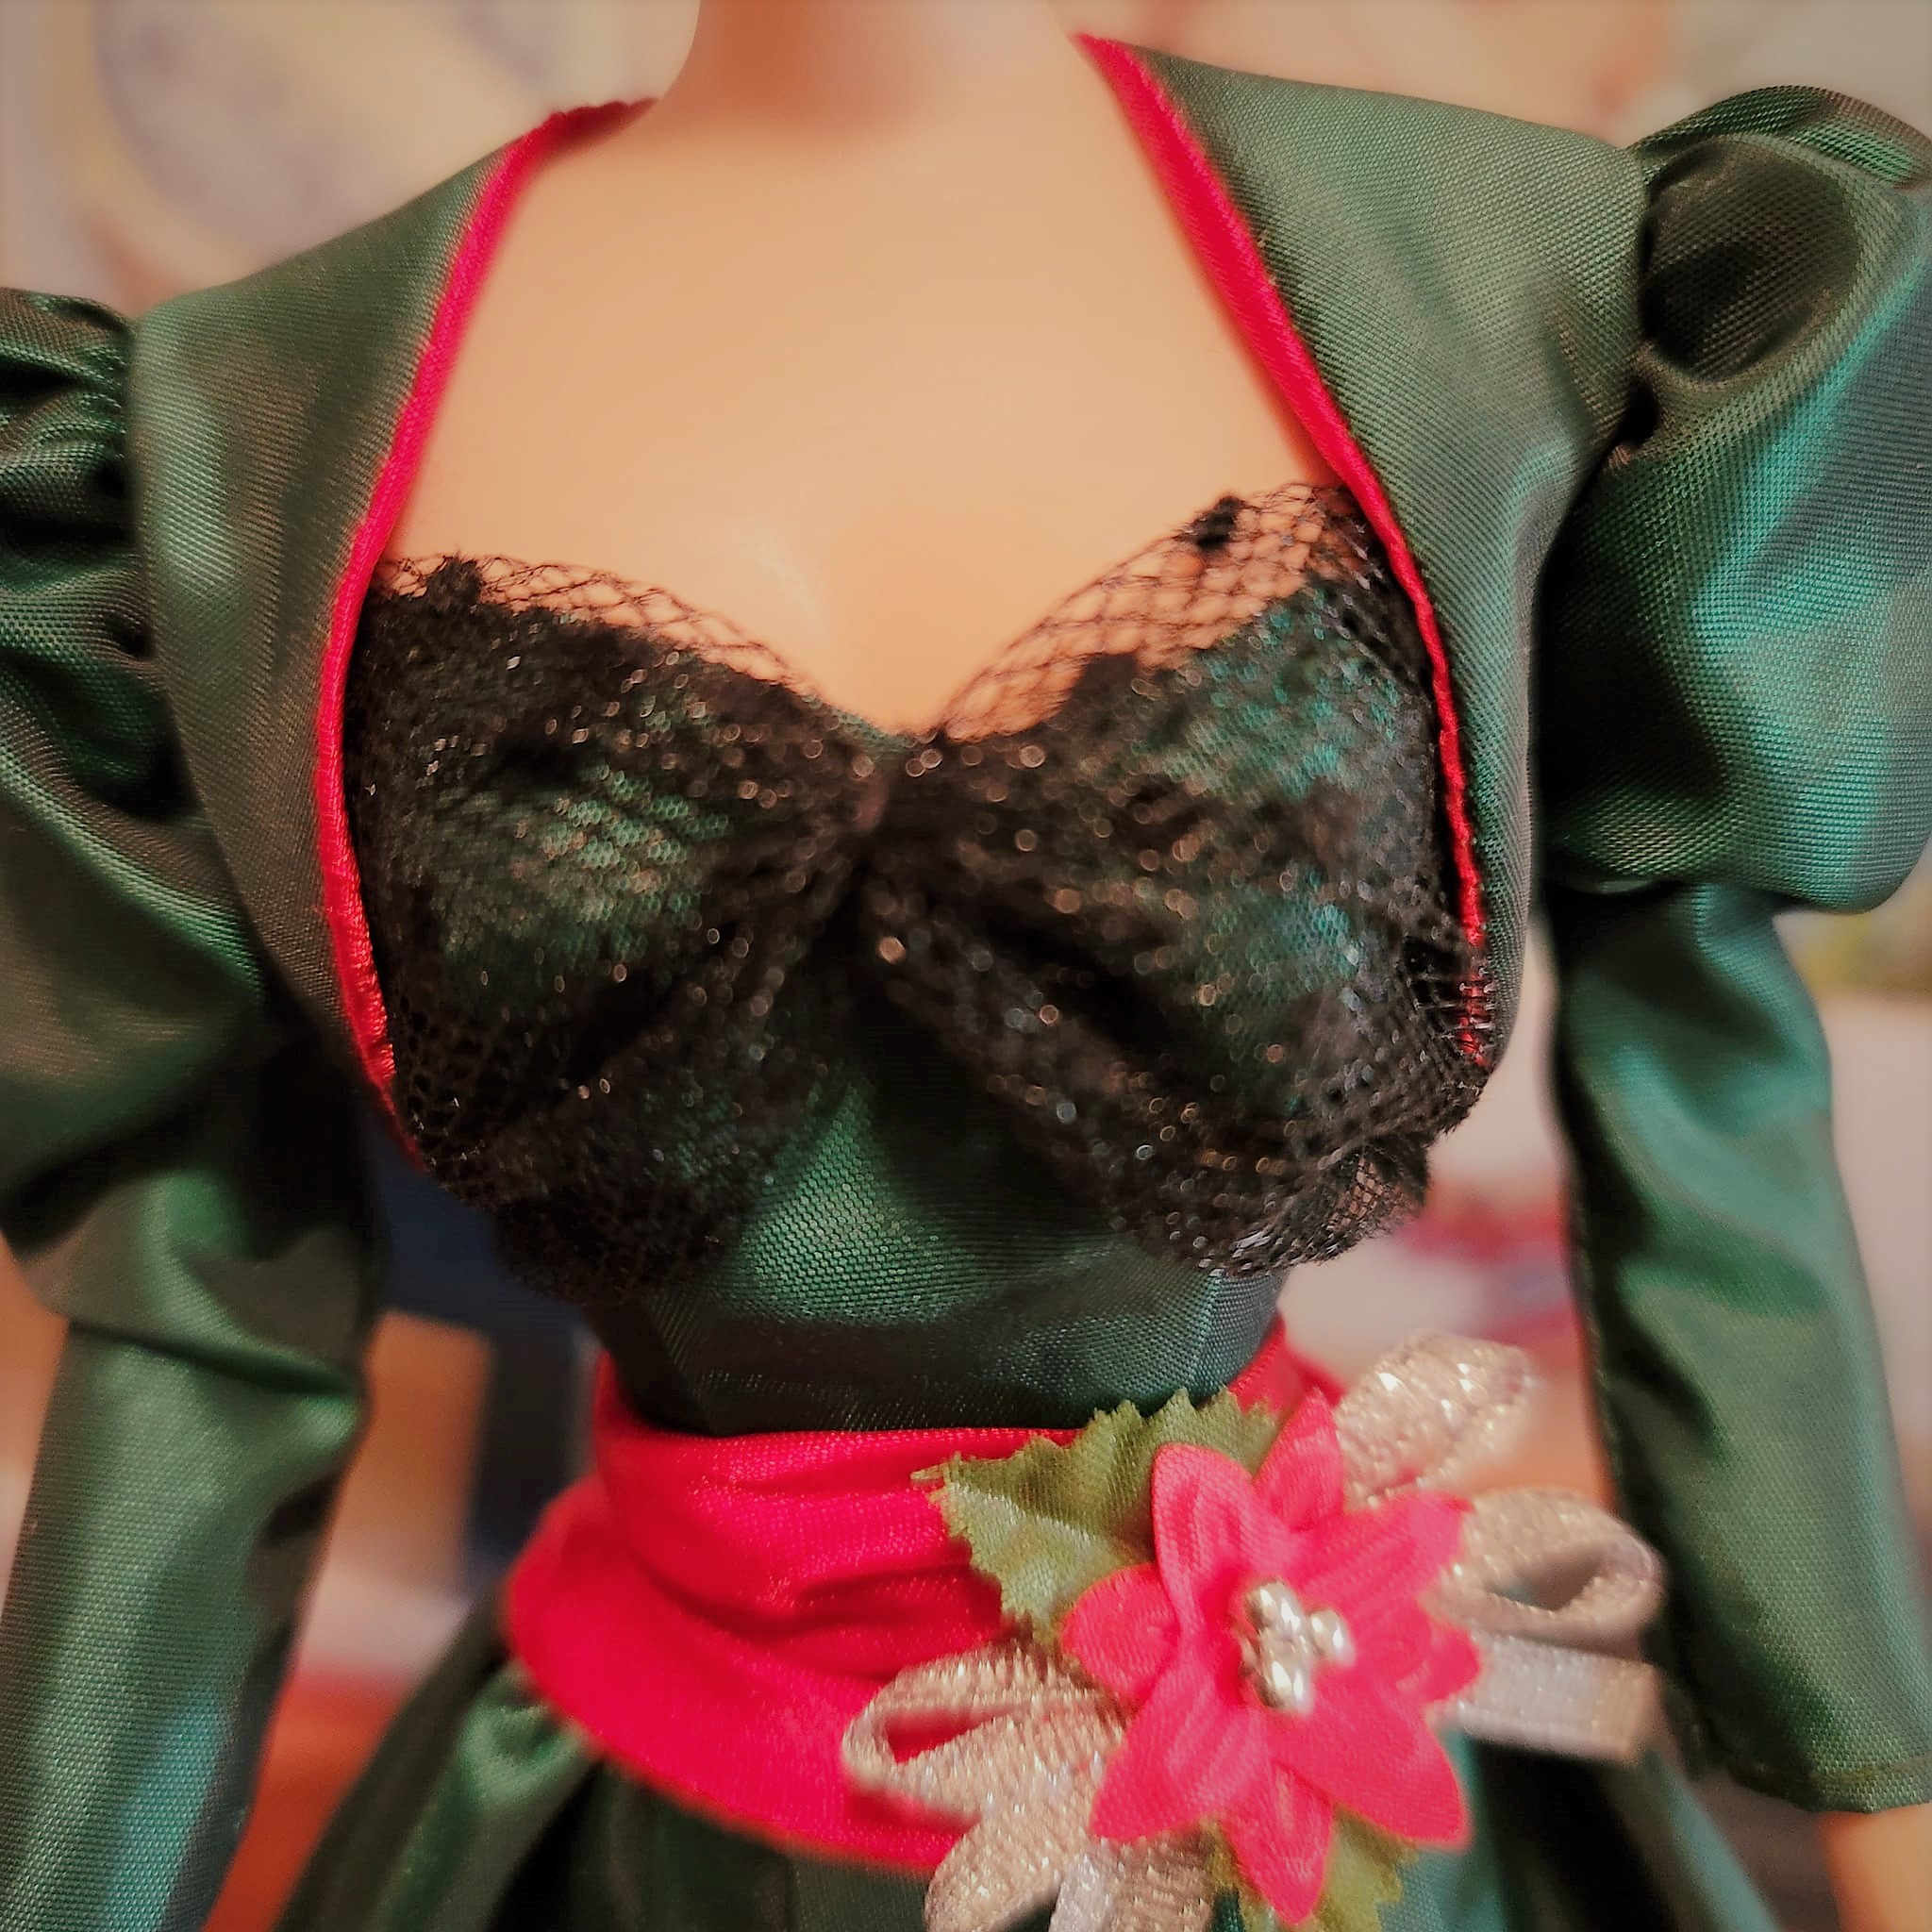
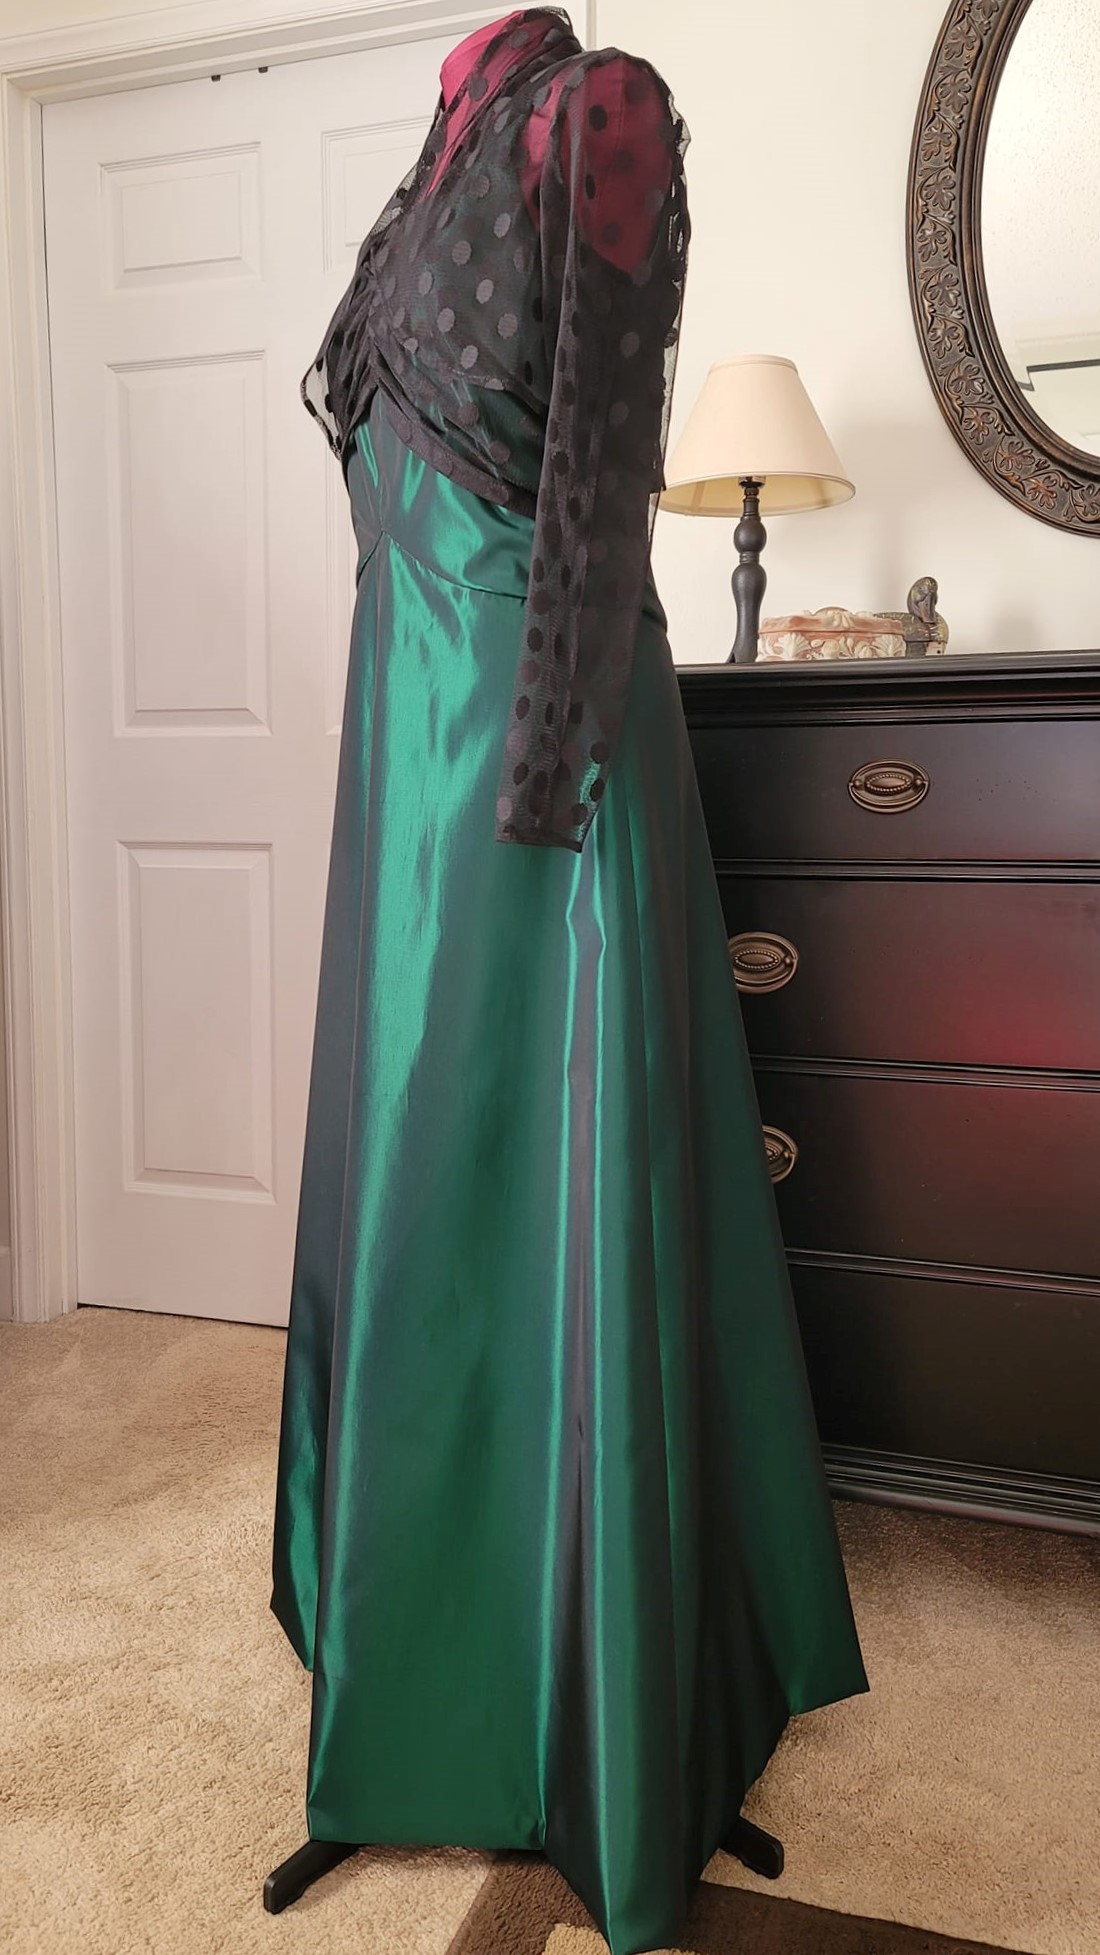
Holiday Barbie has a net overlay on the gown bodice which extends slightly above the bodice top edge and is gathered in the center.

The Simplicity gown bodice pattern gathers at each side and has a slightly dropped waist. After a few tests I decide what I like best for this gown and attach the net to the front bodice halves. Gathering stitches are sewn at the sides.

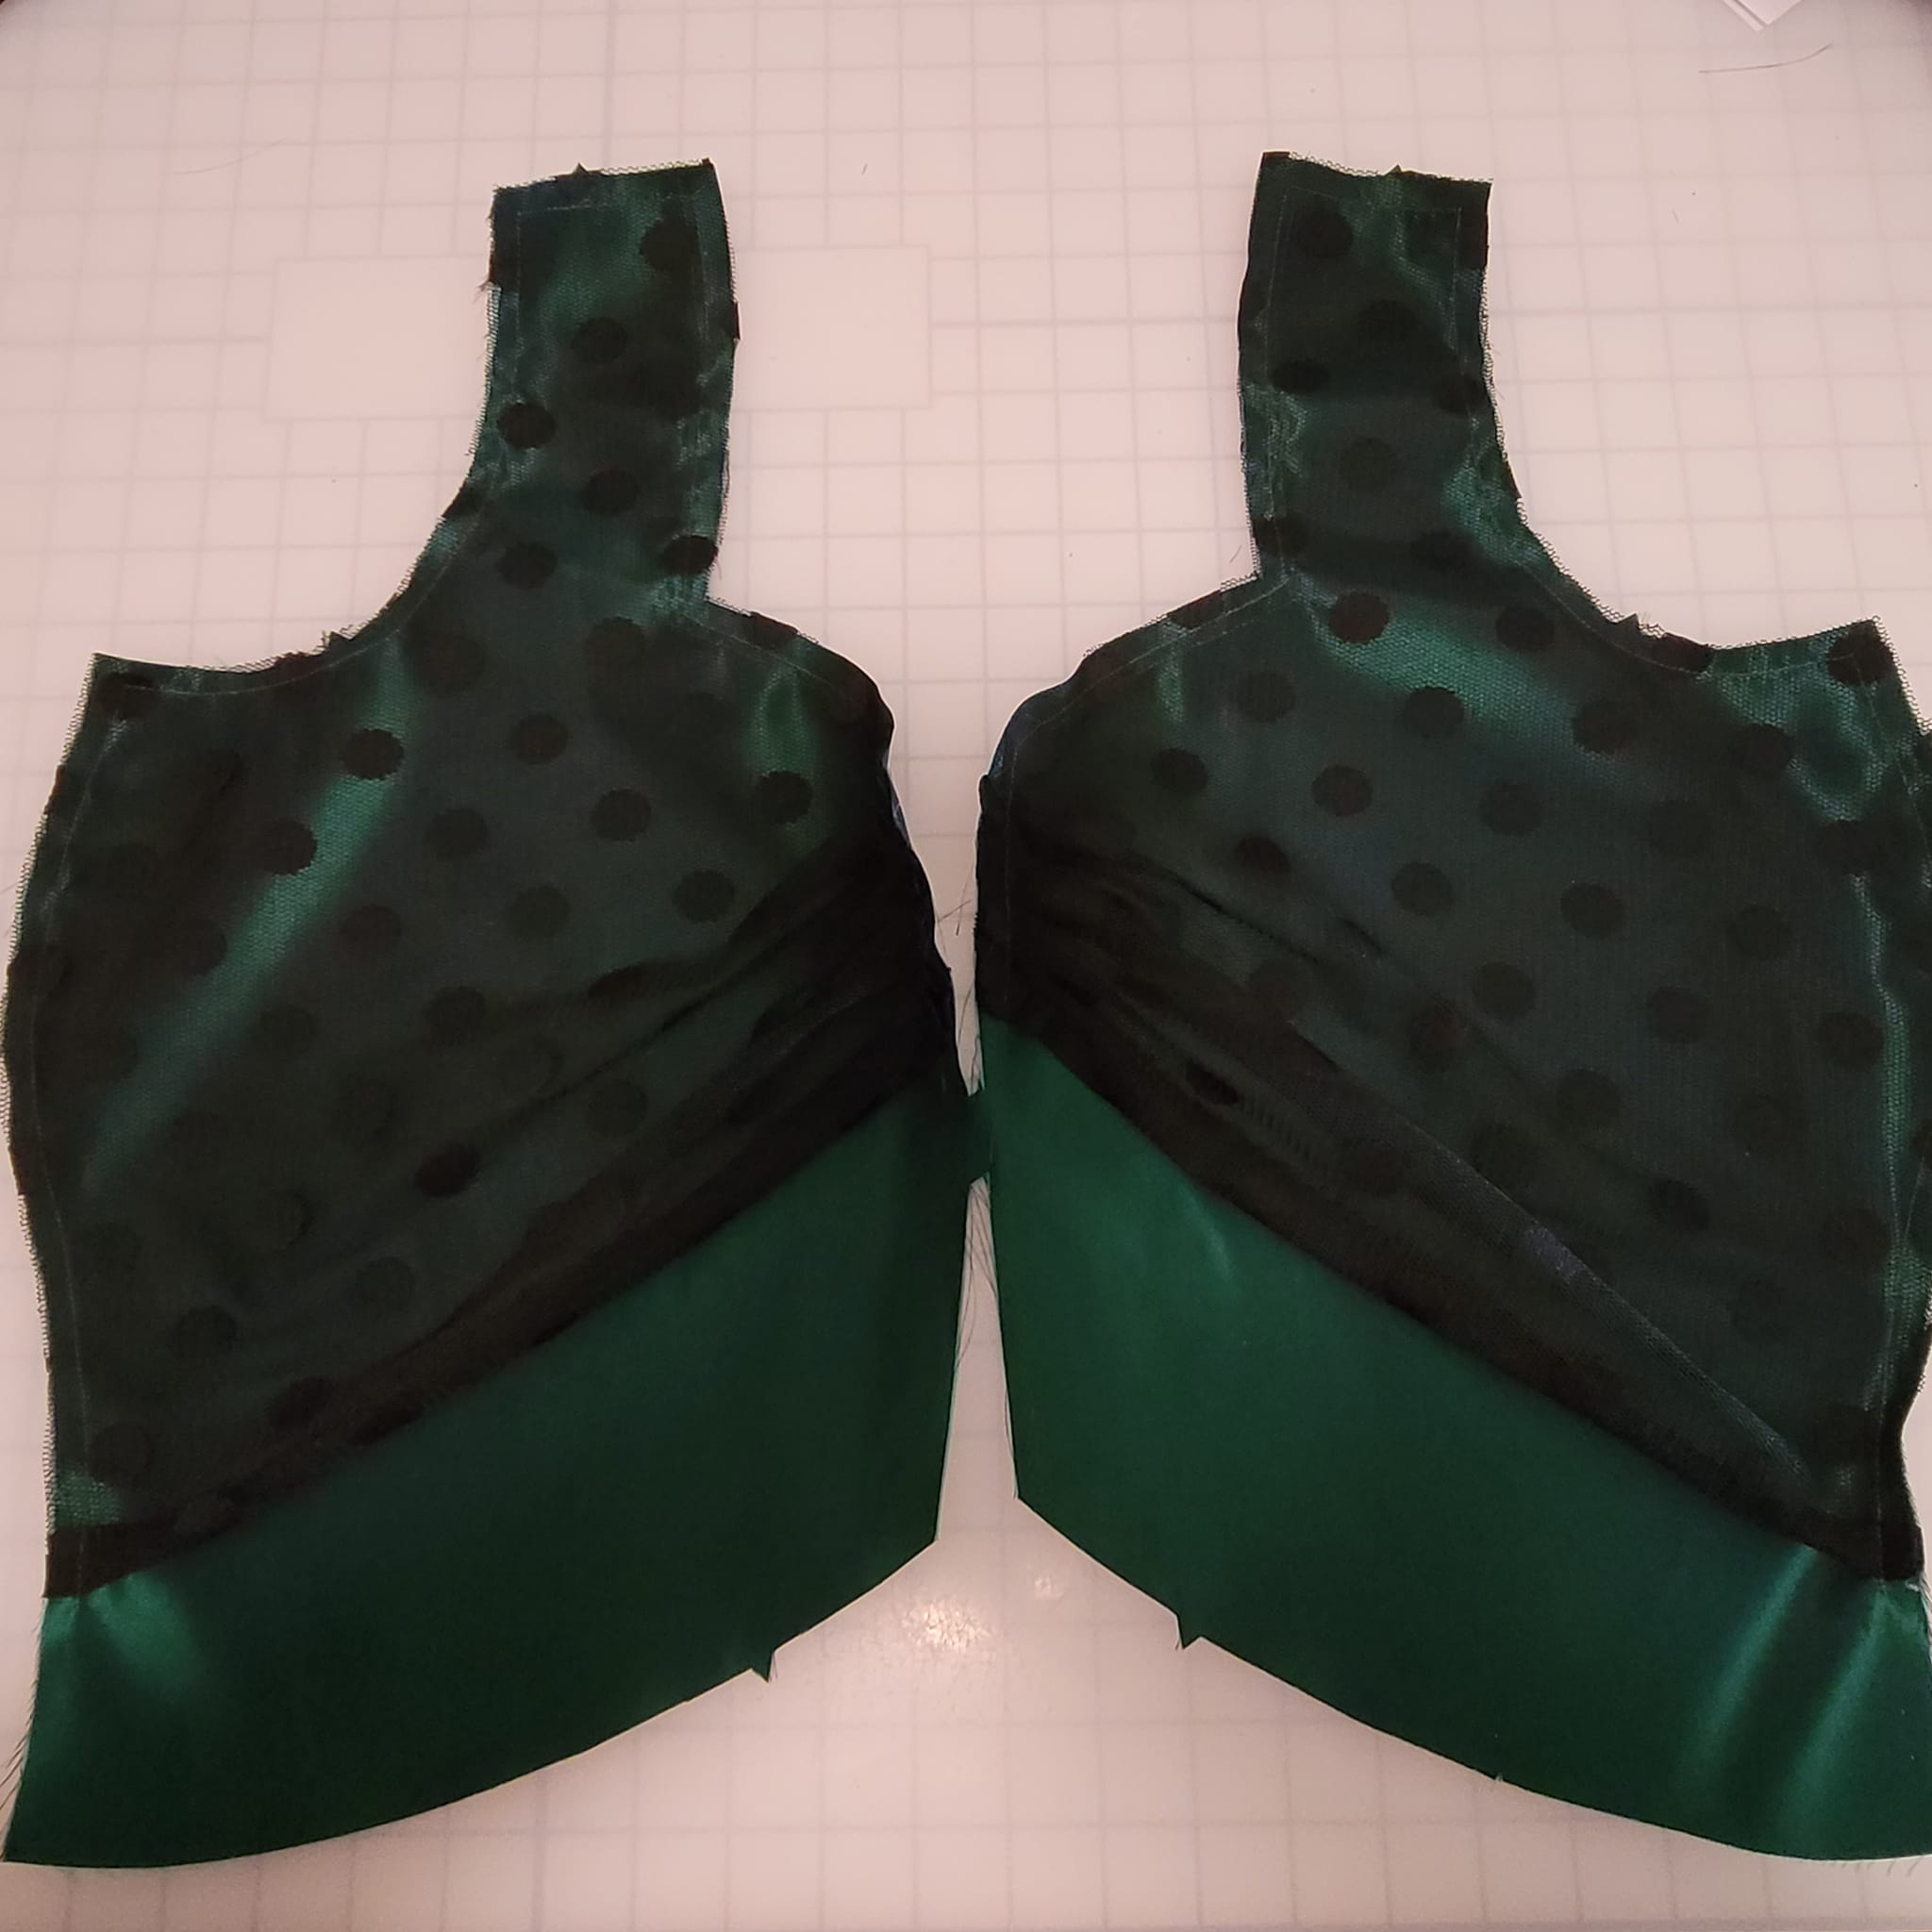
The front halves are sewn at the center seam. Darts are sewn into the back halves. Then the fronts and backs are attached at the sides and gathered to fit. The shoulders are sewn.


The bodice back neckline is staystiched and the darts are sewn. The lining front and back are attached at the shoulder seams.


The bodice exterior and lining are sewn at the neckline and armhole edges

Oh no!! At this point I'm on Step 11 of the pattern instructions and I've done something very wrong. I've sewn the side seams as well completely eliminating the ability to turn the bodice right side out. A cup of tea to overcome the frustration and clear my mind.

Now that my brain is finished with its vacation I can continue! With all the gathering and stitching on the side seams my easiest fix seemed to be to open the shoulder seams, turn the bodice, and resew the shoulder seams by hand.


Much better!


The Skirt
The skirt portion of the gown is a front in two halves, and a back in two halves.


The center front seam is sewn.

The center back seam is sewn leaving the top edge open for the zipper which will extend down the full length of the bodice and into the skirt. The side seams are sewn.

A lining is cut from the same pattern pieces using a slippery light-weight faux satin.

The lining pieces are sewn exactly as the outer fashion fabric.


The separate bodice and skirt with linings are ready to be joined. The skirt with lining upper edge is sewn to the lower bodice edge leaving the bodice lining free.


Then the bodice lining lower edge seam allowance is turned under and hand stitched to the skirt just covering the seam where the bodice and skirt were joined.

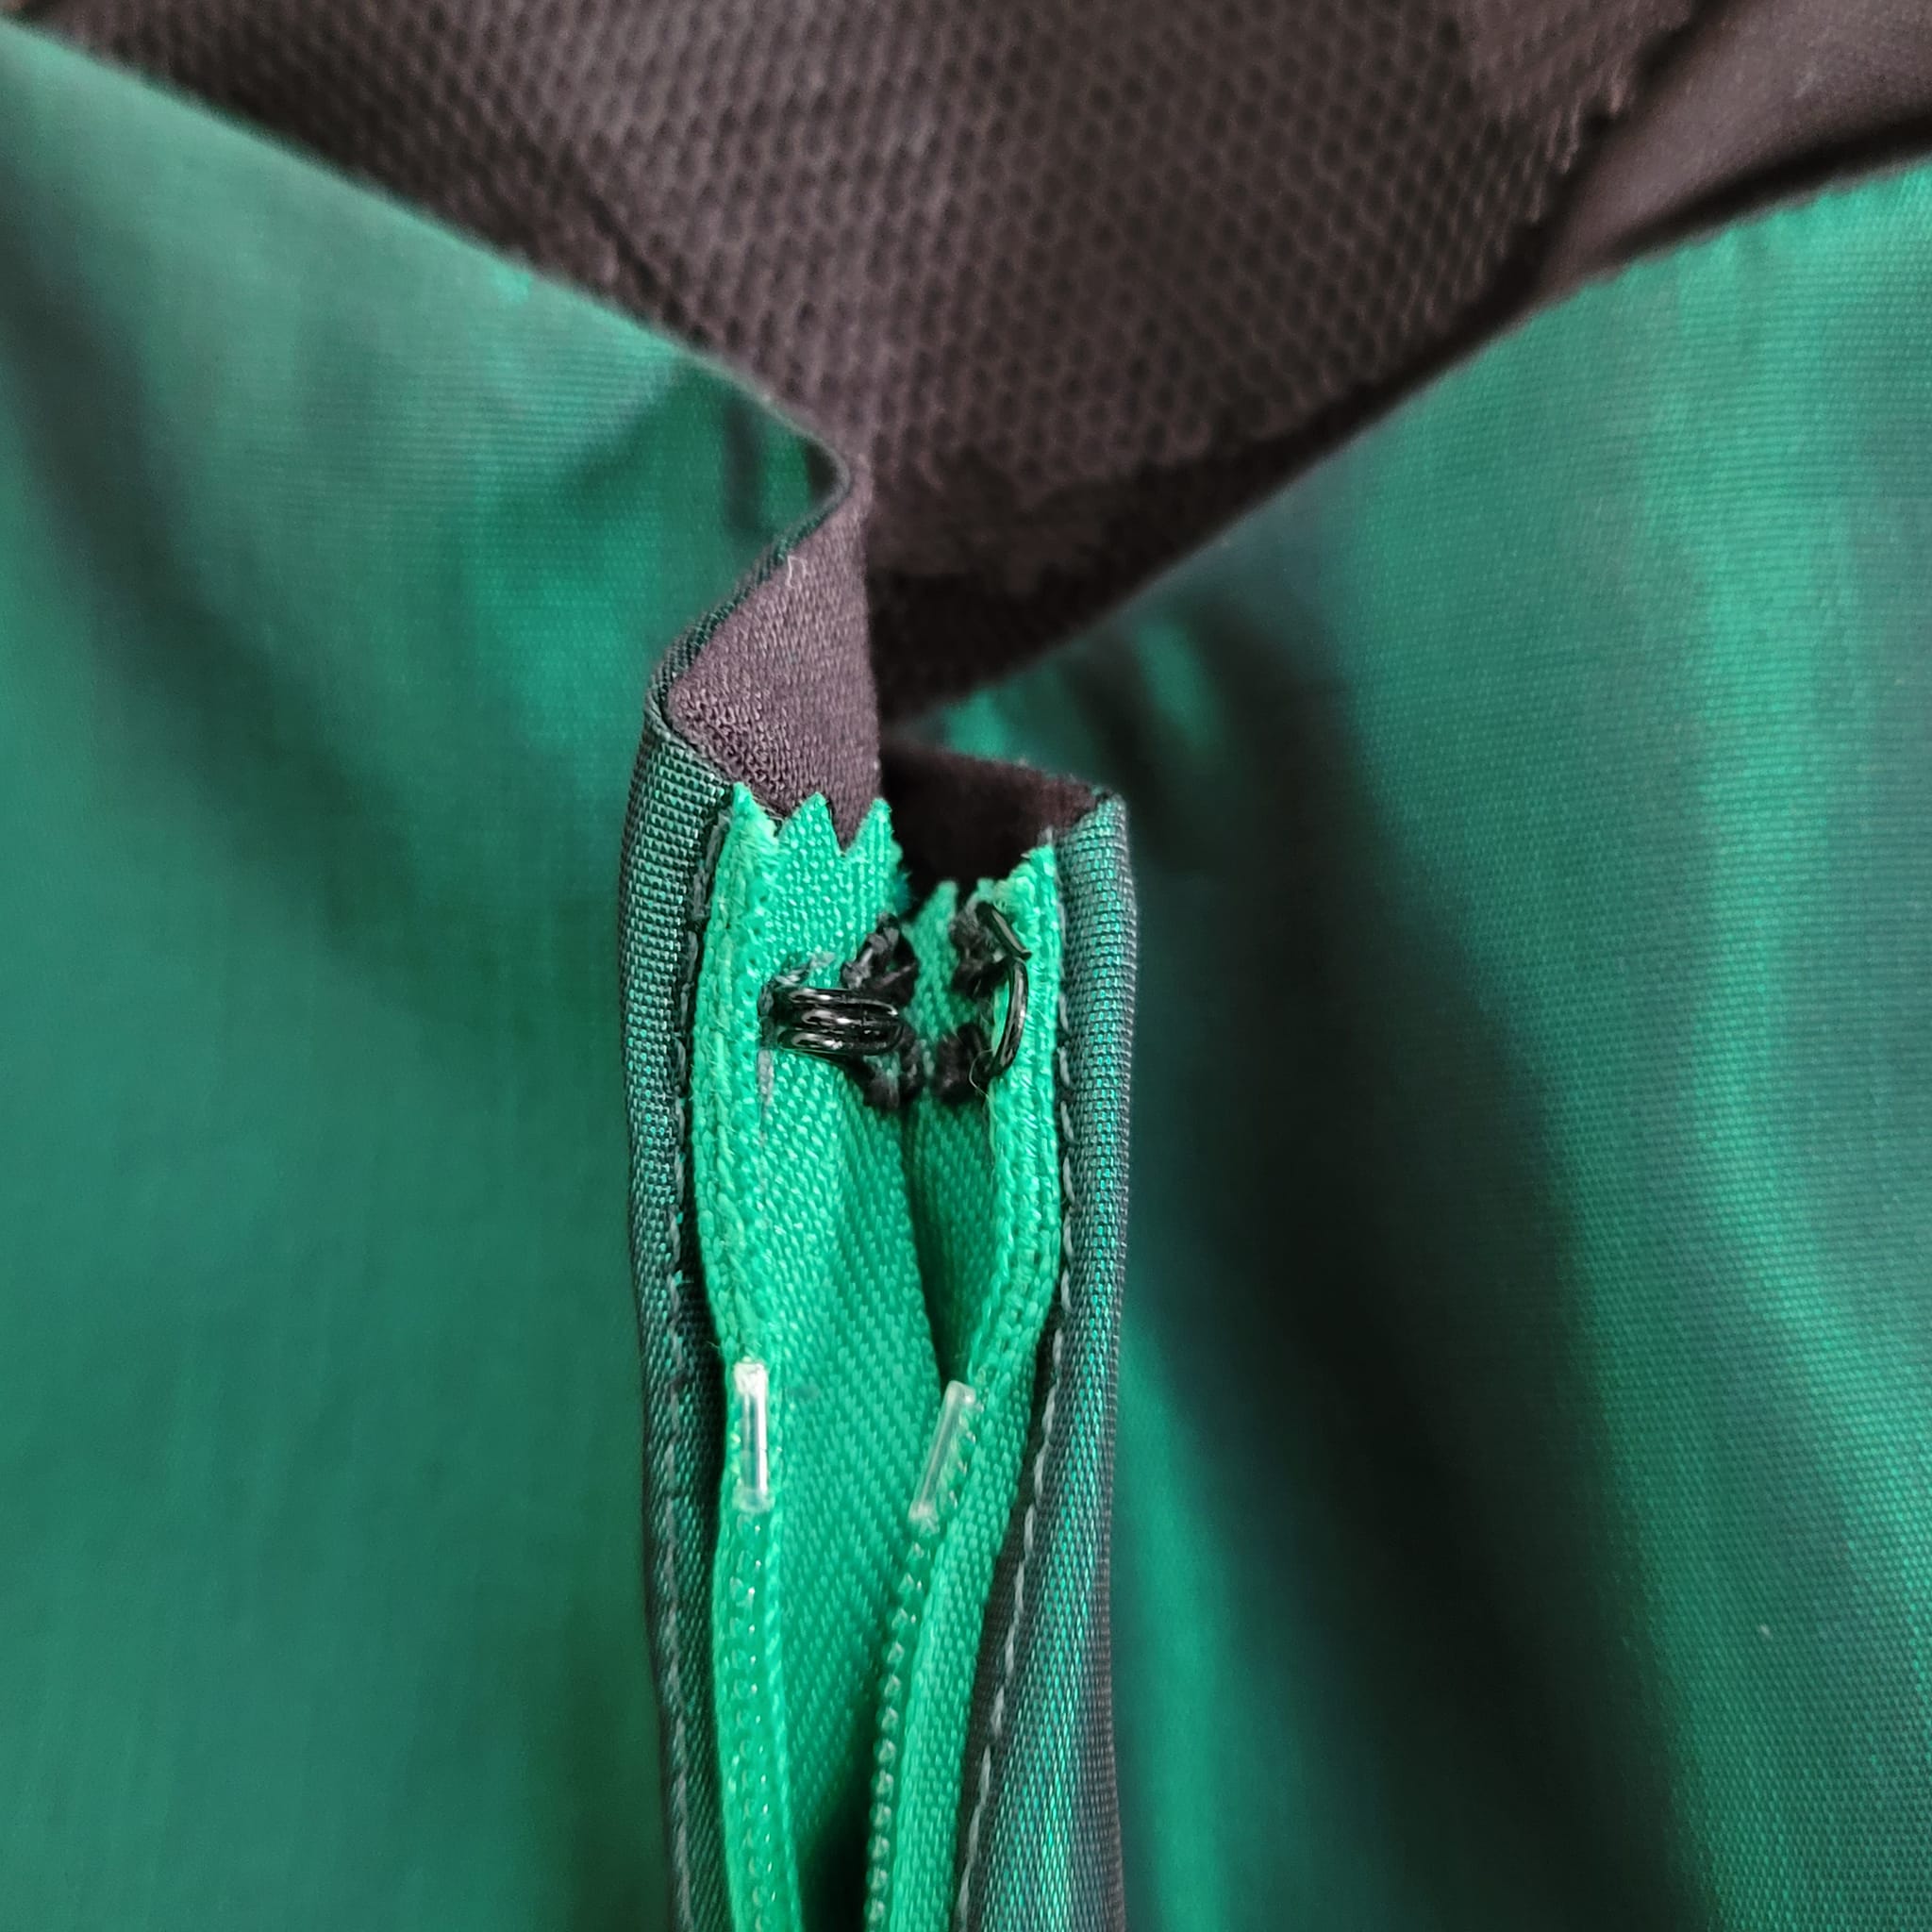
The center back edges of the bodice and skirt fabric and lining are basted together and a long zipper sewn into the opening.

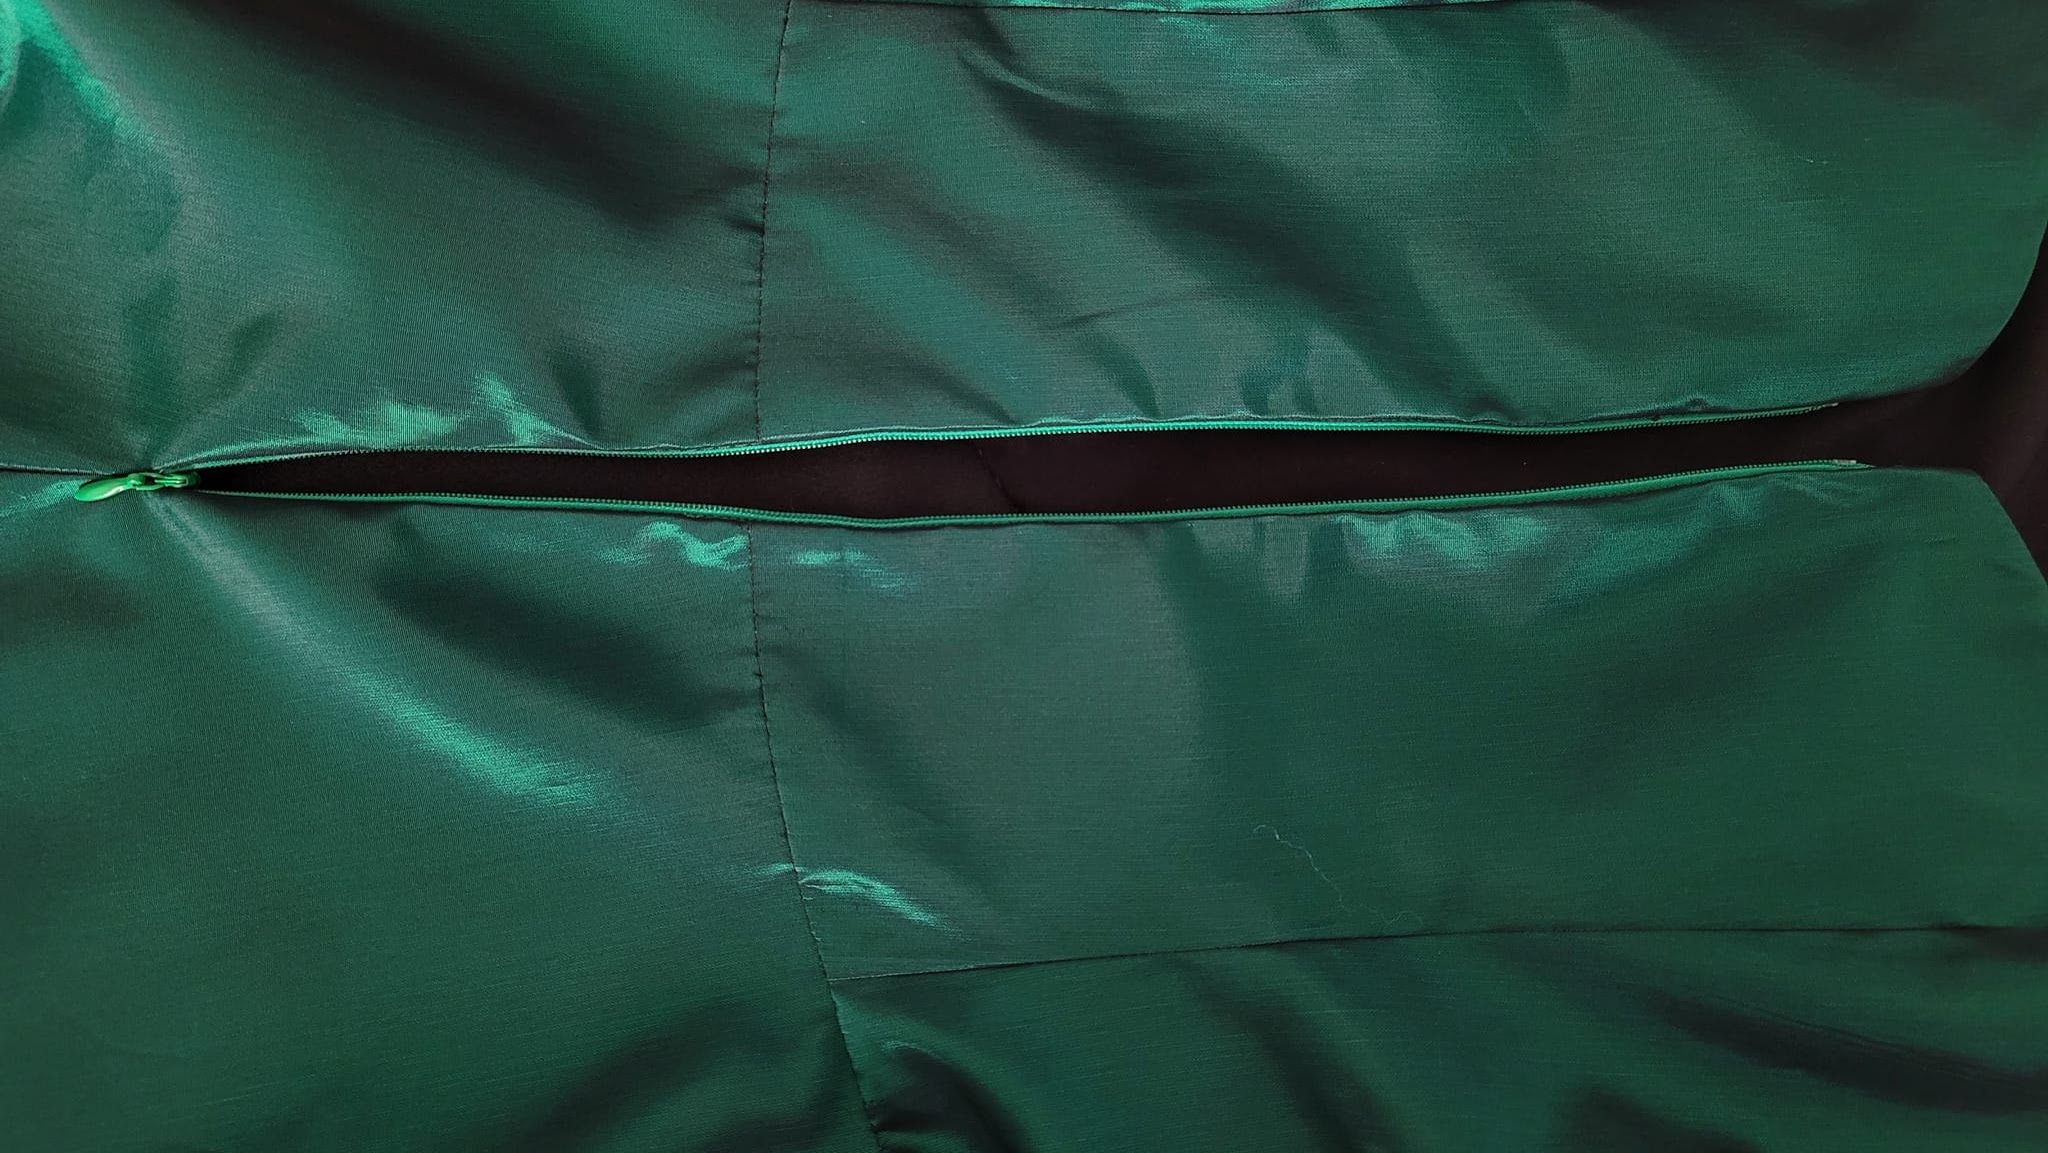
A hook and eye are sewn just above the zipper.
With the proper undergarments and the shoes that I will wear with this gown, I check my hem length in a full length mirror.

A simple hem sewn only through the lining layer means no stitches showing on the outside.


To mimic the Holiday Barbie net overlay I've added a trim to the upper portion of the bodice which can be removed easily if desired.

A Finished Gown


The Jacket
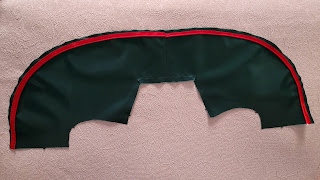
The bolero jacket pattern has a front which includes the collar, back, sleeves, and loops for buttons at the sleeve wrists.

All pieces are cut from the green faux taffeta for the outside, and a red satin for the lining.

The Holiday Barbie bolero has red satin piping and my stash piping will work beautifully.


The piping is sewn to each front edge at the seam line and the center back sewn. Note to future self: sew piping after the center back is sewn for a smooth, continuous line of piping.


The neck and shoulder edges are staystitched and clipped at the corners.

The back neck edge is also staystitched.

The back is sewn into the neck and shoulder edges of the front.


The lining is sewn similar to the outside of the jacket.


With right sides together the lining is pinned to the jacket, sewn on all outer edges, the seam allowance trimmed, and turned right side out through an armhole. The armhole edges are then basted together.


The lining and outer fabric are stabilized at the back neck seam by stitching in the ditch of the seam between the corners. The collar pleats are marked (I've used a white heat-erasable pen) and sewn through both the outer fabric and lining. The pleats are then created by bringing the markings together, sewing through four layers, and then pressing toward the neck edge.


Next, the sleeves. The loop fabric is sewn into a tube, the seam allowance trimmed, and turned right side out. It is cut into the length necessary to loop over the size button chosen and to extend into the seam allowance.
 7th
7th

The loops are sewn at the seam allowance and the sleeve seam sewn leaving the loop area free.

The lining seam is sewn leaving the area free for the sleeve opening. The lower edge and opening of the outer fabric and lining are sewn with right sides together. The lining is then turned and the upper edge sewn with long gathering stitches.


The buttons are sewn on each sleeve opening.


The sleeves are sewn into the armholes matching notches and gathering as necessary.

The Finished Jacket
I truly love the soft draped effect the collar pleats give to the shoulder and jacket front. The pattern also allows for a small gather to be made at the mid front edge covered with a button to maintain that effect but for now here is the finished bolero jacket.


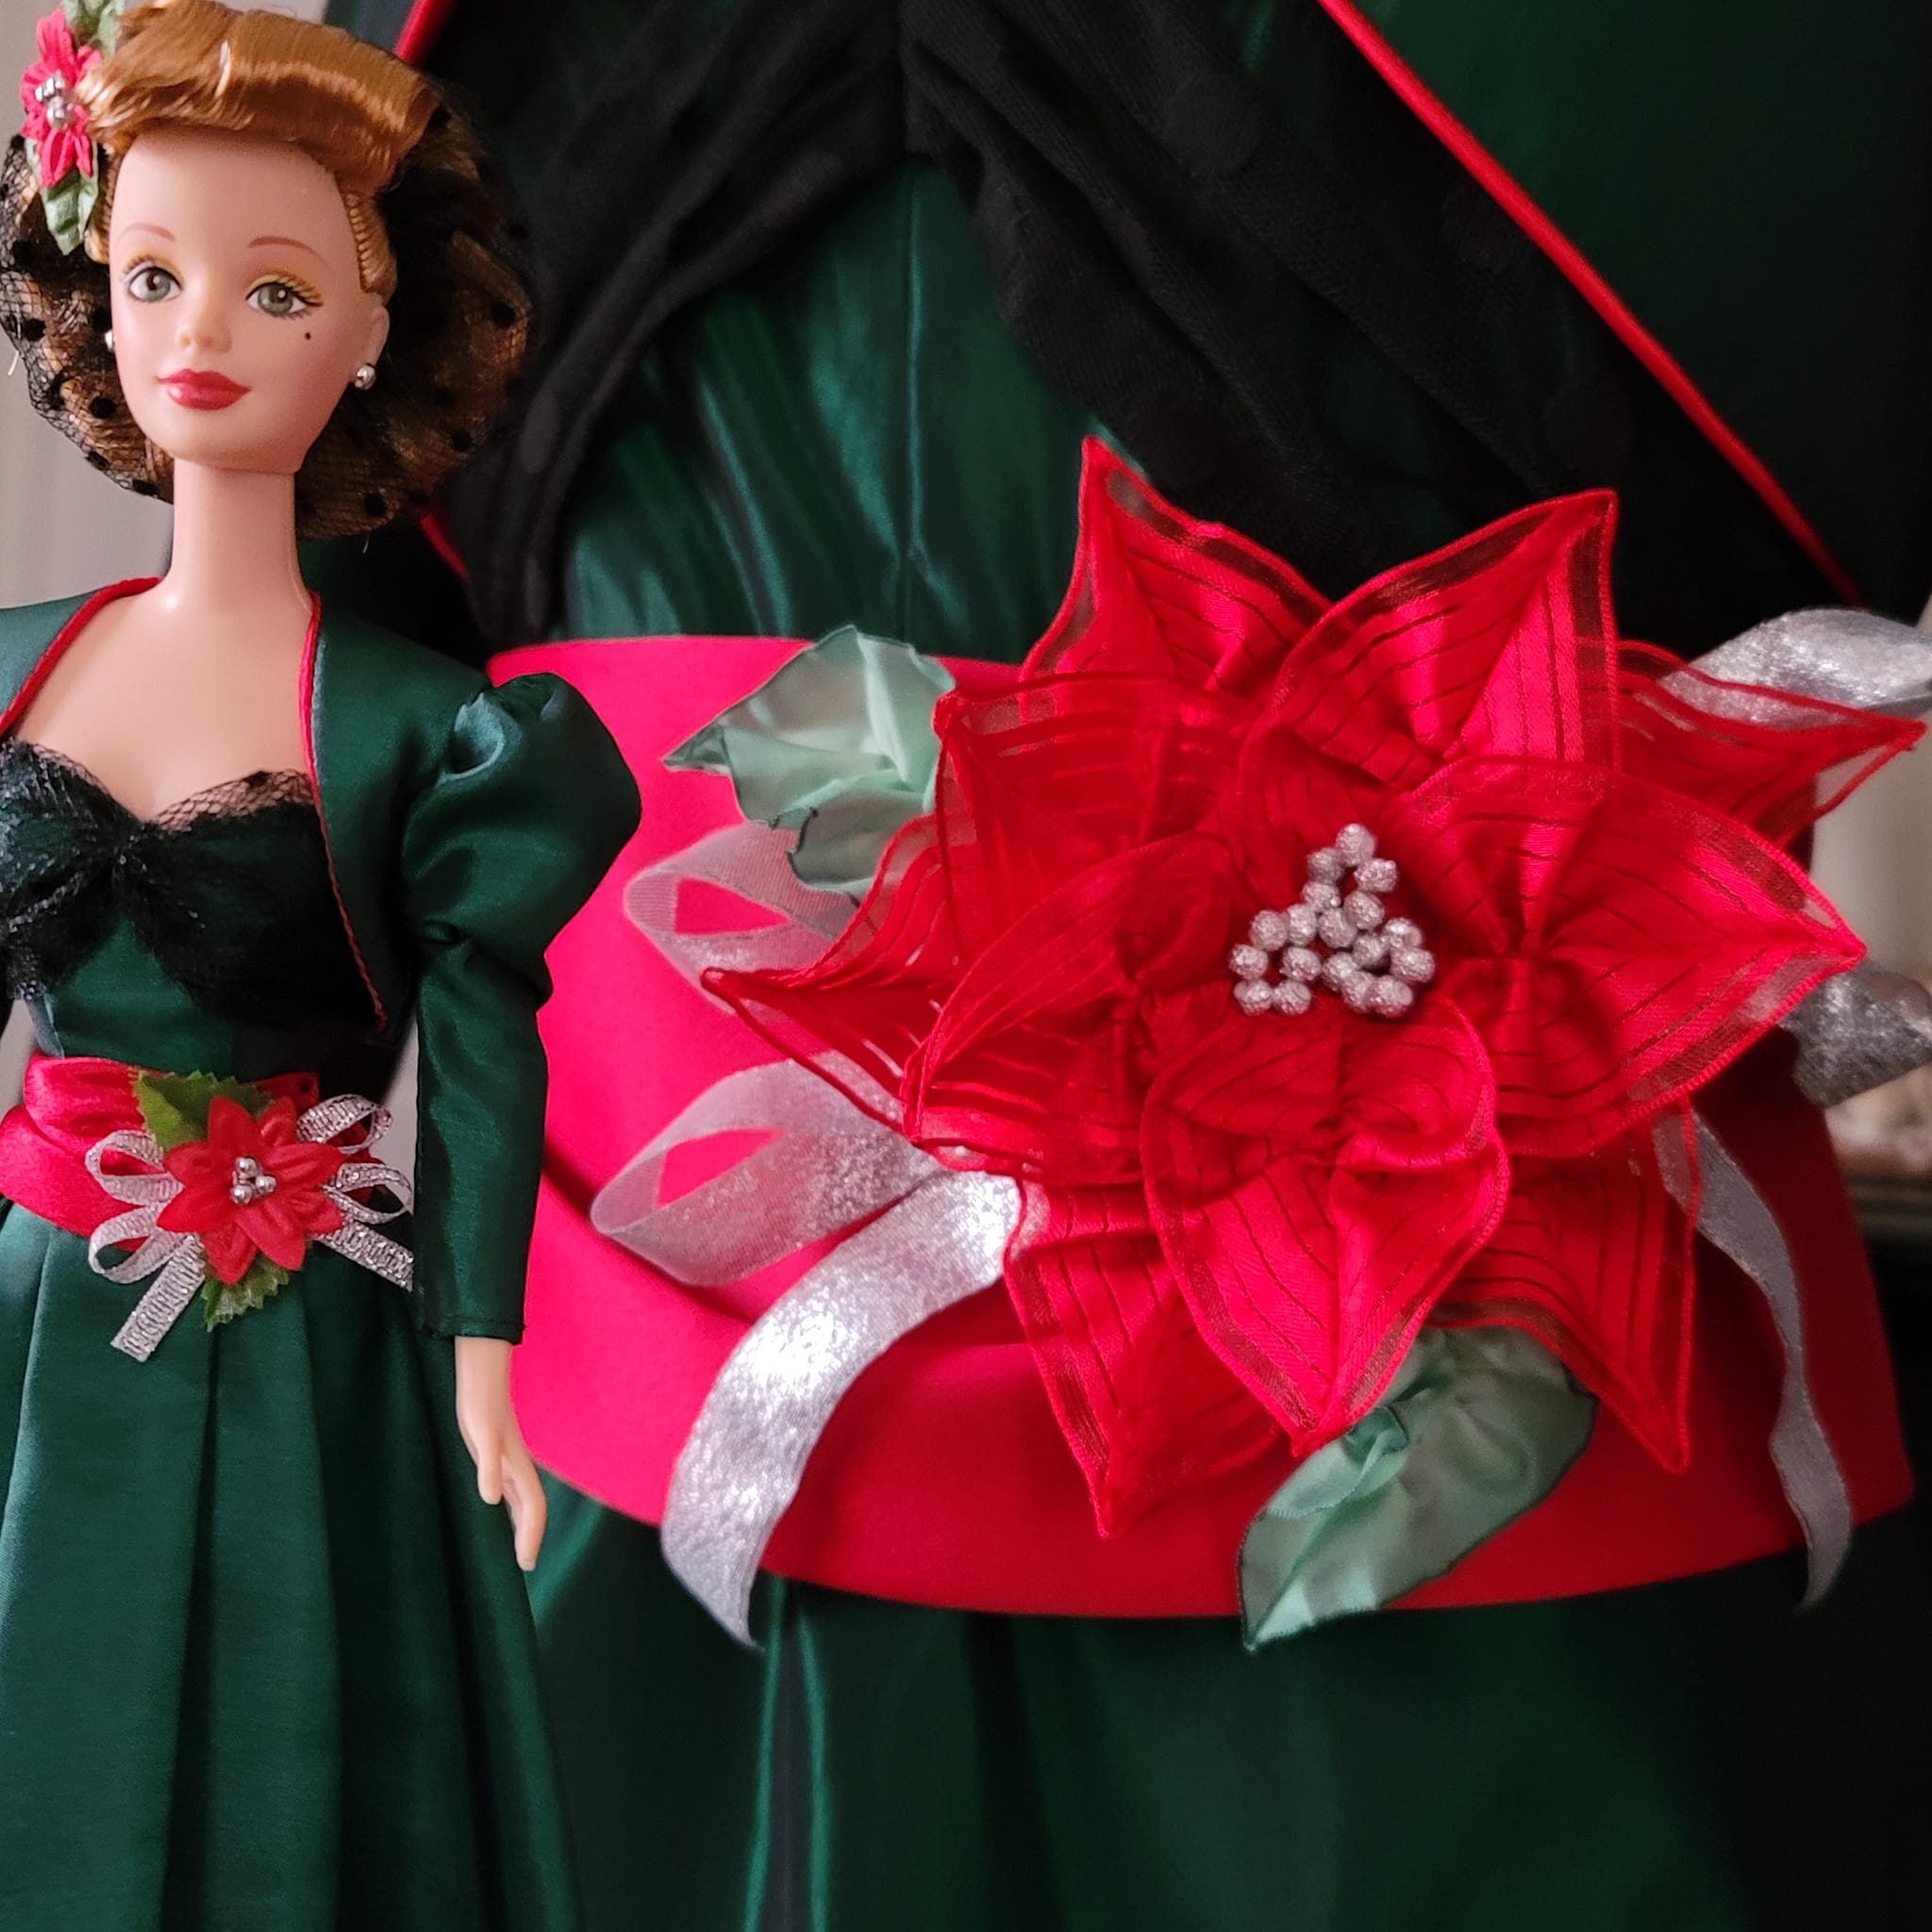
A Ribbon Poinsettia - Step by Step
The Poinsettia on Holiday Barbie's sash and cap are the perfect touch to this costume.


This seems like the right time to share with you a simple technique to create that flower and leaves. Like the Dogwood Blossom, the colorful leaves are called bracts and the actual flower is in the center. The ribbon Poinsettia is perfect to show that as all the red and green leaves are made exactly the same.

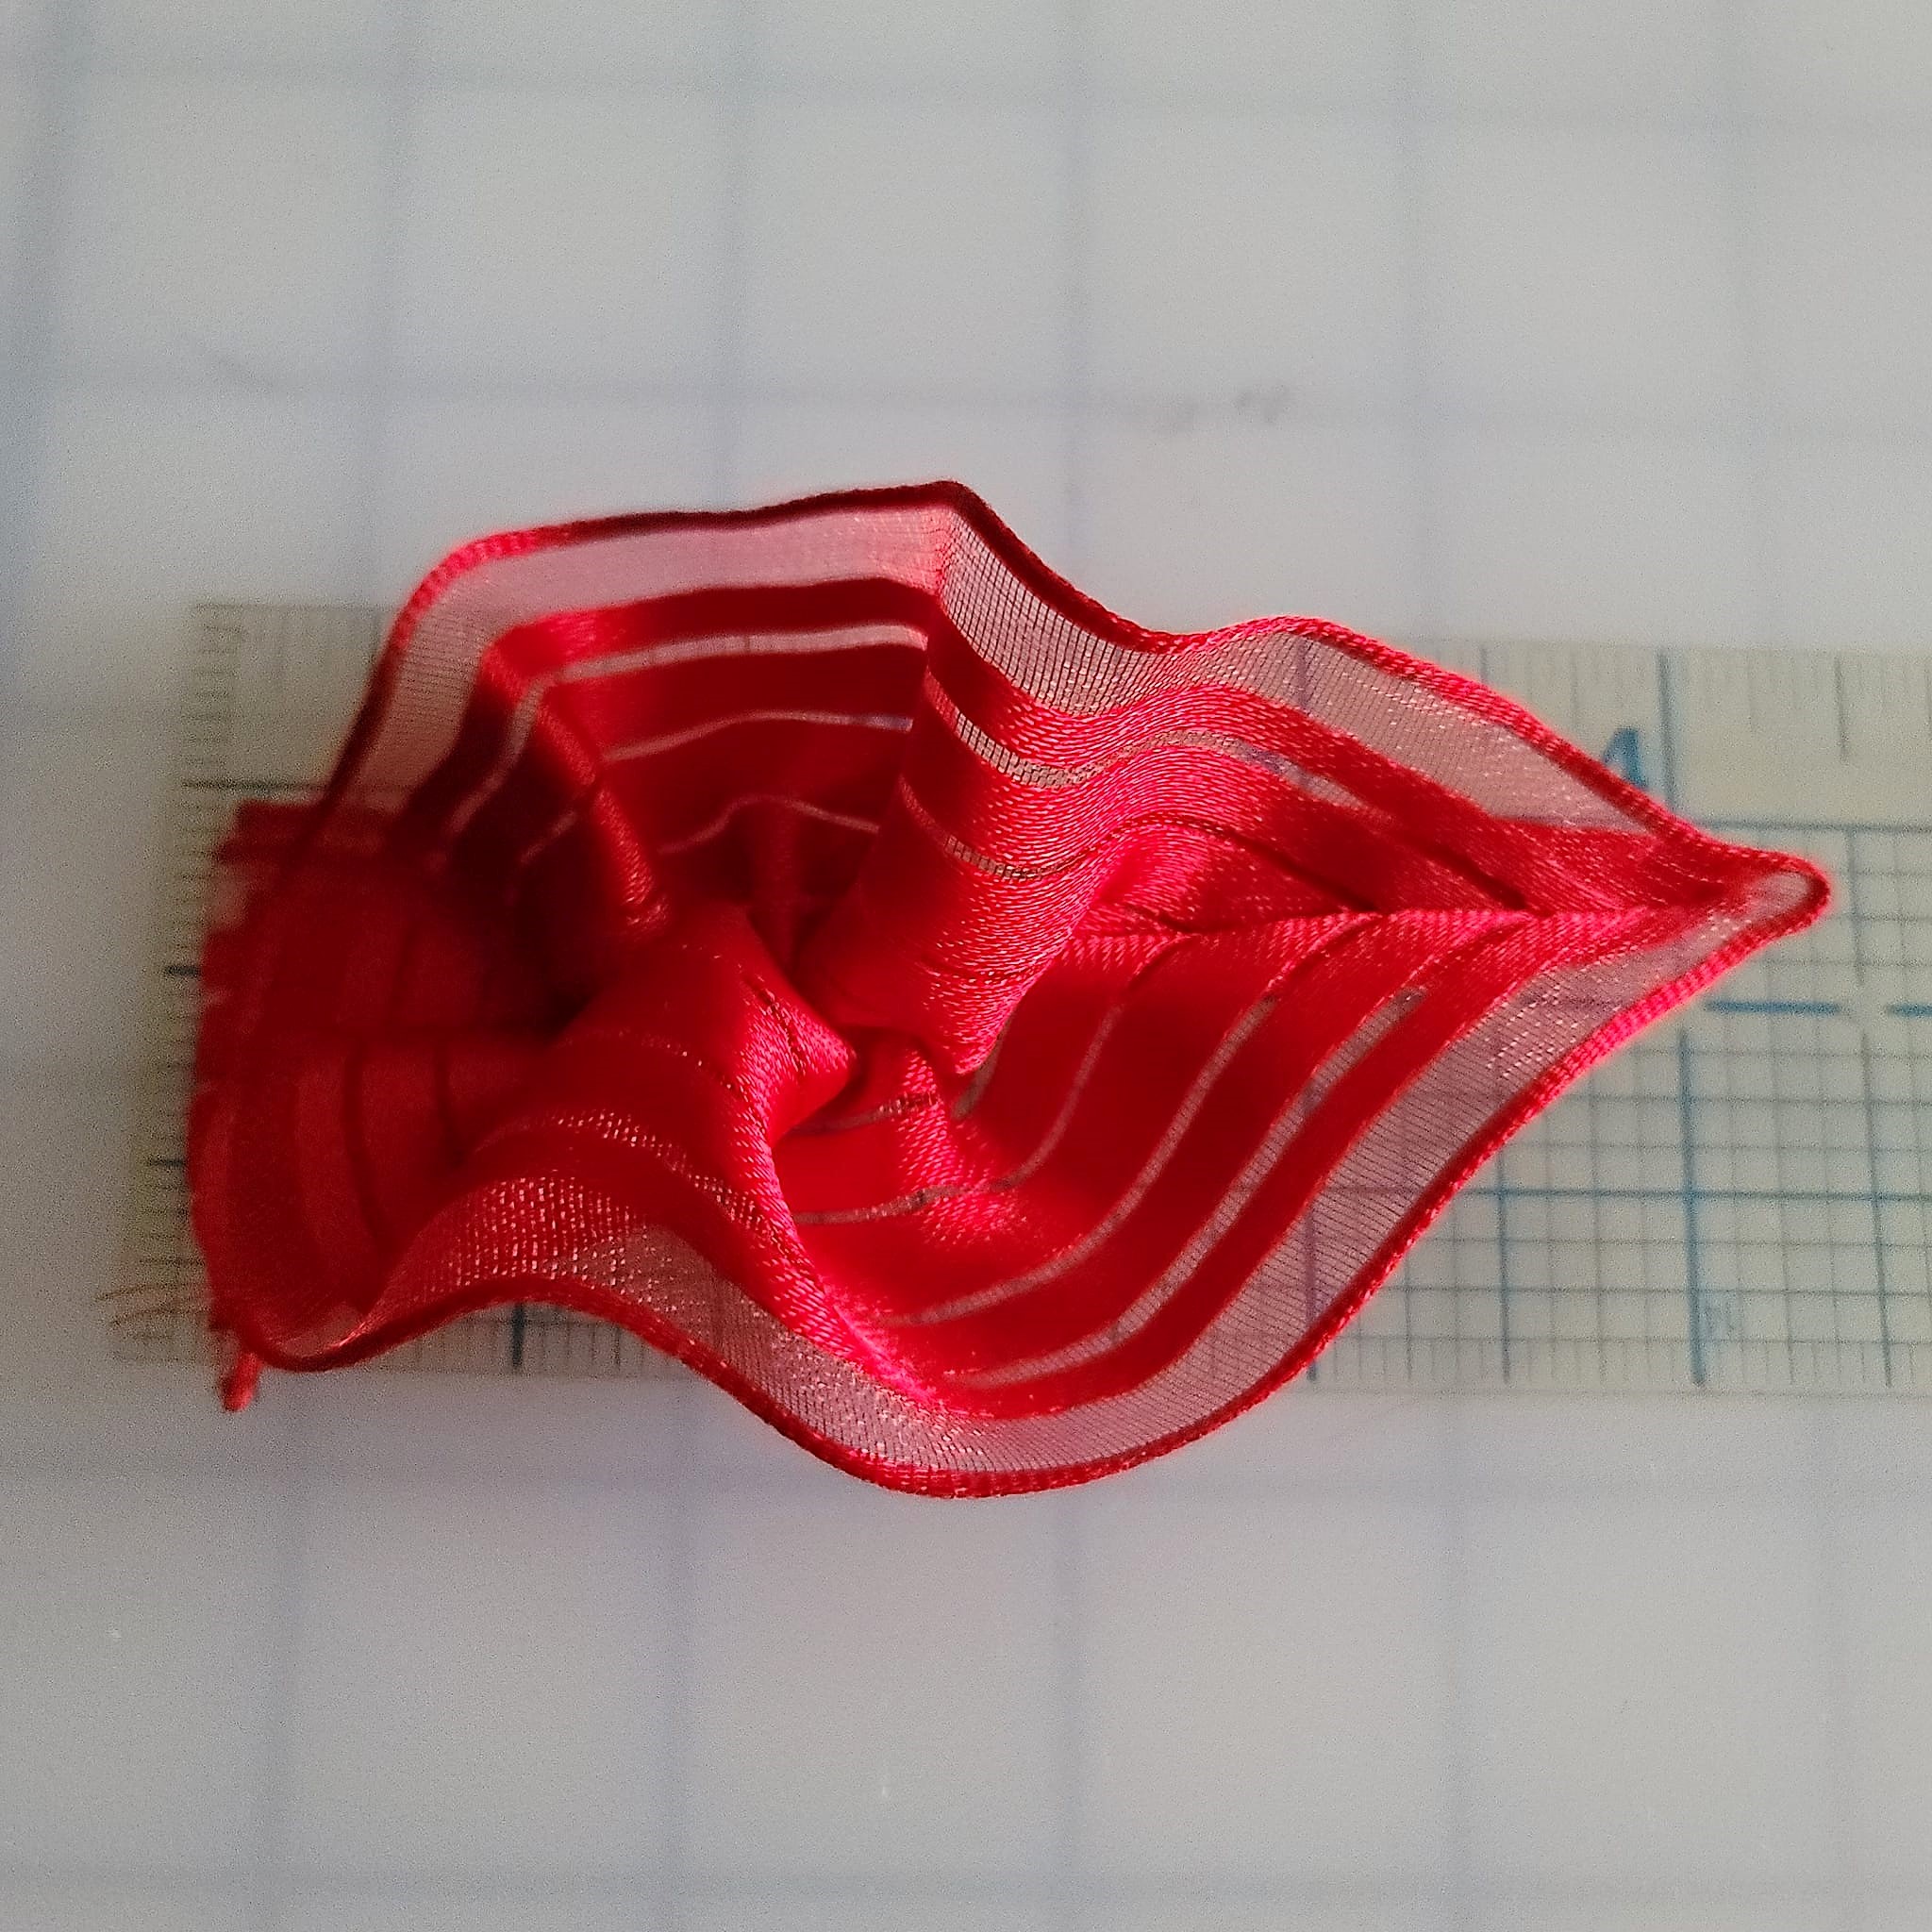
While I did find a silver metallic Offray ribbon for the sash Poinsettia and some silver beads for the centers, there was no wired red ribbon to be found. I did find in my stash a polyester striped wired ribbon in the 1-1/2" width I wanted and just accepted that the sewing universe wanted me to use that. A trial made a rather interesting leaf and I'm actually quite surprised and happy. I did have some nice 1-1/2" width wired ombre green ribbon for the green leaves and I'll begin the step-by-step with the green ribbon.


Step 2: If your ribbon is an ombre like this or has other distinguishing patterns, choose which edge will be the center of your leaf. That edge will become the top edge during sewing. Here I've chosen for my leaf to have a dark outer edge. The light edge will be the center of my leaf and it will be at the top. Remove the wire from the top edge.

Step 3: Fold the ribbon in half with the fold on the right.

Step 4: Fold each corner and pin through all four layers to secure.

Step 5: Using a coordinating thread, knot the thread end and begin to stitch at the lower right corner taking care to avoid the wired edge.


Step 6: Using a running stitch, sew through all four layers to the top of the corner.

Step 7: Sew a back stitch to anchor the thread. The remainder of the thread will be used to gather the center of the leaf but what you just sewed will be the outer point of the leaf and will not gather because of the back stitch.

Step 8: Sew a running stitch through the two layers across the top of the ribbon and through the four layers down the left side.

Step 9: Pull the thread to gather as desired. Different gathering will yield different lengths and effects on your leaf.


Step 10: When you have the gathered effect you desire, knot and cut the thread.
 a
aStep 11: The folded edge of the ungathered corner can be folded to the sewn edge and tacked down with a few stitches. This will prevent the edge from showing when your leaf is displayed.


Ta-da! A ribbon leaf!


Since the wire was left in what is now the outer edge, the leaf can be shaped for your unique flower.


The technique I just shared is the same technique I used for the red Poinsettia leaves. The green ribbon was a wired taffeta which is always a joy to work with but wired polyester ribbon can create beautiful flowers as well. It's been my choice for the classes I've taught and is an affordable way to learn and experiment. It can be used in costuming from head to toe! As ribbons were manufactured in France in the 11th century and by the 17th and 18th centuries they had become a regular part of the fashion industry, you can enjoy ribbon and ribbon flower embellishments in many vintage, historical and modern garments. I'll be adding some more ribbon flower tutorials to my blog and YouTube channel in the coming year. Any special flowers you want me to create? Let me know in the comments!


For the Holiday Barbie I used two different lengths of ribbon for the two layers of the Poinsettia. 13" of ribbon made a 4-1/2" leaf and a 10" ribbon made a shorter leaf for the inner layer of red leaves. I made five leaves of each size.


The poly ribbon needed some taming which worked with an iron at the correct temperature.


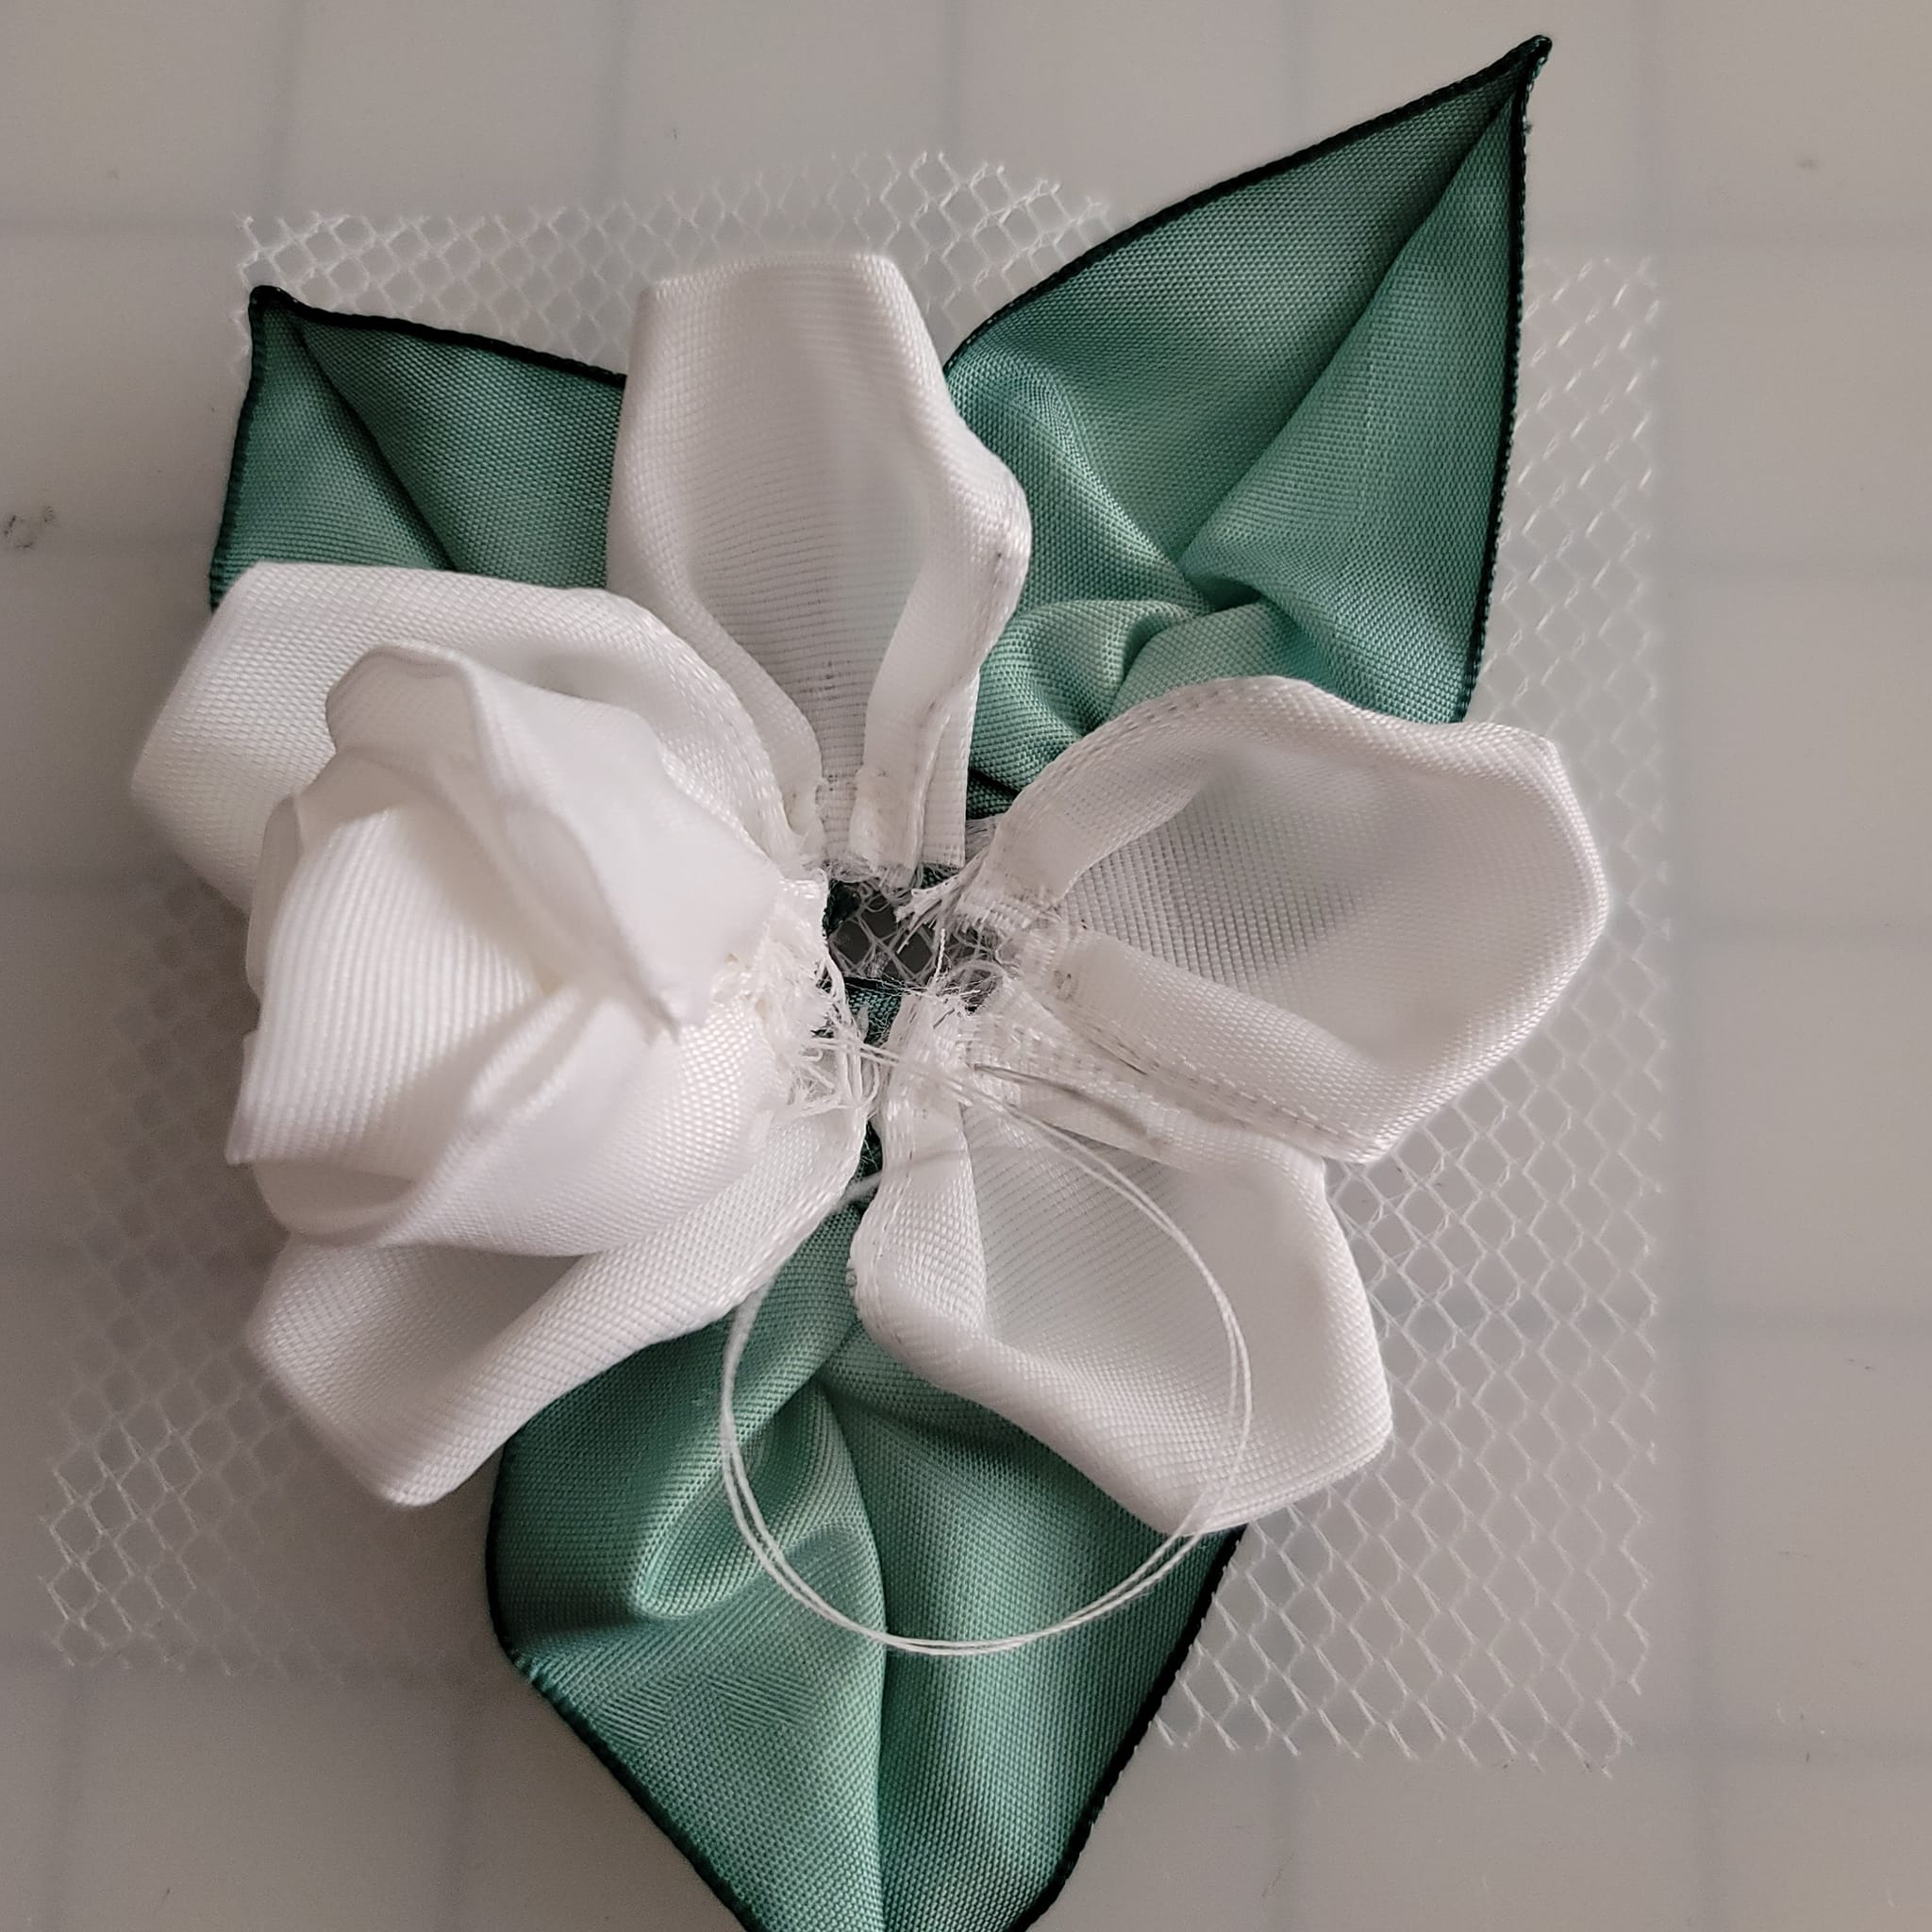
Everything is ready to create the sash Poinsettia embellishment. The silver metallic ribbon is arranged to mimic the belt embellishment on Holiday Barbie. Two green leaves are arranged. The red leaves are arranged and all the proportions adjusted. The layers are all sewn to a circle of buckram. The silver beads are threaded on some of the scrap wire from the ribbon and then tacked to the center.


The smaller Poinsettia for the hair cap is created and assembled in the same way with much shorter lengths of ribbon and fewer leaves and beads.


A Hair Cap and Snood
The 1940s snood that Holiday Barbie wears has the same dots as the overlay on her gown bodice. So I started with my dotted veiling and Vogue 6410 pattern available in pdf format on Etsy.


I printed and assembled the pattern and cut the pieces for my choice of View C with the small back bows.


I cut the cap from my dotted veiling and the brim from a black satin interlined with a woven iron-on interfacing. The bows are cut from the black satin.


Following the pattern closely I hand stitch all the pleats and darts, hand gather where necessary and sew the net cap to the brim.


The bows are sewn and stitched to the lower edge of the back.

The finished cap from the Vogue pattern:


Using the Vogue pattern brim and increasing the volume of the cap, I create another and am much more satisfied. And my red wig is a nice backdrop to the dotted veiling.

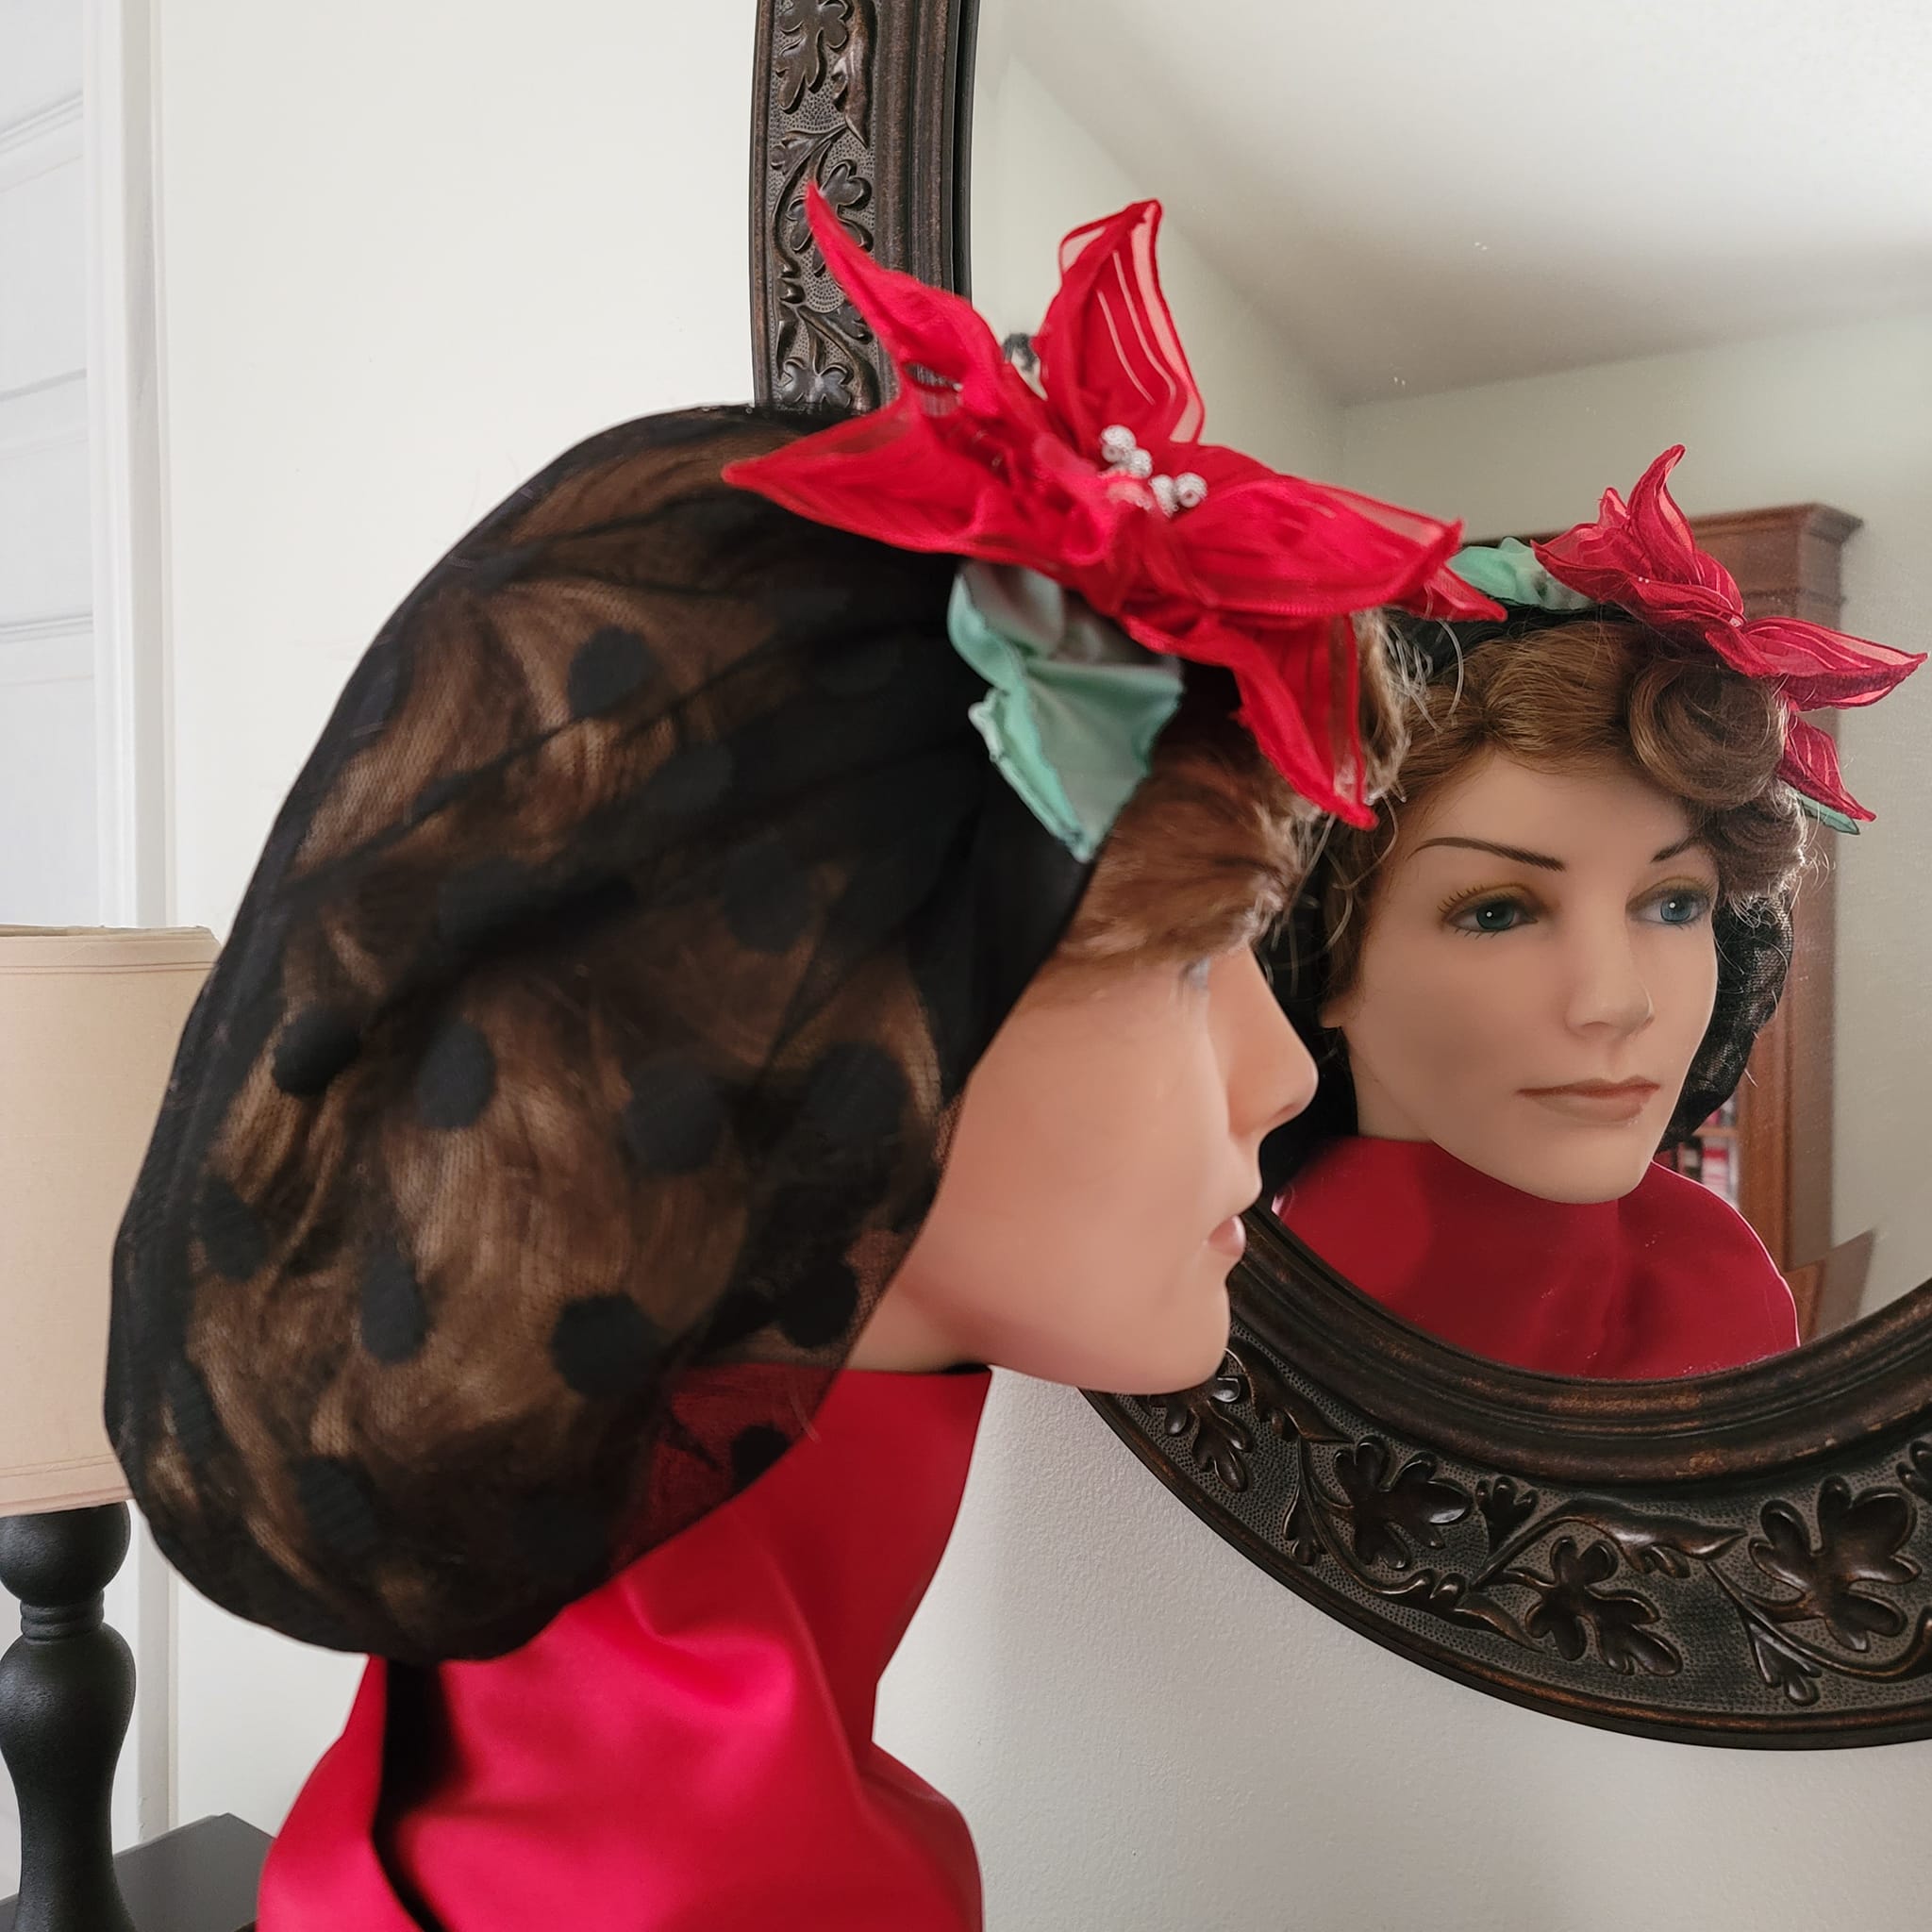


The ribbon Poinsettia is a bit larger than Holiday Barbie wears but as I was limited to available red ribbon, I'm calling this a win!

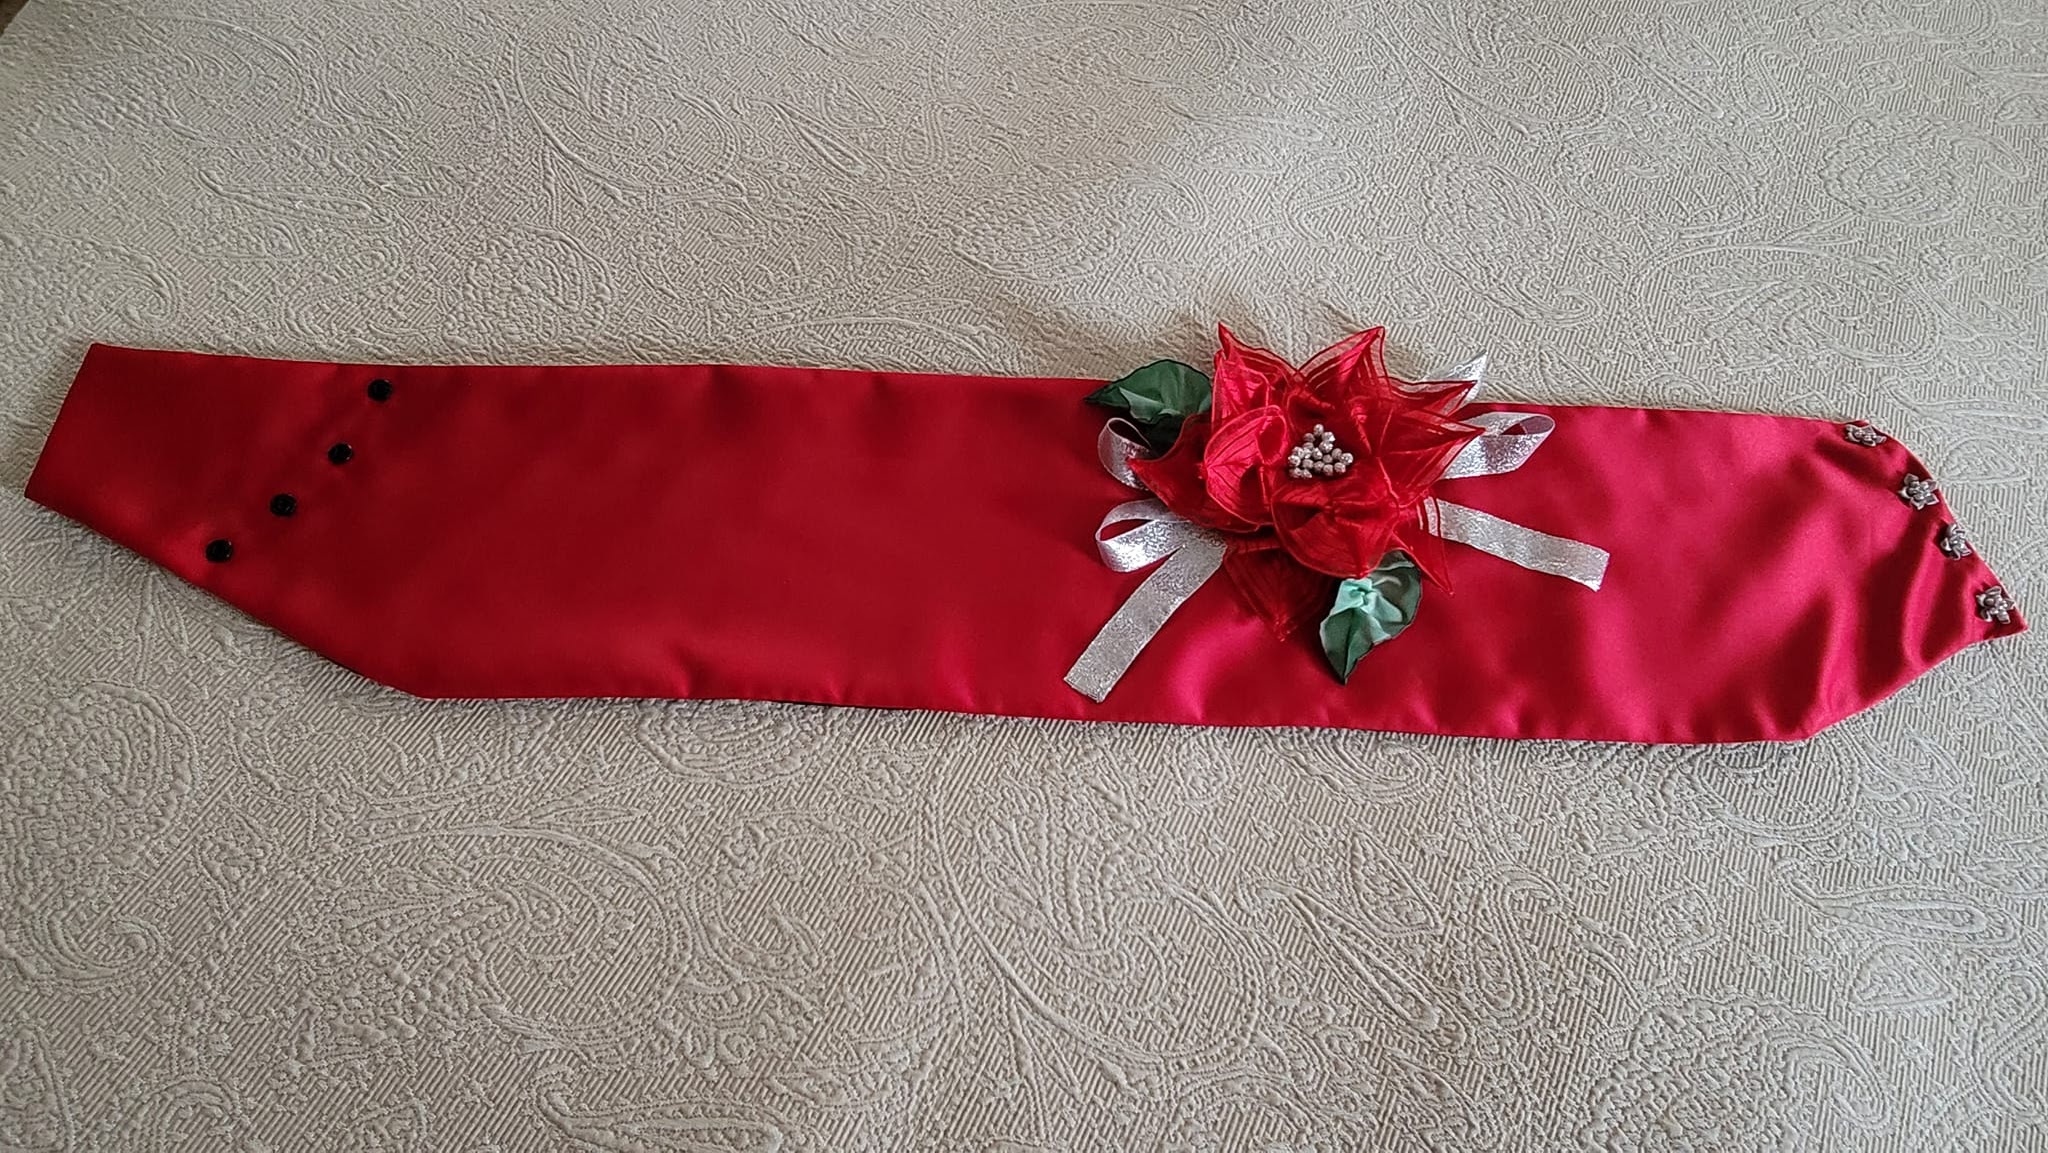
The Sash
The bit of red satin fabric remaining limited me to a single rectangular strip. Not on the bias or cut on a curve would mean some adjustments but I went ahead and cut the fabric and a black satin backing.

The red satin and black lining are sewn into a tube and draped on the gown to create the correct belt impression.


A few trims and tucks and snaps sewn is strategic places and silver ribbon flowers sewn over the snaps and the sash is finished.


The ribbon Poinsettia is sewn to the sash.

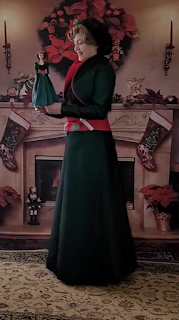
Holiday Barbie - Life-Sized!
Yay! That completes the Holiday Barbie life-sized recreation.


The Dotted Swiss Point d'Esprit Jacket
To extend the wearability of the gown, I made a second bolero jacket from the dotted veiling. The sleeves, back, and fronts are cut and pinned on the dressform to ensure I like this option.


I love it and proceed to sew everything together using French seams.


Small snaps are sewn at the sleeve wrist openings.
The Finished Black Bolero Jacket


A Billy Holiday Gardenia
The story goes that the great singer Billy Holiday was fixing her hair for a performance and her curling iron was a bit too hot and scorched her hair. A Gardenia garland covered the accident and Billy Holiday was from then on noted for the Gardenia in her hair.

So it seemed a natural transition for this gown from a Holiday Barbie to a Billy Holiday with a Gardenia replacing the Poinsettia. I have just enough white wired ribbon and while I won't show the full tutorial here, I will make one for a future sharing.

There are five inner petals created with one technique using ribbon without wires, and five outer petals created with a different technique using wired ribbon.


Leaves are made as I've already shown and then arranged and pinned to the tulle.


The outer petals are arranged and pinned to the tulle and then stitched through the leaves and tulle at the innermost edge.

The center petals are sewn in a semi-circle and then folded on each other and stitched.

The assembled center petals are stitched into the center of the outer petals.
Ta-da! A Billy Holiday Gardenia for the all-season version of the Holiday Barbie gown.


The Finished Gardenia Gown and Snood


Mrs. Knox's Holiday Dainties
I love having a treat to celebrate completing a project! So before I share photos/video of wearing the Holiday Gowns, it's time to whip up a sweet something perfect for the 1930s.

Since I began this blog and video with a story about Ruth Handler, an influential businesswoman in the Mattel Corporation, it only seems right I should share another story of another amazing businesswoman.
In 1890 Rose Knox started the Knox Gelatine Company with her husband, Charles, in Johnstown, New York. Charles died unexpectedly in 1908 and Rose took over as President and CEO. She changed the marketing plan for Knox Gelatin (now with a revised spelling) emphasizing the product's low cost and high nutritional value of almost 100 percent protein.


Rose was an exceptional champion for her employees. In 1913 she instituted the five-day work week, two weeks of paid vacation for all staff members, and sick leave - all unheard of benefits at the time.
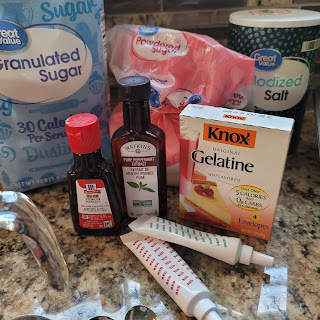
To expand her market, Rose created recipes using her ingredients and promoted those recipes in newspapers, recipe books, and in pamphlets given away in grocery stores. In this recipe book available for you to view on archive.org is a recipe in the Candies Section for French Dainties. A very simple and very delicious square of sugared and flavored gelatin candy.

This link will take you to Rose's history and a link to the Dainty Desserts for Dainty People book.
https://americacomesalive.com/rose-knox-foremost-woman-industrialist-of-her-day/
The treat to celebrate the completion of the vintage Holiday Barbie will be Mrs. Knox's Holiday Dainties which would have been popular as an inexpensive and nutritious treat during the 1930s.

Ingredients:
4 envelopes Knox Gelatine (Gelatin)
1 cup cold water
4 cups sugar
1/4 teaspoonful salt
1-1/2 cups boiling water
1/2 teaspoon peppermint extract
1 teaspoonful cinnamon extract
Red and green coloring (liquid or paste)


In place of cinnamon extract I used the lemon flavor substitute which was 3 tablespoons lemon juice and 2 teaspoonfuls lemon extract to one part of candy. This could have been left uncolored.

Water is brought to a boil, measured into 1-1/2 cups, and then the sugar and salt added and brought back to a boil.

The gelatine is softened in 1 cup of cold water.

The softened gelatin and water are added to the hot syrup, stirred until dissolved, and boiled SLOWLY for 15 minutes.


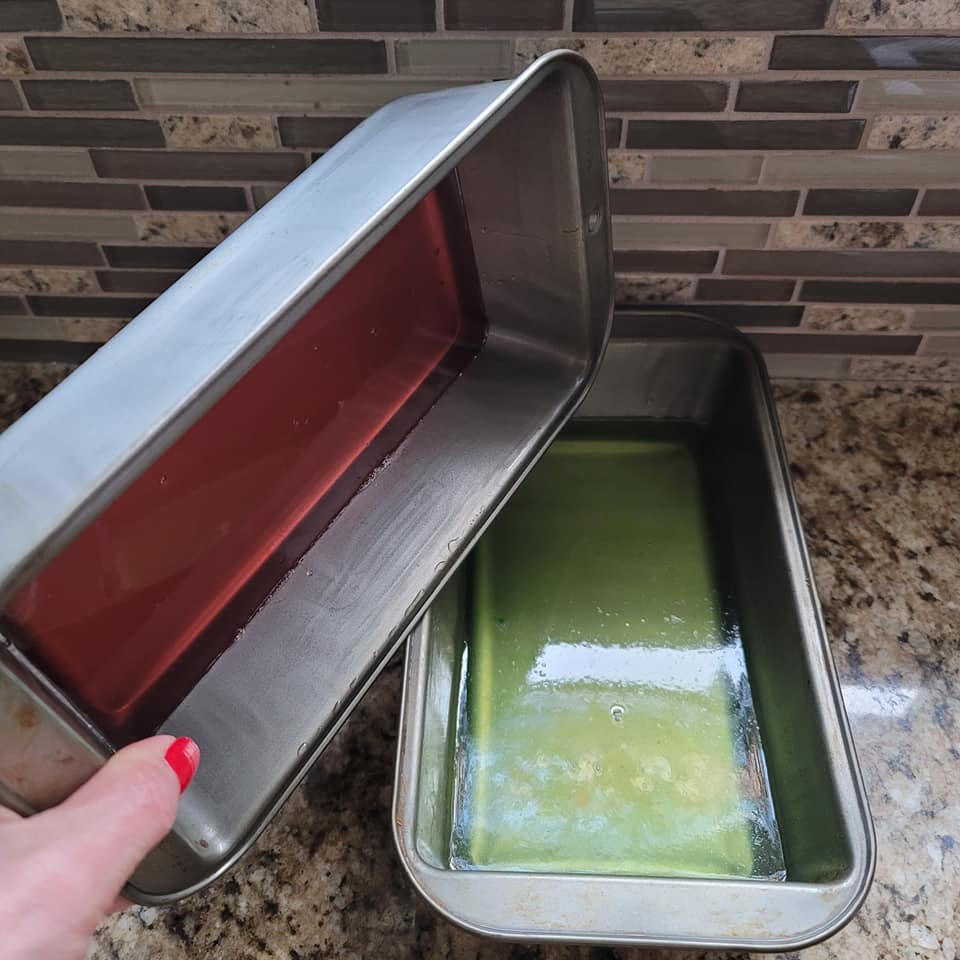
The finished liquid was divided into 2 equal parts.


One part was colored delicate red and flavored with 1/2 teasponful peppermint extract.

The other part was colored delicate green and flavored with the lemon juice and lemon extract.


I used 2 loaf pans which were chilled with cold water and the candy mixture poured. This is kept in a cool place (not the refrigerator) for at least 12 hours to thicken.


Once the candy loaf is set, a wet knife is used to loosen around the edges of the pan and the candy loaf is turned out on a board lightly covered with powdered sugar. The loaf is cut into cubes.


The cubes are rolled in powdered sugar (or fine granulated sugar may be used) and set aside to allow the sugar to crystalize.


It's magic! They're beautiful and heavenly! They just melt in your mouth! Let's treat ourselves!


So with a bowl full of Mrs. Knox's Holiday Dainties, it's time to bring out all the perfect 1930s touches and take some photographs and video of the Holidays (both Barbie and Billy) just for you.
Happy Holidays! Both Barbie and Billy!!


Love,
Jeanette
Historical Sew Monthly - 2022
The Challenge: October: A Perfect 10: It’s the HSM’s 10th anniversary, so make something 10 themed. 10th century, the something-10s, something that incorporates 10 of something? Be creative with it!
What the item is and how it fits the Challenge: 2022 will be the third year I have recreated a Holiday Barbie. As part of the 1930s wardrobe I've been making I chose a 1930s gown that would be embellished with a poinsettia created from ribbon. Ribbons were manufactured in France as early as the 11th century. Ribbons with finished edges as we have today came into being around 1500. Ribbons were so popular that the 16th century English Parliament tried to enact laws limiting the wearing of ribbons only to nobility. Ribbon adornment reached a high art in the form of dress adornment in the 17th and especially the 18th centuries. Fashioning flowers from ribbons is a wonderful art and for this 1930s dress I created the poinsettia with 10 leaves. (You knew I would get around to 10 sooner or later, didn't you?)
Material: Poly ribbon, taffeta ribbon, beads
Pattern: The gown uses Simplicity 1930s Retro 4270
Year: 1930s
Notions: Buckram backing for the poinsettia
How historically accurate is it? Creating floral and medallions such as cockades from ribbon has a long history.
Hours to complete: 4 hours for the poinsettia
First worn: Not yet.
Total cost: This poinsettia with leaves and silver ribbon and beads cost $7.


Absolutely beautiful!
ReplyDeleteThank you!! ❤️
Delete