.jpg)

It's December! A favorite time of year for creating treats to share with family, friends, and neighbors. Some years it's been warm bread wrapped in festive tea towels, other years it's my husband's pecan tea cakes dusted with powdered sugar. This year I'm trying something new and I'll share that with you later as it's easy and you can make some too.
The wreaths are placed at the driveway gate, the mantle decorated with greenery and candles, and now it's time for one more important preparation - a new holiday apron.


The pattern is Simplicity 8152A 1970s Vintage. It has 4 options and I'm choosing View B, a very classic tie apron.

I wanted a fabric that would be special for the holidays and also be useful throughout the winter season. The Cardinal is our state bird and plentiful in my yard and when I saw this cotton fabric called Cardinals on White Ice with Silver Metallic from the Joyful Traditions Collection by Hoffman I knew immediately it was the right fabric.

I ordered enough fabric for the apron and my next project, a holiday Gunne Sax jacket, and knew that both projects would need a bias edge. I searched for something with red and black and happened upon a Buffalo Plaid bias cut ribbon that immediately felt right. But I kept searching and always went back to that wonderful red and black Buffalo Plaid. To keep the cost in check I purchased yardage to make my own bias and with these two fabrics my search was over.


There are only four pieces to this apron: front, back, ties, and pockets.

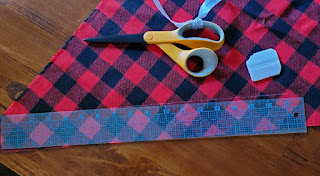
I cut bias strips from the plaid fabric using a clear 2" wide ruler and chalk. I cut enough for both projects while I was in the mood.

The apron front is cut from the cotton taking care to position the cardinals so as to showcase them on the apron front.

The apron back and ties are cut from the plaid. There is a smooth side and a softer side to the fabric and I chose the softer side for a more vintage look.


I was careful with the yardage I purchased to have enough for both projects but the cardinal fabric also requires some positioning of the cardinals on the jacket. So I've cut the jacket front, sides, and back to get the effect I want which hasn't left much fabric for pockets. I don't want to just slap a pocket over a pretty cardinal so I decide to use one pocket positioned as an exact overlay on the apron lower corner.


All the parts are now cut and pressed including the bias strips.


The apron back and front are sewn together at the shoulder seams.

Now the entire back and top front of the apron can be trimmed with the bias. The 2" wide bias strip is first attached to the apron with the right side of the bias strip placed against the wrong side of the apron. I've sewn a 3/8" seam.

Then I turn the bias strip right side out and press. I also turn the free edge in 1/2" and press. The strip is turned to the right side of the fabric with the folded edge placed to cover the seam and stitching of the seam I've just sewn.

The bias is pinned in place and sewn close to the edge. I've used a zipper foot to keep the stitching even along the edge.


The bias is applied to the side edges, and back and neck openings.


The ties are sewn right sides together, turned right sides out, and pressed.


The back of the apron has to have loops created for the ties to pass through. I hang the apron on my dressform to make sure the pattern instructions will create the right fit for me.


The apron back has two tabs which are folded to the wrong side along the fold line indicated on the pattern. The end is turned under 3/8" and sewn across the fold through all layers. The opening created is just wide enough for the ties.

The ties are positioned to the sides of the apron and basted in place.

A bias strip is applied to the lower portion of the apron following the same steps as the upper portion but turning in a portion at the beginning and end for a clean finish.

The lower bias strip is finished, the ties threaded through the loops, one last pressing, and the 1970s vintage holiday apron is complete!


With a new apron it's time to make some treats! This year I'm making white chocolate bark with a variety of sprinkles.

White chocolate confectionery wafers for melting.

A fun variety of sprinkles!


With a cookie sheet lined with parchment paper, a variety of cookie cutters, and a spatula and microwave safe bowl, we are ready to make treats. Oh, and a new apron!


Microwave your chocolate per the package instructions. Pour it on the parchment and level with spatula. Tap cookie sheet on counter to smooth and release air bubbles. Press cookie cutter into the chocolate completely through the chocolate. Sprinkle on the sprinkles. Place in refrigerator for 10 minutes. Break excess away from cookie cutters and press bark through bottom of cookie cutter. Remelt excess chocolate and repeat.


Enjoy with your family! Package some for neighbors! And don't forget to have some yourself because you deserve it!!


I hope your Holiday Season is full of sweet treats and love!


In the yard today:


Holiday stockings!

Companion YouTube Video: https://youtu.be/GWvgXduJUNQ


What a charming apron and the cookies look delicious!
ReplyDeleteThank you! Chocolate is always special!!
Delete