You have seen me participate in many collaborations with other costumers. Sometimes in real life. Sometimes in virtual life. And they are always wonderful experiences for me and, I'm told often, fun for the readers of my blog and viewers of my videos alike.
So when Juul proposed a collaboration where we could share our favorite recipes and she would gather those recipes into a downloadable booklet for our readers/viewers I happily joined!
Juul's YouTube Channel: https://www.youtube.com/c/JuulThijssen
The Costube Cooks Recipe Booklet in Google Drive: https://drive.google.com/file/d/16hYTLbeiFl7YJTjl-rnBTksL4ej75ra7/view
Also on Juul's Ko-fi Page: https://ko-fi.com/s/3a17f6bbc5
Playlist of YouTube Channels as their videos upload: https://www.youtube.com/watch?v=Rdc49S7dac4&list=PLIXZOOWe46njgJPru5_Mbq8fp-fTdirkD
Special thank you to Juul for coordinating our collab, gathering our recipes, creating the wonderful booklet, and for all her beautiful artwork! It's so amazing and fun!
In fact it looked like so much fun that Patrick decided he wanted to join me as we both spend time in the kitchen and have our own favorite recipes. We agreed to the recipes we would use and I set out to sew us aprons for our first joint video project.
I say video project because we've shared a blogging project back in 2014 and 2015 and created recipes from 1950 and 1951. We had so much fun with that and included bits of history of our families which gave us a wonderful book to give to family members.
Supplies
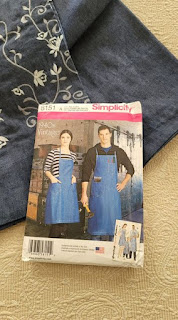
Simplicity 8151 is a reprint of a 1940s Vintage Simplicity Apron with patterns for boys', girls', misses' and men's aprons. The pattern envelope had an image of blue aprons in the 1940 edition and denim in the reprint.
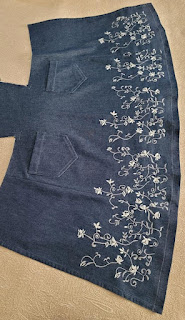
This was a perfect use for a single denim curtain panel with a beautiful embroidery for one apron, and the plain fabric for another. I chose the floral because, you know, I love flowers!
While the fabric was an easy choice, the thread was a bit more difficult. I pulled out a number of choices and compared the colors to jean leggings I have, jeans that Patrick has, what looked best with the embroidery, and what most stood out on the plain fabric.
The curtain panel has most seams unpicked and the panel is washed and ironed.
Jeanette's Apron
With a pattern, fabric, and thread choices made and the fabric prepared, it's time to sew my apron. The apron consists of a bibbed front cut on the fold, two sides, a waistband, ties, and pockets.
Although I was able to use the panel side seams for the apron side pieces, the fabric wasn't wide enough to accommodate the fullness of the side pieces. So I just used the fabric as best as I could.
The upper edge of the pocket is prepped and sewn, the edges turned in and pressed, and then sewn to the apron front. I've used a pale blue thread matching some of the thread in the embroidery.
The side pieces are sewn to the apron front. Since the sides are already hemmed from the curtain panel, all that remains to be hemmed is the lower edge. This is all done by machine.
The two ties and single neckband are prepped and sewn according to the directions.
Two rows of gathering stitches are machine sewn at the apron waist and gathered to fit the opening in the waist tie. Everything is pinned in place and sewn.
The tie opening is then folded over the gathers and topstitched near the edge the entire length of the tie.
The upper edge of the bib is hemmed. Then the bib sides are hemmed.

Bread Baking Day Arrives!
The neckband is adjusted as necessary and sewn in place. And the apron is finished! Yes, the dressform is still wearing the Victorian velvet jacket and walking skirt just finished. So 1890s, meet 1940s!

Patrick's Apron
There is a single main pattern piece cut on the fold. There are two ties and two separate and different pockets.
Fabric is cut.
There are two darts sewn on each side at the waist. A patch of fusible interfacing is applied in the area where a buttonhole will later be sewn.
The pockets and ties are prepped according to the directions.
The pockets are sewn in place using a gold thread which shows up well against the blue denim and has the impression of blue jeans. A stay stitch is sewn at the curve which will be removed after hemming.
The buttonholes are sewn, the apron hemmed on all edges, and the ties sewn.
The ties are sewn to the upper edge of the bib. The buttonholes are opened. The ties will cross at the back, pass through the buttonhole, and then tie together.
The apron is finished! Again, 1890s meets 1940s!
The Recipes
We are sharing one of our favorite and very easy recipes which we find makes any meal extra special - Homemade Peasant Bread with Honey Butter. We've made these recipes many times and while the eating is wonderful, the time from mixing the bread until it rises and bakes is full of anticipation and a houseful of fantastic aromas. It is a full morning or afternoon from start to finish which is a perfect time to spend with friends and family waiting to share warm bread with melting sweet butter. This is the page we gave to Juul for the Costube Cooks Booklet. The best part? The bread is made and baked with a single bowl!
Before the baking begins the birds are fed. Black oil sunflower seeds are a favorite for every bird at our tiny farmhouse (and every squirrel) and they apparently send out a message as soon as the feeders are filled.
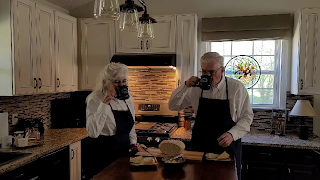
We don our new aprons and are ready to bake.
Ingredients:
- 4 cups unbleached all-purpose or bread flour
- 2 teaspoons Kosher salt
- 2 teaspoons sugar
- 2 teaspoons instant yeast
- 2 cups lukewarm water (1-1/2 cup cold water plus 1/2 cup boiling water)
Patrick uses a 2 quart or 2 litre Pyrex or oven-proof bowl. The bread will be mixed and baked in the same bowl. Patrick likes to begin by buttering the sides and bottom of the bowl.
Yeast Options
1. Instant Yeast - Whisk together flour, salt, sugar, and Instant Yeast in the bowl.
2. Active Dry Yeast - Prepare lukewarm water. Add 2 teaspoons sugar and stir to dissolve sugar.
Sprinkle 2 teaspoons of Active Dry Yeast over top of water.
The yeast granules will begin to fall through the water and begin their reaction with the sugar.
The yeast will begin to bubble on the surface indicating that it is ready to use. This can take between 10 to 15 minutes.
Measure 4 cups of flour into the bowl and add 2 teaspoons of Kosher salt.
Whichever yeast you are using, at this point the directions are the same. You will want to remove your rings as this can get messy. Fun! But messy!
Add the liquid to the dry ingredients in the bowl and mix with a spoon just to combine.
Finish mixing by hand until you have combined all dry ingredients and have a sticky dough.
Cover the bowl with a towel and place in a warm spot to rise for 1-1/2 to 2 hours. The weather and house were cool so Patrick heated the oven to 200 degrees, turned the oven off, then placed the bowl on the range over the oven vent.
After the first rise the dough is punched down using two forks. Pull the dough from the sides and bottom of the bowl and punch down the center to remove air from the dough. This takes just a few minutes. Recover the bowl with the towel, return to the warm spot, and let rise another 30 minutes.
Just enough time for a cup of tea and then preheat the oven to 425 degrees.
Uncover the dough and place in the center of the preheated oven.
After baking for 15 minutes, reduce the oven temperature to 375 degrees and bake for 15 to 17 minutes longer.
The aroma is heavenly! And our bread is baked to a golden brown! Time to let it cool a bit.
Honey Butter
Ingredients:
- 8 ounces unsalted butter - softened
- 1/4 cup honey (4 tablespoons)
- 2 tablespoons powdered sugar
- 1/4 teaspoon sea salt
I'll divide the recipe in half for the two of us.
The bread has cooled on the rack just until the bowl is cool enough to touch. Then Patrick slips a butter knife between the bread the the side of the bowl to make sure the bread is loose and then flips it onto the cooling rack.
We're ready for freshly baked Peasant Bread with Honey Butter and just a few dirty dishes.
Wish you were here!
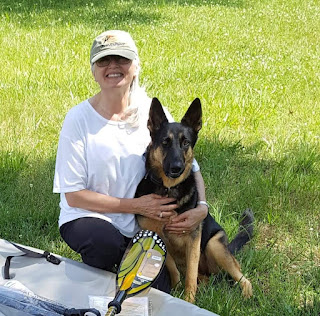
If you've read any of my other blog posts or seen other videos, you might have met Tasha. Named after Tasha Yar the Security Officer on Star Trek - The Next Generation. Actually this is Tasha the Second. On the day we took these photos Patrick and I are celebrating our 30th wedding anniversary. We were married on February 29, 1992. Within a few years a German Shepherd Dog joined our family. We named her Tasha. She passed and when we brought another German Shepherd Dog into our family we gave her the same name. These 30 years have been quite a ride!
 |
| February 29, 1992 |
 |
| The last day of the 20th century. |
.jpg)


