.jpg)

Do you often feel as if you and your most used sewing tools play a never-ending game of Hide-n-Seek?

Do you see it hiding? That bright pink and always playful little seam ripper!

Until now!! Because Miss Violet Needleturn reimagined and redesigned the ever practical, usually thought of as 18th century, tie-around-your-waist pocket. She has created............drumroll, please.........The Fantastical Utility Pocket! I knew the minute I saw her creation it was perfect for my always playful and always hiding sewing tools.
The pattern is available at her website and I'll share a link for you:
https://www.missvioletneedleturn.com/product-page/the-fantastical-utility-pocket-pdf-pattern-download


Although I didn't have enough fabric to sew a waistband, I did have some wider bias tape from a previous project and ironed the folds out of the tape and fused a width of interfacing along the entire length of the waistband.

The instructions contain full color photos with lots of detailed instructions and the pattern is simple to cut with only minimal taping.

Supplies are listed and easy to locate at most craft or fabric stores.

It is an excellent way to use larger bits of leftover fabric to to piece smaller scraps. I had these Neon Hearts and Roses fabrics left from a mock-up I made in 2019 and they will be perfect and fun for this project.

My fabric is cotton and I use a midweight fusible interfacing for each of the four sections.
There are four main sections: back, back compartment, front compartment, and front.


Interfacing fused with iron and press cloth...

...for all four sections according to the instructions.

The top edges of all sections except the back are sewn.

Then they are pressed, clipped where necessary, turned, and pressed again.

A mark is made on the front compartment according to the instructions. This can be adjusted for your personal preference. Then the front compartment is stitched at that line to the inner layer of the front.


A diagonal line is marked on the back compartment and stitched to one layer of the back.


Having found all those mischievous sewing tools and determining where you want them placed in your handy new pocket, it is time to lay out the elastic and stitch.


Another seam line attaches back compartment to back. There is an option for a horizontal seam near the lower edge to keep your shorter tools from getting lost in the bottom of the pocket. But you can make any adjustments to your compartments and I chose to leave the lower seam off my pocket.


Now there is a front section with compartment, and a back section with compartment.

Before we put all the sections together there is a place for a pincushion holder. The base stabilizer is cut from paper and the base fabric sewn at the back to enclose the paper. It is then placed on the pocket and stitched down at the edges placing the magnet inside before the last edge is stitched down.


Now the pieces can be stacked beginning with the back layer wrong side up, the back with back compartment attached, then the front with front compartment attached. The edges are sewn together all the way around, and the edges and elastic trimmed where necessary.


I was in the middle of my Historical Disney Costume project and had just finished some particularly difficult hand sewing. This pocket project was perfect to give my hands a break and so I chose to machine sew all of the bias edge trim. Laying the shorter edge of the bias tape on the front meant that the longer edge would be at the back insuring that I would catch both edges when machine stitching from the front with a zipper foot.


The waistband is sewn to the top edge of the pocket.

The seam allowances are folded in at each end and then the ends are each sewn closed. The corner is clipped to reduce bulk, and the end turned with my handy stick creating a nice sharp corner.


The seam allowance is turned in along both edges of the waistband, the band is folded in half with edges even, and the edge is sewn with the machine and a zipper foot.


The adjustable slide is sewn on the short end of the waistband.


A piece of felt was the only item I had on hand that would not fray and I used that for the scissor holster. The open edge is closed with a zigzag stitch and the scissors help to push the holster into the compartment created with the diagonal seam. This will protect the pocket and can be replaced as necessary.


The last item will be a pincushion made with a jar lid, magnet, pincushion base and top fabric, strong thread, scraps for filling the pincushion, and hot glue. I just purchased a hot glue gun 6 months ago and am excited to use this handy tool again!

The pincushion is gathered at the seamline with strong thread, filled with scrap fabric, and then sewn closed.
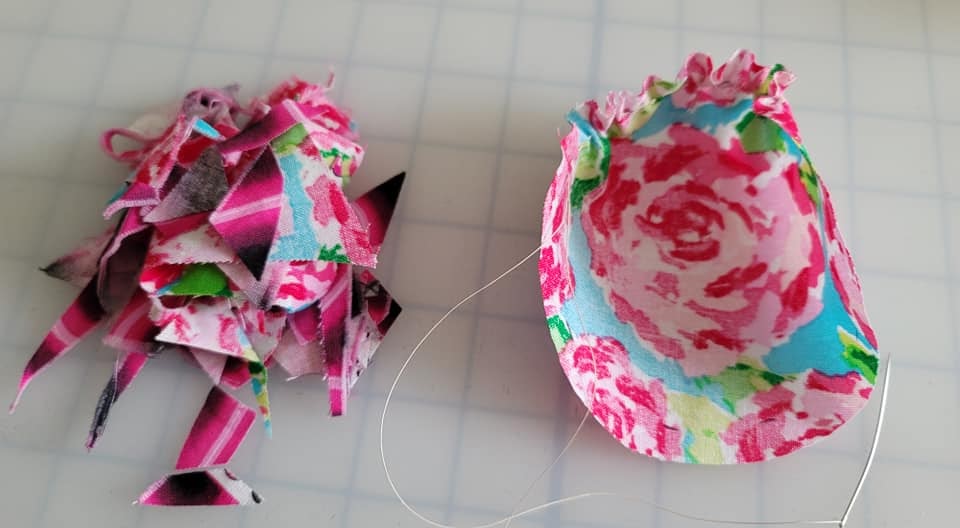

The lid is covered with fabric attached with hot glue.

Finished lid and pincushion:


Oops! The missing piece here is hot gluing the magnet to the inside of the lid. Be sure to test that your magnet works correctly with the magnet on the pocket base. Then glue the pincushion to the lid. Yes, I really selected a scrap piece to mimic a rose when placed on the pocket. :)

The pincushion is magnetized and removable from the pocket so it can be attached to an elastic wristband which also holds a magnet.


The Fantastical Utility Pocket is finished and ready to be filled with all our most used sewing tools! If we can find them....


