.jpg)

YouTube Companion Video: https://youtu.be/jIrI65Sva64
It's been great fun as a costumer to recreate life-sized versions of historically- and vintage-inspired fashion on Barbie dolls. Victorian,


Edwardian,


and 1930s.


This year it will be 1920s from the Holiday Voyage Barbie and the fabrics are ready and waiting.


While searching Barbie dolls for future makes, this amazing offering came across my social media feed and I knew I had to recreate it!

She is Holiday Hostess Halloween Haunt, a Barbie Fan Club Exclusive. Members had to be Gold or Platinum status to order the doll. Released on September 8, 2011 with the 1958 Original Barbie Face Sculpt (note the side eye) and the Silkstone Body Sculpt. Only 3,100 produced. (Information and images from Dollect.net)


The back of the box reads: "Favorite memories of all Hallow's Eve glow like the full moon. Ghostly goblins bob for apples, and the holiday lore is spine-tingling fun! While things go bump in the night, terrifying adorable trick-or-treaters roam the streets, ringing neighborhood doorbells. Will a bowl of wickedly wonderful Halloween Treats await? Barbie doll is the perfect Halloween hostess in her frightfully fabulous frock - in traditional Halloween colors of orange and black - an featuring silhouettes of cats and stars."
Sadly, I'm not reading that from a Halloween Barbie that I own as the prices on the secondary market are also spine-tingling! On the Walmart website, $800.00 minus a nickle.

But some photos across the web allowed me to see other sides of an unboxed Halloween Barbie.


Then who appears across my social media feed? Jacki of Fantastical Follies Costuming with a costumers collaboration idea. Her videos are always entertaining and I knew a collaboration would be exactly what I needed in my life right now.
.png)
Jacki proposes - #angelicathon. Scroop and Virgil's Fine Goods has released the Angelica Gown pattern and it looks incredible!
.png)


All of that skirt fabric and the open skirt front remind me so much of the Halloween Barbie doll and I jump on this collaboration with - 18th Century Halloween Barbie Witch. Forget that I have a queue of other projects with deadlines! I'm on this!!

The Pattern
The pattern was first offered in a full paper pattern with the release but is now only available as a pdf download. I purchase and begin to print.


In addition to the 54 pages for the pattern itself, there are 48 or so pages of printing instructions, sewing instructions including historically accurate techniques and tips, and fitting and pattern adjustments. It's truly an amazing amount of information especially for an 18th century novice like me.

I usually download pdf patterns to my phone and attach them to an order for shop printing or print them myself through my wireless printer. For this I used my wireless printer and had only one teeny glitsch when pattern block 5F didn't receive it's full instructions. The page is located on my phone and reprinted perfectly.

Now to assemble the pattern. I cut off the lower and right edges and assemble from the lower right corner. I only lightly tape, cut off pattern pieces as I see them complete, then firmly tape as necessary. Still, this pattern requires my working on the floor. Tasha Puppy thinks floor time is play time but she sweetly curls up to the door and all pages remain unscathed. She is such a companion and protector and I decide to forego the cats on the Halloween Barbie doll inspiration and dedicate my gown to Tasha Puppy, my German Shepherd Dog.


The Fabric
Now that I have a pattern and know the yardage required I can source fabric. I've seen costumers with their gorgeous silk taffeta gowns billowing behind them as they glide down cobblestone walkways. And I begin with what I know to be a good silk taffeta source with a wide range of colors - Silk Baron. There it is! Firesand. A perfect orange and gold that will glisten in the sunshine! But this is a learning piece and a wearable mock-up and more of an investment that I care to make at $30 a yard.

I find a very acceptable man-made option at fabulessfabrics on etsy at $9.95 a yard.

I've purchased from this vendor before for The Supreme Witch and was very satisfied with their service and products. So Sun Orange from fabulessfabrics it is! Although I still dream of the silk taffeta from Silk Baron for a special event....some day.

The fabric arrives. It has a beautiful drape and changeable color. I'm thrilled!

There is some black lace in the stash which gives a witchy vibe and some black satin ribbon.

All I need from my local fabric store is a bit of black tulle with silver sparkles and a bit of orange tulle for the hat.

The Angelica Gown is dated 1775 - 1790. To create the full-bottomed, round-hipped shape of 1775-1787 or the back-focused silhouette of 1785 to 1795, Scroop offers a free downloadable pattern for The Frances Rump. I choose to go all out with the full-bottomed beauty.


I've cut an interior tight woven white cotton to hold the feathers I will use for stuffing, covered with an ivory linen.

The outer seam sewn, the seam allowance trimmed and clipped.

The rump is turned right sides out and the quilting lines marked and sewn.


An old feather pillow is recycled for this project and the tag is finally removed. No penalty for me.


Since it's windy outside, the pillow is opened into a plastic bin and trash bag inside and each pocket is stuffed and then pinned closed.


The feather-filled rump is stitched closed and pleated.

A length of twill tape is folded over the top edge and then stitched in place by hand on both inside and outside.


The Frances Rump is finished! Time to dress the dressform in what few 18th century undergarments I've made up 'til now.


And now I can add a feather-filled rump to my silhouette.


The Angelica Gown pattern does not include a petticoat pattern. I have a Haunted Mansion petticoat made for an event and I was thinking I would use it for this project. The silhouette created by the new Frances Rump is definitely full-bottomed and round-hipped as described in the pattern.


But I changed my mind and used the back of a petticoat I had made for another fun project. It's a nice black costume satin and I have some scraps left which will be a perfect use for part of this project as well.

If the wind blows and the back of my petticoat shows, there are cute hearts to see. Which inspires another part of this project.

I'm ready to begin my Angelica Gown Halloween Barbie Witch!
The Bodice
I began my Angelica Gown with a thorough study of the instructions. I will use a machine sewing where I can and I make notes. There are a few shortcuts I will take as well as a few items being done out of order. So the following diary is not a true following of the pattern instructions which are extremely thorough and well written. I can see this as the first of many patterns I will purchase and use from this company. I have chosen View B which has a longer sloped V at the front, a two-panel back, and a slight train. All pieces in the pattern can be mixed and matched.

The View B bodice consists of a front, side, shoulder strap, and back.

I cut the bodice lining from a white cotton.

There is a one-piece sleeve with a dart.


The remaining bodice pattern pieces are a lower front trim, and the templates for the eyelets.

All pieces are cut from the fabric including the bodice trim.


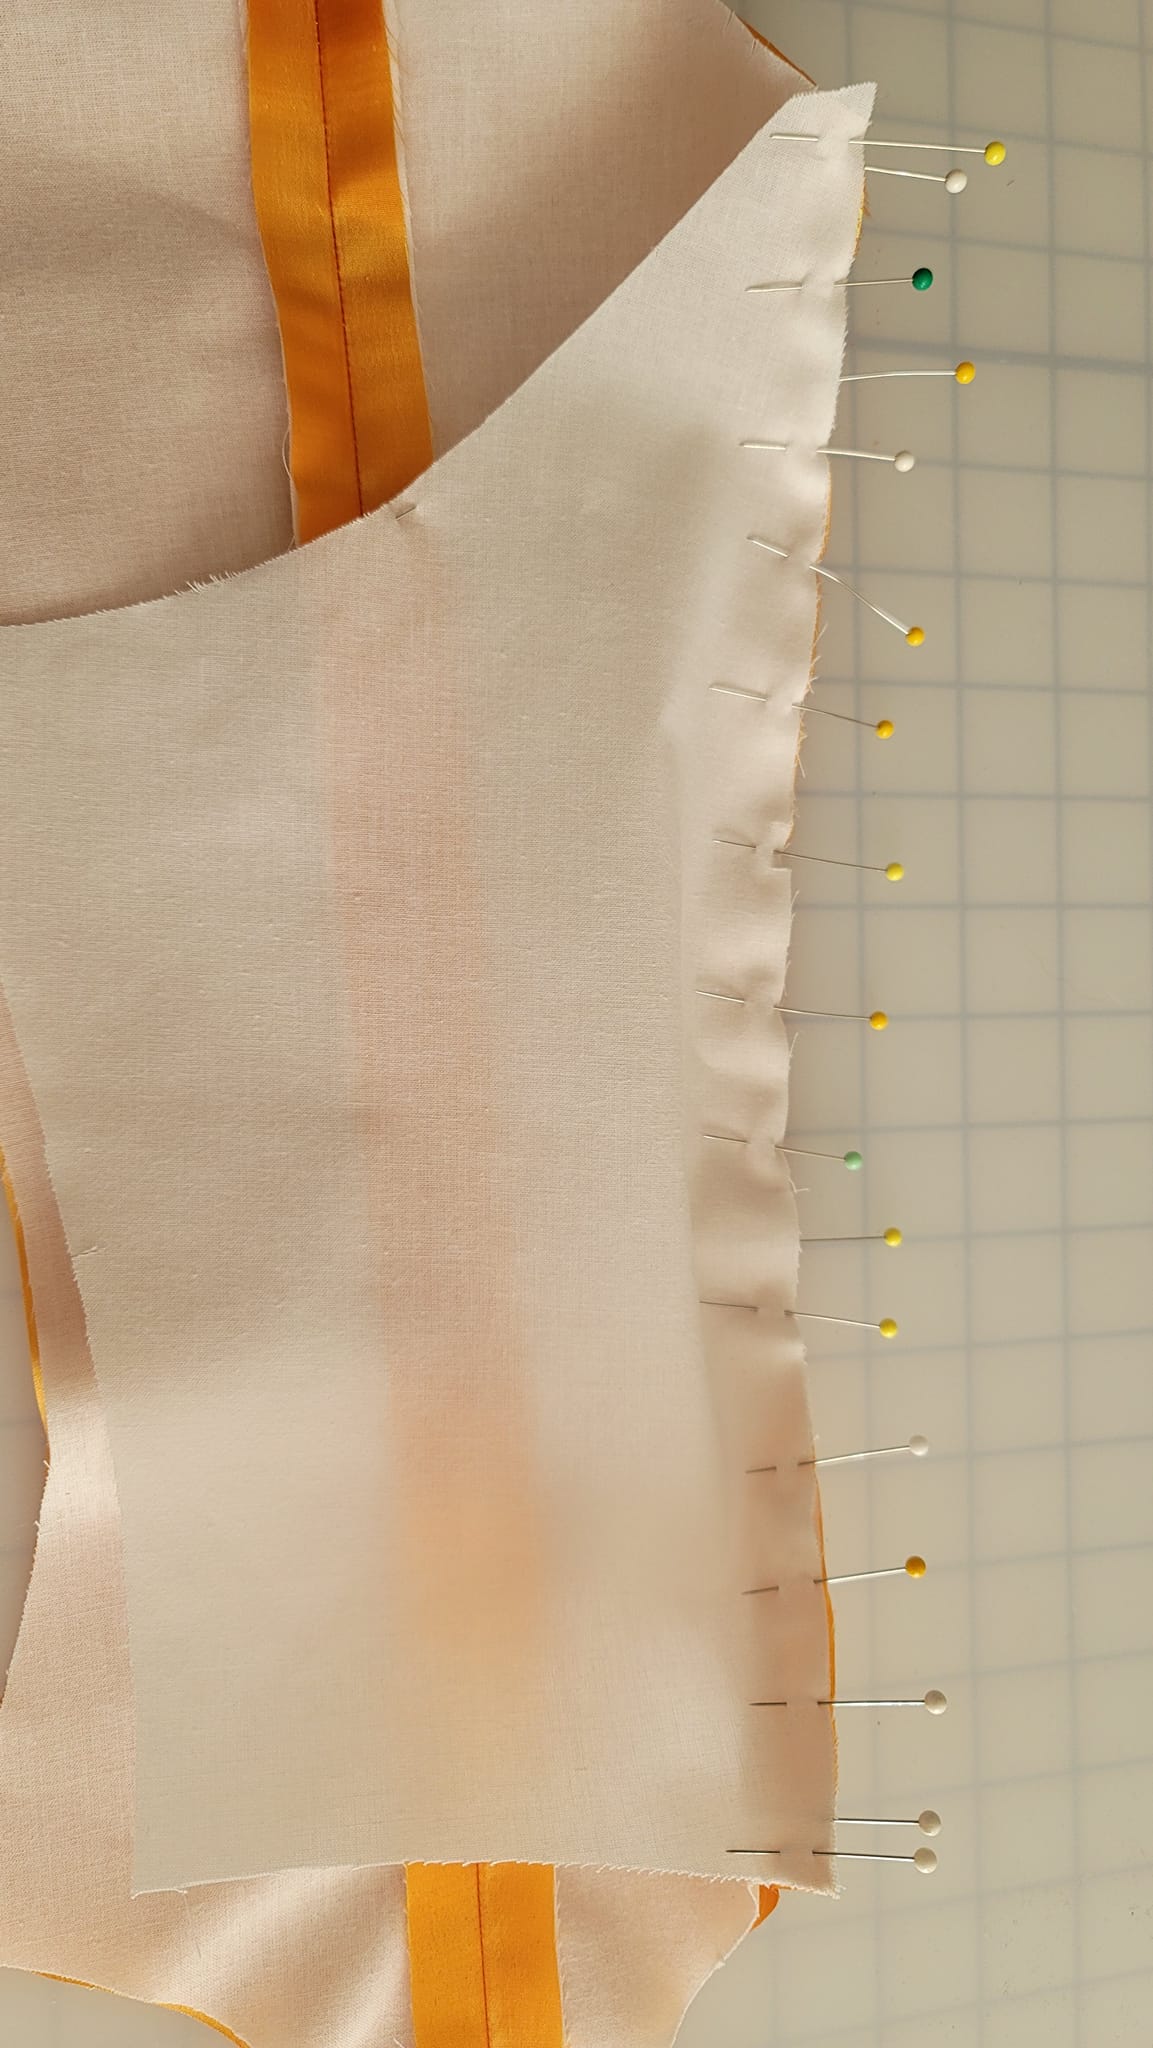
I did not make a perfect mock-up for this gown. A quick pin and fit of the lining told me it was a good start so I move forward. I've sewn the lining front as directed and inserted metal eyelets for lacing.

I use heavy duty cable ties for the front and back boning. They are cut to length, the ends rounded, and inserted in the front channels.


The finished bodice front lining with the eyelets, boning channels and boning, and seam allowances pressed and trimmed.


The seam allowances for the remaining bodice pieces are also pressed and trimmed according to the instructions.


This is also where I made a drastic shift from the instructions. I will use the machine sewn center back seam allowances for my boning channels. When I construct corsets I use a method where the lining and fashion fabric are sewn with the lining pieces right sides together matching the leading edge. The same for the fashion fabric. Then the seam is machine sewn. The lining and fashion fabric are then turned and pressed and the process repeated. This encases the seam allowances and can also be used to create boning channels with more stitching, but does not easily allow for any adjustments later. So not according to the directions, most likely not historically accurate, but quick for me for this project.


The process is repeated to attach the bodice fronts. But, ah, there is a problem I will not discover until later but I'll point it out now so that you don't make the mistake I did. The finished edge of the bodice lining should face your body. Mine is reversed. The unfinished edge of the lining will be covered by the fashion fabric later. I do discover this in time to correct it, if I choose to do so, but I do not choose to do so. I'll just know better next time!


So I accept my mistake and move on by practicing my lacing with yarn and a yarn needle. It works! We're good!


The lining straps are pinned to the front and back and then sewn.


Now I get crazy with topstitching with black thread - the side and back seams, the lower edge, the upper edge, the back boning channels, and the center fronts.


At this point the skirt should be constructed and added to the bodice. But I have that witchy black lace I want to add to the neckline and sleeves and my machine sewing space is tiny, tiny, tiny. Too tiny to machine sew sleeves into a bodice with all that skirt attached. So I decide to do the sleeves next.
The elbow darts are sewn into the lining and outer fabric.

The seam allowance is pressed on the lower edge.

Now this was the most miraculous thing! The sleeve and lining and pinned right sides together. A sleeve and the mirror image of the lining are stacked with the open edges together. The seam is sewn through all four layers. The sleeve is turned with the outer fabric right side out. And magically the seam is encased between the lining and outer fabric. I just trusted the directions because it made no sense to me when I read it, but what an amazing technique!


The upper edge is basted.

And repeat.


The instructions and pattern markings are very detailed for setting the sleeves. I'm able to machine sew the sleeve for most of the sewing, and then hand stitch where the back darts are made for fit. Meanwhile Tasha Puppy has taken to very closely watching all the progress. She has fallen in love with this gown! Maybe because I always talk to her about how this is HER gown. I ask her if she loves it. She seems very attentive!


With the sleeves attached to the gown I can now pin the outer straps in place and hand stitch them to the gown.


Now I can add that beautiful black lace remnant. I position and pin the lace having to offset the center front. An organza ribbon adds just enough structure to cause the overhang to ruffle as necessary. I pin the lace and hand stitch at the two solid lines on the lace. This lace makes all the difference!


The Skirt
There will be different procedures to the skirt assembly depending on your fabric width. There is a pattern piece for the waist edge, and a pattern piece for the hem edge. Those separate pieces are placed on the fabric with 30" between them. This was another floor project for me.

I had cut all my fabric at the same time and stored it pinned to the dressform.


For my fabric width there is a center back seam and a front side seam. Additional false seams can be sewn to mimic historical fabric widths. I've pinked the seam allowances and pressed the seams open.


The pattern piece for the waist edge has markings for the pleating line, fold down line, and where the skirt meets the bodice at the front. I use an awl to create holes in the pattern and mark those holes with a heat-erasable pen. Now this project has taken over the tiny sewing space, the bedroom, and the kitchen.


Time to pleat! What?! I have no idea what I'm doing. There are guidelines as to the number of pleats for different sections and a guideline for the reveal on each pleat. But I also have to pleat down to a specific width from center back to the bodice front mark. I anguish over this knowing that there must be a mathematical formula for this. I'm an engineer! I should be able to figure this out! To my delight I discovered it was already figured out in 2022 by Kat at Craftmatics.com. I'll share a link where you can download her pdf formula sheets for any type of pleat you can imagine. Since I know the reveal, number of pleats, length of the finished piece, and starting length, I simply plug my numbers into the formula and ta-da! Thank you, Kat!! You saved me from repeated attempts at pleating on the fly! And those beautiful pleats satisfy my engineer heart.
.png)


I weigh the pleats overnight with heavy books.

Then baste the pleats at the upper edge (lowest edge in this photo) and at the V-shaped turn down at both sides of the center back.


A check to see what this will look like over the Frances Rump and I'm thrilled at the skirt volume!


The Applique
While the skirt is still free from the bodice I decide to add the applique. An Etsy shop had a pack of German Shepherd Dog silhouettes for $1.52 and they are perfect.


I purchase and print.

Where the inspiration Halloween Barbie doll has cats and stars on her garment, my 18th century gown will have Tasha Puppy silhouettes and hearts. I find one on the internet and trace it off my phone in different sizes.

I've taken some amazing free online classes from Tricia at Creative Costume Academy. She has a patternmaking class that I would love attend one day. She has a YouTube channel, which I follow, and shares some excellent tips. It was pure luck when her video about applique appeared introducing me to Steam-A-Seam 2.
.png)
Following Tricia's tutorial, I find Steam-A-Seam and with my costume satin scraps and my templates, I'm ready to test.


It works! And it's flexible with a strong bond. Now I can cut out all my templates, trace then onto sheets of Steam-A-Seam, and adhere them to the black satin.

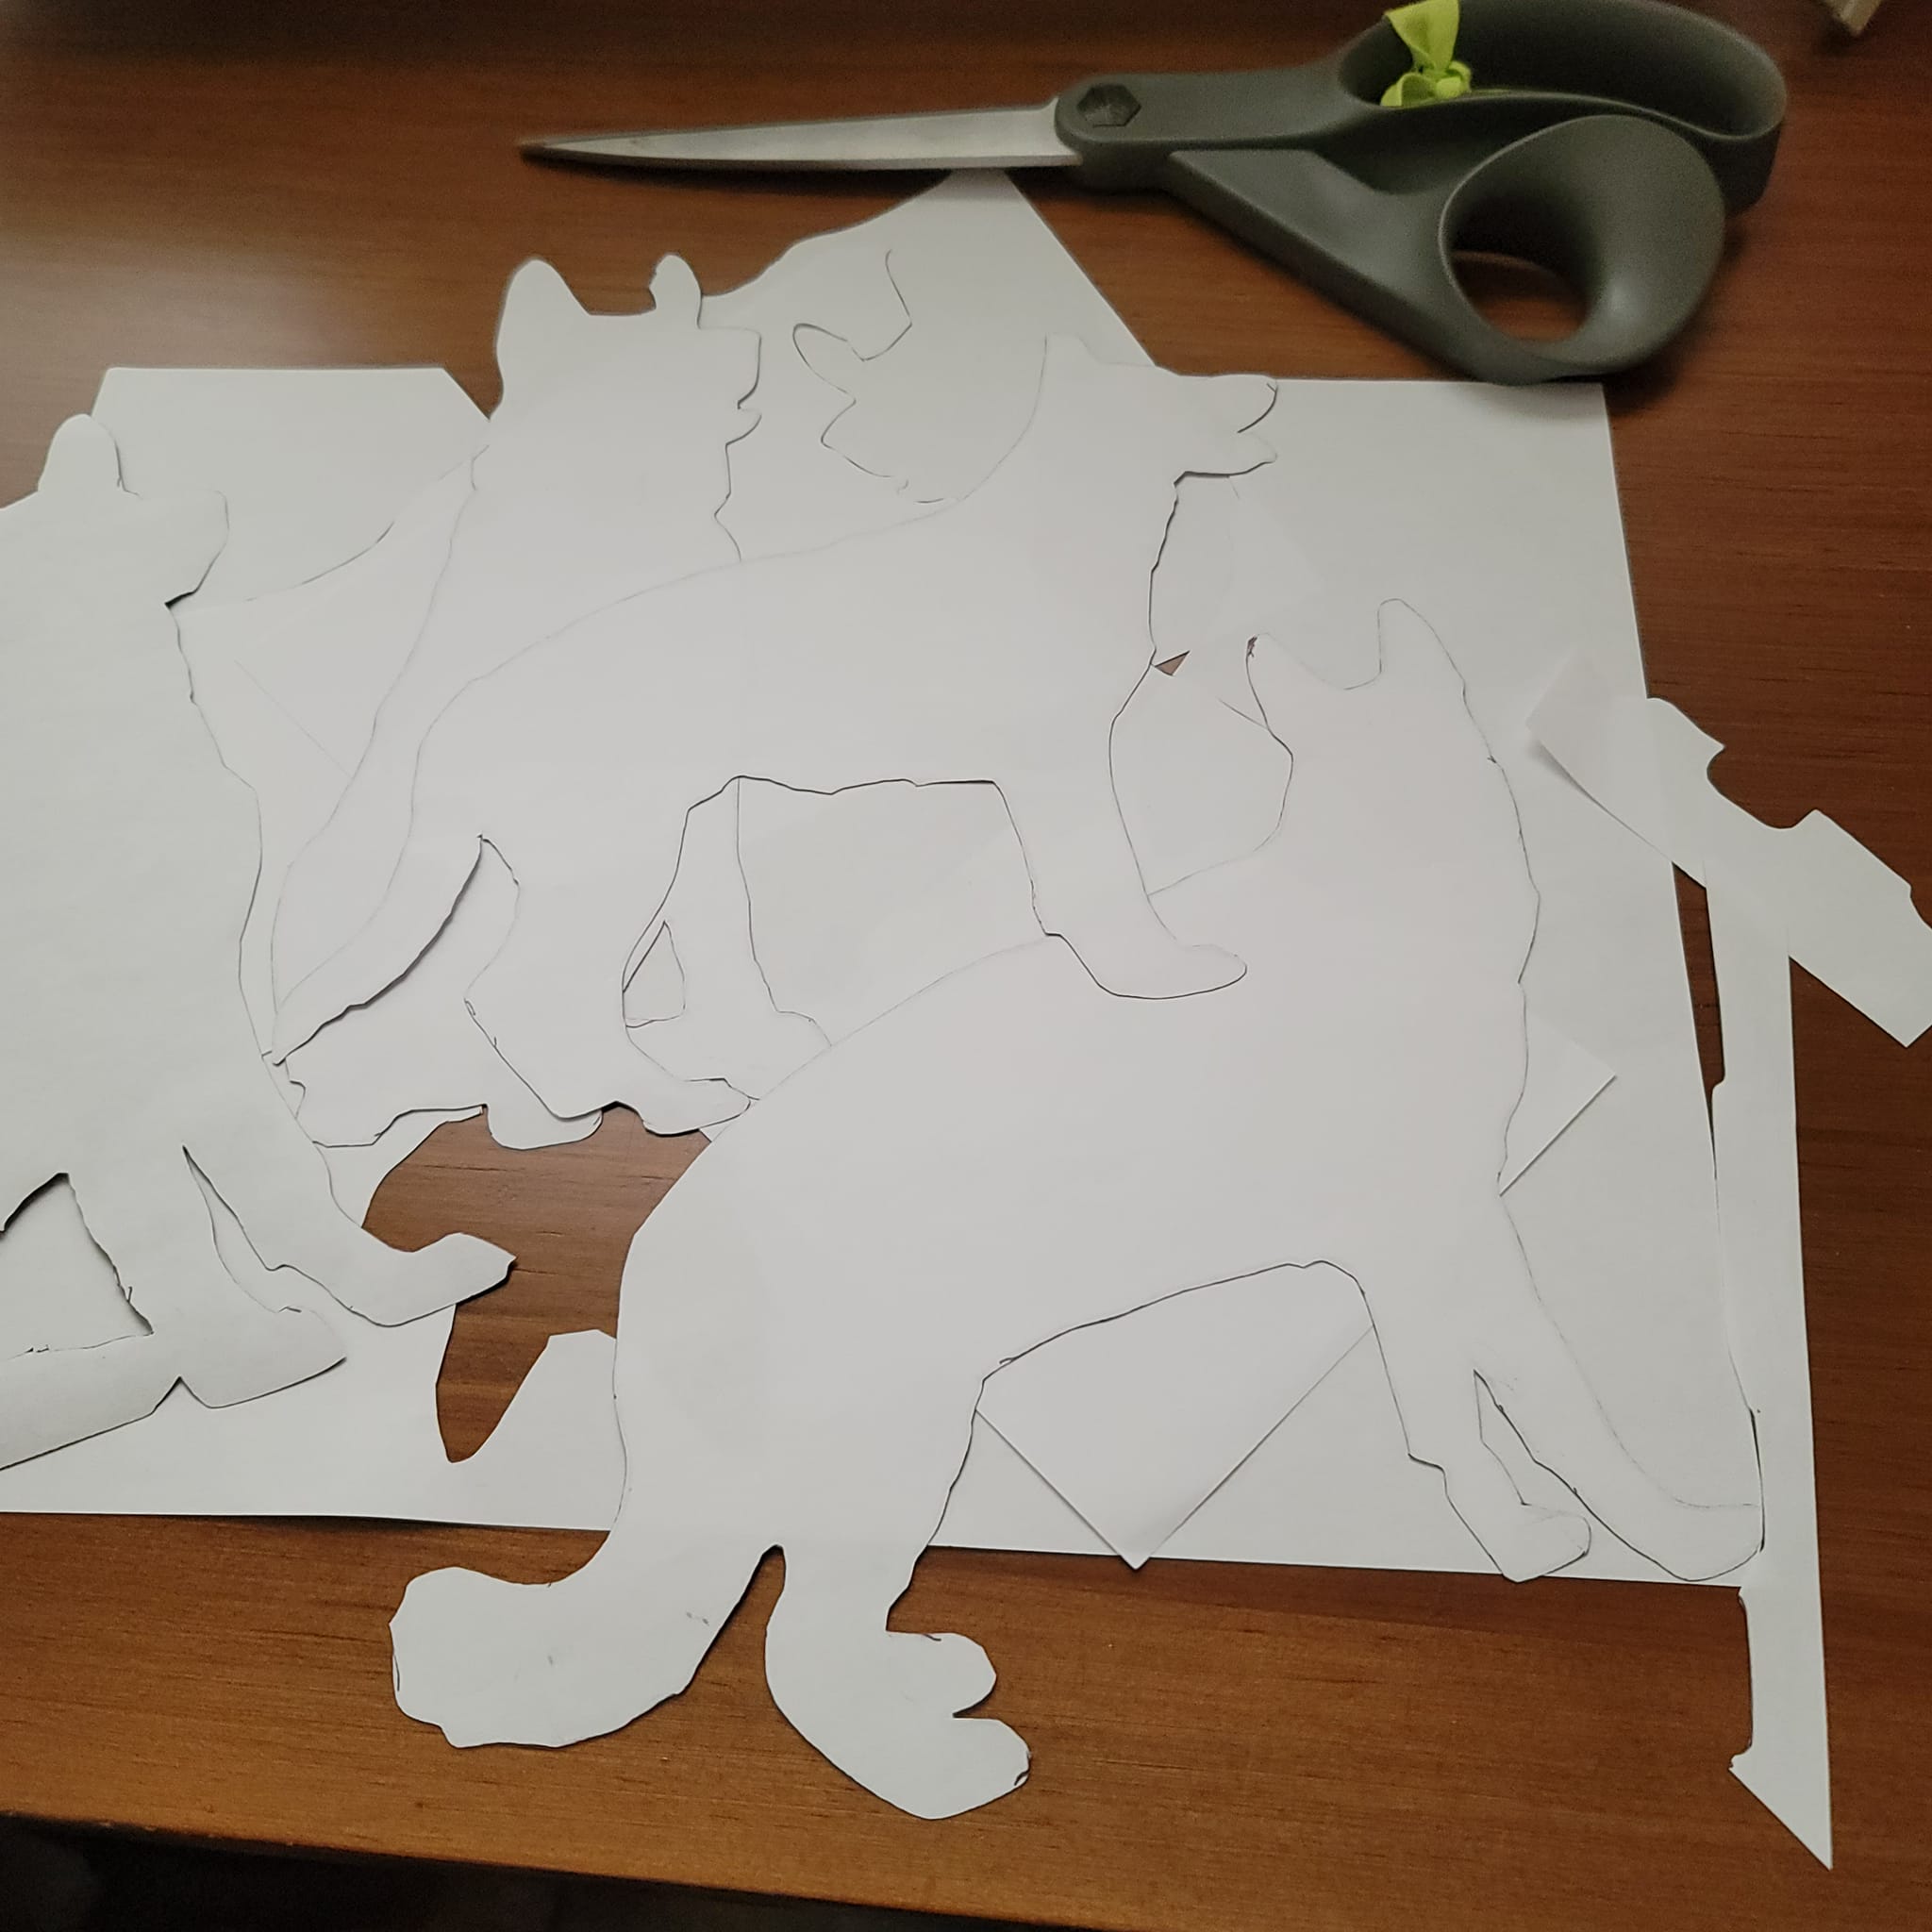


The silhouettes and hearts are cut and now ready t have the backing peeled off and ironed onto the skirt. I really love them on the orange fabric!


With all the appliques pinned to the skirt, the bodice placed on the dressform, and a few extra touches I'm considering, I'm beginning to feel that my vision for this project is taking shape.


All the appliques are ironed to the skirt. Tasha Puppy has taken to sticking close to the gown. Her bed is right next to the dressform, but she even sleeps with a watchful eye on HER gown.


Bodice and Skirt Assembly
Using the needle holes created by the bodice edge topstitching, I hand stitch the bodice and skirt together sewing through all layers.

Here you can see those black thread stitches from the inside. I am sewing the pleats 1" from that stitchline using a backstitch and just catching the fold of each pleat. This will help the pleats behave.


The pins holding the pleats at the pleating line are removed and the pleats begin to fan out in beautiful folds across the back.


The front and lower edges of the skirt are pinked. A light pressing to remove the heat-erasable pen markings and the 18th Century Halloween Barbie gown sewing is finished!


The Perfect Touches
Now it's time to add the extra touches that make this gown very Halloween Barbie. First a beaded choker with my German Shepherd Dog keychain silhouette attached.

A chatelaine (actually a necklace with a chain tassel) perfect for holding a black organza bag for Tasha Puppy treats.


Then the gown is finished with a black satin ribbon fashioned into a belt with a puppy love belt buckle.


Tasha Puppy, what do you think of YOUR finished gown?

She loves it!!!

The Halloween Barbie doll has a hat with just a touch of orange. I have a hat with a very similar silhouette that I've worn for the Witch's Brew Teas I've hosted. Adding a touch of orange to it works beautifully.


The wonderful wig was created by Victoria Vane of Sew Vane Couture on Etsy. She doesn't have wigs listed in her shop but she kindly agreed to fashion this wig for me. I love it!
.png)
Halloween Barbie wears the cutest shoes with orange pompoms. I fashion similar from the orange tulle and tie then to the bows on my black velvet pumps.


Be aware of falling houses!

To complete our Barbie doll recreation, we need that sweet little broom.


An old broom handle dug out of a dark corner of the barn and a can of black spray paint will do nicely.

The black tulle is folded to the right width and cut along its length to create four equal pieces. Lots of sparkle! A gathering stitch is run to create an upper short section and a longer lower section. Then the thread is pulled.


The tulle is fastened to the broomstick with small tacks, tied across the gathers with orange ribbon, and the broom is finished.


A Finished 18th Century Halloween Barbie Witch


Tasha Puppy! Let's Play!!


.png)
.png)
Tasha Puppy and I thank you for joining us in this recreation. We wish you a Happy Halloween Day and Happy Every Days filled with fun, laughter, and especially, good treats!

Hugs and Tasha Puppy Kisses,
Jeanette
Challenge: Re-make one of your very first projects. Or make something that is the beginning of an entirely new outfit.
What the item is: False Rump
How it fits the Challenge: This false rump will create the full-bottomed and round-hipped shape for the beginning of a new outfit.
Material: Linen, cotton
Pattern: Free Frances Rump pattern by Scroop Patterns
Year: 1775-1795, this view being correct for 1775-1787
Notions: Waterfowl feathers and down, twill tape, thread
How historically accurate is it? The pattern and silhouette are very accurate, the fabrics and notions are accurate, but the false rump is primarily machine sewn.
Hours to complete: 4 hours
First worn: Halloween 2023
Total cost: Fabric $8, twill tape $4, feathers recycled from a pillow
Historical Sew Monthly - September 2023 - The State of Fashion
Challenge: Make something for which the fashion was influenced at that time in history (ex. sumptuary laws, tariffs, protests, conflicts, or social movements).
What the item is: 18th Century Gown
How it fits the Challenge: Britain had its silk industry located in Spitalfields, London. Beautiful fabrics brocaded in silver and gold were produced. To protect the local industry the British government established high taxes on imported textiles. Between 1765 and 1768 riots occurred during a downturn in the silk weaving industry. The Spitalfields weavers organized to attempt to ensure that the rates of pay for their piece work was not cut beneath the level at which they could feed themselves and their families. Destruction, violence, and a hanging were all attributed to the Spitalfields riots.
I've chosen a pattern close to that period (1775-1790) which has detailed and historically accurate sewing instructions greatly helping me learn period construction. I'll be making a mock-up from a non-silk fabric for a fun costume allowing for mistakes and learning, but will create the final gown in a beautiful silk.
Materials: Faux silk taffeta, cotton
Pattern: Angelica Gown by Scroop Patterns
Year: 1775 - 1790
Notions: Metal eyelets, yarn, lace, and the fun appliques.
How historically accurate is it? I learned a lot of historical techniques from this pattern. I did machine sew where possible and, of course, the complete impression is non-historical. But it was fun and completely stress-free! So 10% - maybe. :)
Hours to complete: With the appliques this took almost 40 hours.
First worn: Halloween 2023
Total cost: $35