Sunday, March 29, 2015

Historical Sew Monthly Challenge #3 - Stashbusting

"No, I don't have a fabric/trim/accessories stash."
 
Said no costumer - ever!!  The minute you begin historic costuming a new life begins.  It starts with a little voice that calls out when you pass by the fabrics lining the walls of your favorite store and ends with plastic bins or rolls of fabric in a closet, under the bed, or in a huge pile in a corner of the sewing space.  It's inevitable and it's a testament to your creativity and commitment to this wonderful passion.  But time is your enemy and robs you of those moments (hours, really) needed to take that beautiful stash and turn a next-to-nothing into the fabulous something you just knew it could be!
 
The Historical Sew Monthly Challenge #3 was understanding of this phenomenon and gave us the opportunity to dive and dig into those corners and put together that fabulous something once and for all.  This is mine.
 
Starting with a Butterick Retro '12 pattern B6108 released in 2014 and loved by many.  I adored this pattern but started to hear some not so great reviews and immediately put the pattern into the pattern stash. (Yes, there is a stash for those too.)  Our local Hancock Fabrics built a new store last year and I had to stop to check it out (of course!) and found some interesting crinkled cotton at $1.00 a yard.  I bought all 24 yards and it went into the stash.  When a friend was destashing her fabric collection and offered a pewter and black taffeta remnant piece at a good price, I thought the crinkle in her fabric would be a great compliment to my crinkled cotton and I moved her little stash into my stash.  At least they could be together even if they didn't have a purpose.
 
Perhaps in a previous life I was a crow because I have an immediate attraction to little sparkly black things - buttons, beads, jewelry, appliques, trim - I buy it and put it into my stash.  Some day it will all come together.  I just know it!
 
And so it is that my project finally does come together with my Butterick pattern, the crinkled cotton fabric, the pewter and black plaid fabric, some vintage buttons and some modern but similar buttons, and a beaded collar that I have had for so long I don't even remember it's original home.
The crinkled cotton has to be flatlined since it is very lightweight and sheer in the right light and to keep the crinkles in place.  I've chosen the option with a single large collar piece on the right side.
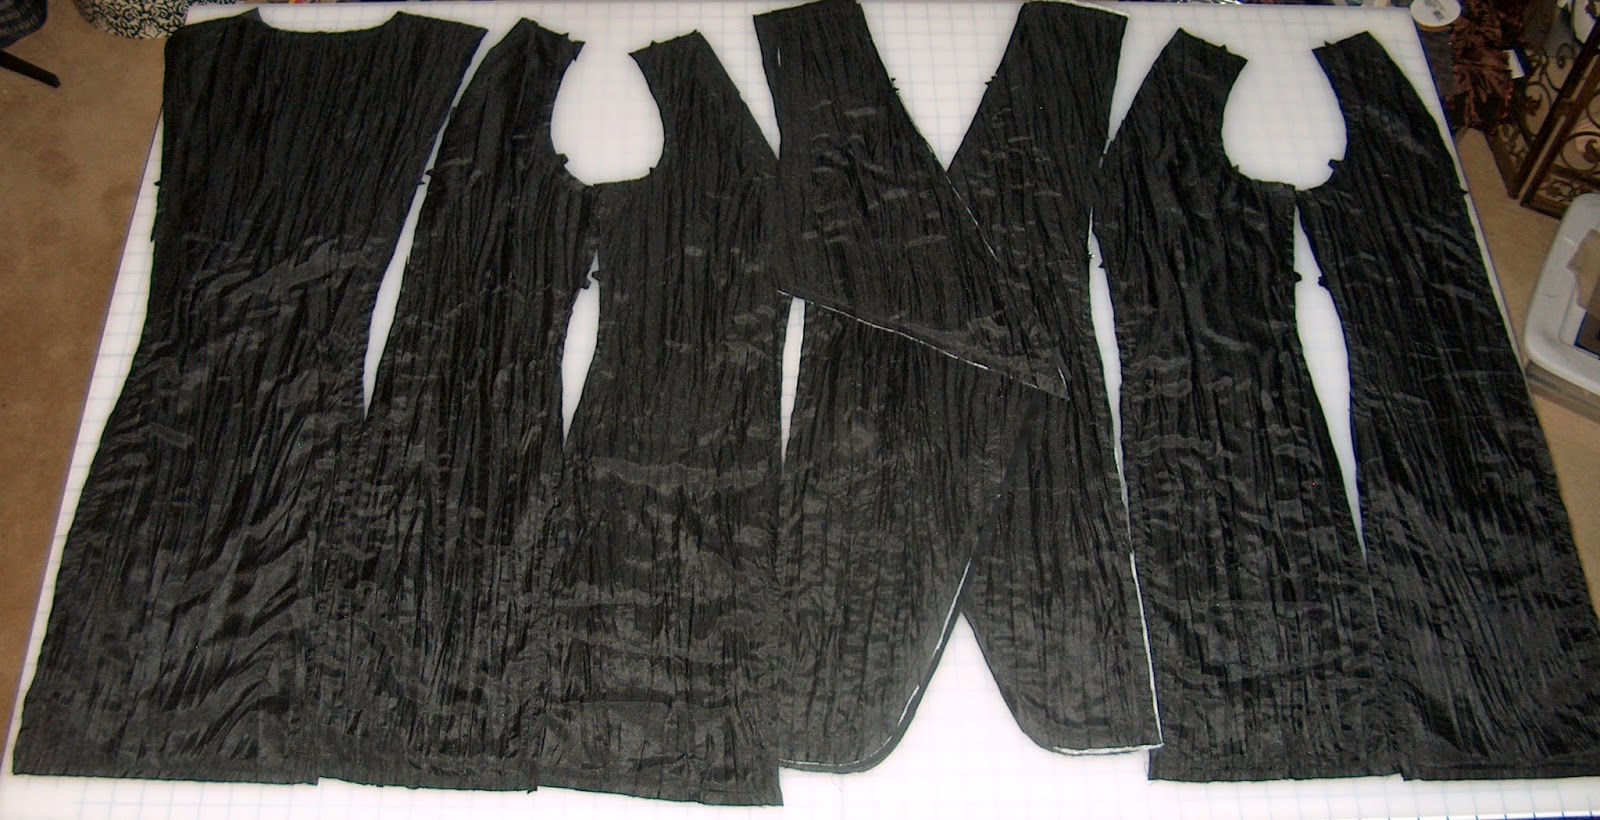
The flatlined and interlined jacket pieces.
 
The skirt, small contrast collar and cuffs will be made from the plaid taffeta.
 The pattern allows for cutting the skirt on the bias but as I'm limited in my fabric, I cut on the straight of grain making sure to match my plaid.

Black cotton lining.
During the jacket construction I have a thought that I may not like the contrast collar with a vintage blouse I plan to use.  I take some pictures, share with friends, and the vote is unanimous - yes to the collar.
Before sewing in the sleeves, before hemming, and before adding buttons, I try on the in-process suit with the shoes and underthings I will be wearing.  In my accessory stash I have rediscovered this over-the-top beaded hat which is perfect for this suit.
The suit is finished and at last I add the wonderful vintage buttons to the cuffs.

With a finished skirt I change my mind and add a black blouse with lace jabot.
The finished suit!


The vintage buttons have a new life.


 Historical Sew Monthly

What the item is:  'Martha Levinson' Suit
Fabric:  Cotton, taffeta
Stashed for how long:  Soonest was late 2014 and longest was when I first started sewing in 2007.
Pattern:  Butterick Retro '12 B6108
Year:  1912
Notions:  Vintage and modern buttons and beaded collar
How historically accurate is it?  The pattern is very accurate according to photos I have seen and a vintage jacket owned by a friend.
Hours to complete?  22 hours
First worn:  Made for the April 2015 Dressing Downton Exhibit at Biltmore Estate.
Total cost:  Fabric was stashed because the cotton was purchased at $1.00 per yard and the plaid came from a friend's stash.  Total actual out-of-pocket approximately $40.00 mostly in the collar and buttons.

Do you think Martha Levinson would approve?  It's quite her over-the-top style, I believe!

Love,
Jeanette


Wednesday, March 4, 2015

Historical Sew Fortnightly Monthly #1 - Foundations - 1920s Draped Slip

The slip!  The last foundation garment needed for a 1920s dress.  It's taken a while but the brassiere and bloomers are finished:
http://theperfecttouchvictorian.blogspot.com/2014/10/historical-sew-fortnightly-challenge-19.html

the corset is finished:
http://theperfecttouchvictorian.blogspot.com/2015/02/historical-sew-monthly-challenge-1.html

and now the slip is finished!

The pattern is from Mrs Depew Vintage on etsy and is only a page of instructions with some additional period sewing information.  That means no paper pattern which is completely new for me.  And scary!  I've adjusted patterns and adjusted garments for a better fit, but sewing a garment with only written instructions...  !!!!!!!
The slip is made from two lengths of fabric where a "length" is the length you want your slip to be from upper chest to hem plus hem allowances.  First the back of the slip is draped and pinned over the undergarments I've already made.
Then the front of the slip is draped according to the directions and pinned in place.  The straps are made and pinned.  The great part about this slip design is that the two panels are only attached to each other from the underarm and then to slightly below the hips.  They overlap from the hip down to the hem which means that there is room for walking and dancing while still maintaining the columnar silhouette for the 1920s dresses.  Brilliant design!


Making sure that all pins have been readjusted to keep the slip pieces in place but not attached to the other undergarments, the pinned slip is removed from the dressform and everything sewn according to the directions.

I was very inspired by a blog post from The Dreamstress about 1920s monogrammed unders.
http://thedreamstress.com/2014/10/monogrammed-unders-in-the-1920s/

Now is the time for me to learn how to use the embroidery machine I won on ebay a while back but have never used.  With instructions to everyone to stay out of the sewing room, I set up the machine, and sew my very first machine embroidery!  I'm thrilled!
Of course this isn't period correct for my 1920s slip, and I probably could have easily hand embroidered my monogram in half the time it took me to learn the machine, but I'm pleased to have taken this step and look forward to some beautiful embroidered items in the future.

Here is my finished 1920s monogrammed slip!

 
The perfect touch!

Historical Sew Fortnightly

What It Is:  1920s Draped Slip
The Challenge:  #1 Foundations
Fabric:  Lingerie tricot
Pattern:  Mrs Depew 3032
Year:  1920s
Notions:  Linen for monogram, embroidery thread
How historically accurate is it?  The pattern is from vintage directions, the monogram is inspired from garments of the period, but the fabric and machine embroidery are modern.
Hours to complete?  5 hours (not including the day to learn how to use the embroidery machine)
First Worn:  1920s Reception during Party Like A Vanderbilt weekend at Biltmore Estate April 2015
Total Cost:  $7

Love always,
Jeanette

Thursday, February 26, 2015

Historical Sew Monthly Challenge #2 - Blue

Have you ever looked at an inspiration and dreamed that one day you could wear such a gown?  As costumers I'm sure we all have that one special dream and this is mine.
This is an evening gown from Worth from the cover of Harper's Bazar March 17, 1894.  "This superb gown is of very light ciel-blue satin bordered with black fur.  It is further enriched with bead embroidery in iris design."  Sigh.  Wearing this gown is still my dream but much of the creation has come true.  Are you curious?  This will be the year and you will be told the whole story!  But in time....in time.

As I do have the blue satin and it is the only blue I have in the remnant pile, the Historical Sew Monthly Challenge #2 - Blue is the perfect time for me to make an accessory for this gown.  M'lady absolutely needs an evening bag and I shall make one for her.

From the moment I saw the inspiration I knew the gown should have crystals - Swarovski crystals!  The history is that Daniel Swarovski's father owned a small glass-cutting factory.  Sand, burnt limestone, and soda are melted together at extremely high temperatures to create glass.  If lead is added a stronger and highly refractive glass is created which can be cut and polished like any gemstone.  The secret to Swarovski crystals is in the cutting and polishing.  In 1892 Daniel Swarovski patented an electric cutting machine that facilitated the production of crystal glass and so it seems perfectly understandable to me that the lady having her Worth gown made in 1894 would have Swarovski crystals embroidering her gown.  And her reticule!

Like most things, purchasing in bulk is least expensive and 1,440 Swarovski crystals come in this envelope from Austria.  This envelope is approximately $75 or $.052 per crystal.
They are beautiful!
But when the light hits them (or the photo flash) they take your breath away!
The first thing I do is enlarge the inspiration and study the design.  This will be the design I use for the reticule.

In my online searches I locate a used purse frame.  It is bent and has lost some of its glow, but I feel that this is the perfect frame for my reticule.  With a blue satin remnant, a blue silk velvet fabric, crystals and the plan, I'm ready to begin.
First I do the crystal embroidery using a hoop, a beading needle, and clear bead embroidery thread by Clover.  I draw my design with a quilter's pencil and begin beading.

.
With 199 beads sewn, the design is finished.
 
My pattern for this reticule s a simple half circle.  I cut both the satin and the velvet on the fold.

With right sides facing, I sew both the satin and the velvet from the fold up leaving the tops open just slightly larger than the frame opening.  (1/4" seam allowances on the entire reticule)
I cut a small opening in the lining which is my velvet, right in the center of the fold.

The satin is turned right side out and slipped into the velvet.

The curved edges are sewn.  Then the satin outer layer is pulled through the hole that I cut in the velvet lining.


The velvet lining is then turned down into the inside of the satin outer layer.  I've pressed the upper curved edge and now that edge is ready to be sewn to the frame.  At one time the frame had holes for sewing the fabric onto the frame, but those were then covered with another piece of the frame.

I've found a thread that matches the frame and will sew the fabric directly to the frame design with tiny stitches.

Modern reproduction frames with holes work well and in this wild hot pink silk velvet reticule I made a while ago, I used seed beads inside and outside to anchor my fabric and thread.

Silk velvet is nice for a reticule and this was the same pattern I'm using for the satin.  I sewed running stitches along the bottom of the hot pink silk velvet and the gathering made for a pretty lower edge.
I tried the same technique for the lower edge of the satin but the look wasn't the same and the crystals were distorted, so I removed the stitching and created a box bottom by just pushing the lower corners inside and making a tack stitch.
The crystal and blue satin reticule is ready for the ball!


Historical Sew Fortnightly

What It Is:  Satin and Velvet Crystal Embroidered Reticule
The Challenge:  #2 Blue
Fabric:  Satin and silk velvet
Pattern:  Self-drafted
Year:  1894
Notions:  Used reticule frame, Swarovski crystals, bead embroidery thread
How historically accurate is it?  Completely hand drafted and hand sewn using historically accurate materials
Hours to complete?  6 hours
First Worn:  Costume College 2015
Total Cost:  Fabrics were remnants, crystals approximately $11, used frame $4

Love,
Jeanette