.jpg)
This project started with an inspiration - a 1996 Holiday Traditions Barbie Doll.


Then there was The Plan to bring Barbie to life and the blog post and video links are shared here:

This blog post/video will share the detail of creating what is described on the Hallmark box as "a velvety wide-brimmed hat embellished with a glamorous feather."


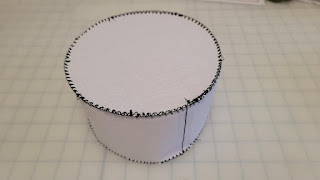
The crown tip and crown side band are both cut from a single layer of buckram and #19 millinery wire sewn to the edge of the crown tip and lower edge of the side band. I'm using a dark thread so that you can see the stitches. I'm using a polyester thread and a locking stitch which is simply running the needle through the same hole twice.

The side band is closed into a circle with a back stitch.

The crown tip is attached to the side band using a locking stitch but with a curved needle.

Now there is a finished wired buckram crown.

The wired edges are smoothed and the outer fabric protected from the wire with either bias tape or French elastic. It can be sewn on or glued with a fabric glue used sparingly.

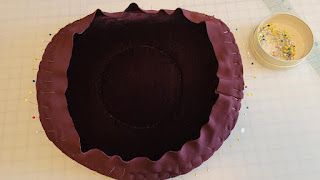
With a finished crown it is time to transfer the pattern markings for the brim to the buckram. I wanted just a bit more width and added 1/2" all around the brim.

Before stitching the millinery wire to the outside edge of the brim, I've stitched at the center opening and outside edge of the brim for stability of the two layers. I steam the buckram using my iron and gently create the side upturn.

Now I can sew the millinery wire to the edge of the buckram using a locking stitch.

French elastic is sewn to cover the wire.

The brim and crown are now ready for the next step and I place them on the mannequin head to check the upturn. I make final adjustments to the brim wire.


At this point I would usually add a layer of flannel to soften the buckram imperfections and hard edges. The inspiration hat is very plush as is my velvet, but I've decided to add a bit of extra softness with a layer of apparel batting. The batting is cut with no overlapping edges and I placed a bit extra at the crown tip to add some curve. A few dots of fabric glue hold the batting in place.


I cut the velvet adding a bit of extra length and width to all pieces to accommodate the extra batting. I also cut a 2" wide length of bias to encircle the brim.

The velvet crown tip is smoothed over the padded buckram crown and glued to the side band and pinned in place while the glue dries.

Once the glue is dry and the pins removed, the side band can be attached. The upper seam allowance is turned inside and the folded edge placed over the crown tip edge and pinned in place. The side band is sewn to the crown tip with small blind stitches using a curved needle. The side seam allowance is folded and sewn closed.


A few drops of fabric glue inside the crown to hold the lower fabric edge in place and the crown is finished.

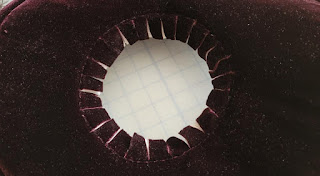
Time to cover the brim. The center seamline is drawn on the batting since I covered the line on the buckram and it doesn't show well through the batting. The velvet is clipped to the underbrim. The seamline is then sewn through the two layers of buckram, two layers of batting, and one layer of velvet. This line will be where the tabs fold up that are used to attach the crown to the brim.


The velvet is positioned on the upper brim and clipped to the edge. The centerline is then hand basted from the under brim velvet through all layers and the upper brim velvet. Doing this by hand allows me to keep the fabric positioned at the upturn and I add a few drops of fabric glue at the points where the fabric might drift away at the upturn when the hat is finished.

I again baste the edge through all layers including the newest layer of velvet.

To finish the hat brim edge I lay the 2" wide strip of bias cut fabric along the edge, right sides together. I turn the fabric under 1/2" at the first end which is positioned at the back of the hat as that will become the seam. Then I pin the bias along the entire edge and overlap the folded edge.


I machine sew the bias strip to the brim 1/2" from the edge.

Then the bias strip is turned right side out, the raw edge folded under 1/2", and pinned to the brim.


The bias is sewn to the brim fabric using a curved needle and a blind stitch and sewing the back seam closed as well. The crown and brim are finished and ready to be assembled.

The center front and center back and cutting line is marked on the center of the brim according to the pattern. The center is cut out through all layers. Tabs are cut up to sewn seamline and bent to be placed inside the crown. Because of the many layers I've clipped each tab before pinning them inside the crown.


Using a millinery needle which is very long and strong, I stitch through each tab to the outside of the crown. Then, taking a small stitch, I bring the needle back to the inside. Moving over to the next tab I repeat the process all the way around the hat.

I cut the crown tip and side band using the buckram pattern pieces and adding seam allowances. The parts are sewn, placed inside the hat, the seam allowance turned under, and stitched to the brim opening with a curved needle.


With the lining sewn in it's time for my favorite part of hat-making - the embellishments!


As I mentioned before, I change embellishments on hats to coordinate with costumes. Over time I've been fortunate to locate some beautiful vintage and antique plumes which I use often. These three seem like good candidates to recreate the Holiday Traditions Barbie.

I arrange and rearrange the feathers until I find the right combination and setting and then create a fabric holder with some remaining bias trim. I sew the trim to the upper brim fabric and lightly secure the feathers to the brim fabric with a loop and knot.


The mulberry-colored silk velvet and feathered 1890s hat is finished and I have some photos for you.


I think our life sized Holiday Traditiona Barbie is off to a great start, don't you?


Hugs,
Jeanette
Companion YouTube Video: https://www.youtube.com/watch?v=rMK8rkWFSog
Historical Sew Monthly - June 2021
On Your Head - Create an item you wear on your head.
What the item is: Victorian Hat
How it fits the challenge: Worn by every lady of the time.
Material: Silk velvet
Pattern: Denise Nadine Design Audrey
Year: 1890s
Notions: Buckram, millinery wire, apparel batting, lining fabric
How historically accurate is it? Made with period materials including buckram and wire and in an historical impression style.
Hours to complete: 13 hours
First worn: December 2021
Total cost: $78 not including vintage feathers


Looks great! The color is scrumptious!
ReplyDeleteBest,
Quinn
Thank you!! Totally loving this color!!!
Delete