Friday, August 31, 2018

Historical Sew Monthly Challenge #8 - Extant Originals

2018 Challenge #8 - Extant Originals
Copy an extant historical garment as closely as possible.
The Dreamstress
 
 
I love historical headwear!  It is where I started on my costume journey.  I started creating historical hats only because I had access to patterns and the internet and with no fear I jumped in.  And loved it!  Studying museum photos and fashion plates from my home computer was all I had to learn the designs of the times and truly that can be enough to start you on your own journey.  There are many patterns available from amazing designers and I have used those by Denise Nadine Designs, Truly Victorian, Wingeo, and Lynn McMasters, and have learned so much I have even designed my own.
 
When I saw this 1870's bonnet online through the Victoria and Albert Museum, London, Museum Number T.163-1923, Place of Origin:  Great Britain, Unkown artist/maker, I knew it was a beauty that I wanted to recreate.  http://collections.vam.ac.uk/item/O233687/bonnet-unknown/


The Museum description:  Bonnet of plaited silvered straw, trimmed with grey and mauve silk ribbon, embroidered cream net and artificial poppies in magenta coloured silk.  There are long narrow tying ribbons of black satin.  H 500mm, W 220 mm, D 190 mm

Quite a few years ago I purchased two colors of plaited straw at auction which closely resemble the extant original bonnet detail but are in a blue and cream color.  Since I have some remnants of a blue silk crepe which matches the blue straw, I decide to make my recreation with the blue straw.  Sadly I have a finite amount of the straw, so I choose to make my bonnet on a buckram base, covered in the silk crepe, and using the straw only where necessary.  The buckram is also a very rigid base for all the floral embellishment.

Lynn McMasters, Out of a Portrait, has a beautiful Mid-Victorian Winter Bonnet pattern with the shape I want for my not-so-winter bonnet.


And from here, it is just a step by step to a recreation!

The bonnet crown tip, base, brim, and crown side cut from 2-ply buckram.


Other supplies are millinery thread, millinery wire, and French elastic.
Millinery wire is hand sewn to the edges of the brim, base, and crown tip.  The crown side band is sewn into a circle and the tip attached.  All wire is covered with French elastic.

The bonnet base and crown are covered with the silk crepe fabric and the brim is sewn to the base.  Sometimes it takes a pliers to push or pull the needle through the layers of buckram and fabric.  It was here that I realized my design did not need the additional brim and I will save that for a future project.
With the crown sewn to the base I can now attach the plaited straw to the base edges, crown edge, and create the front straw wave embellishment.  Using a similar colored thread makes the stitches disappear. 

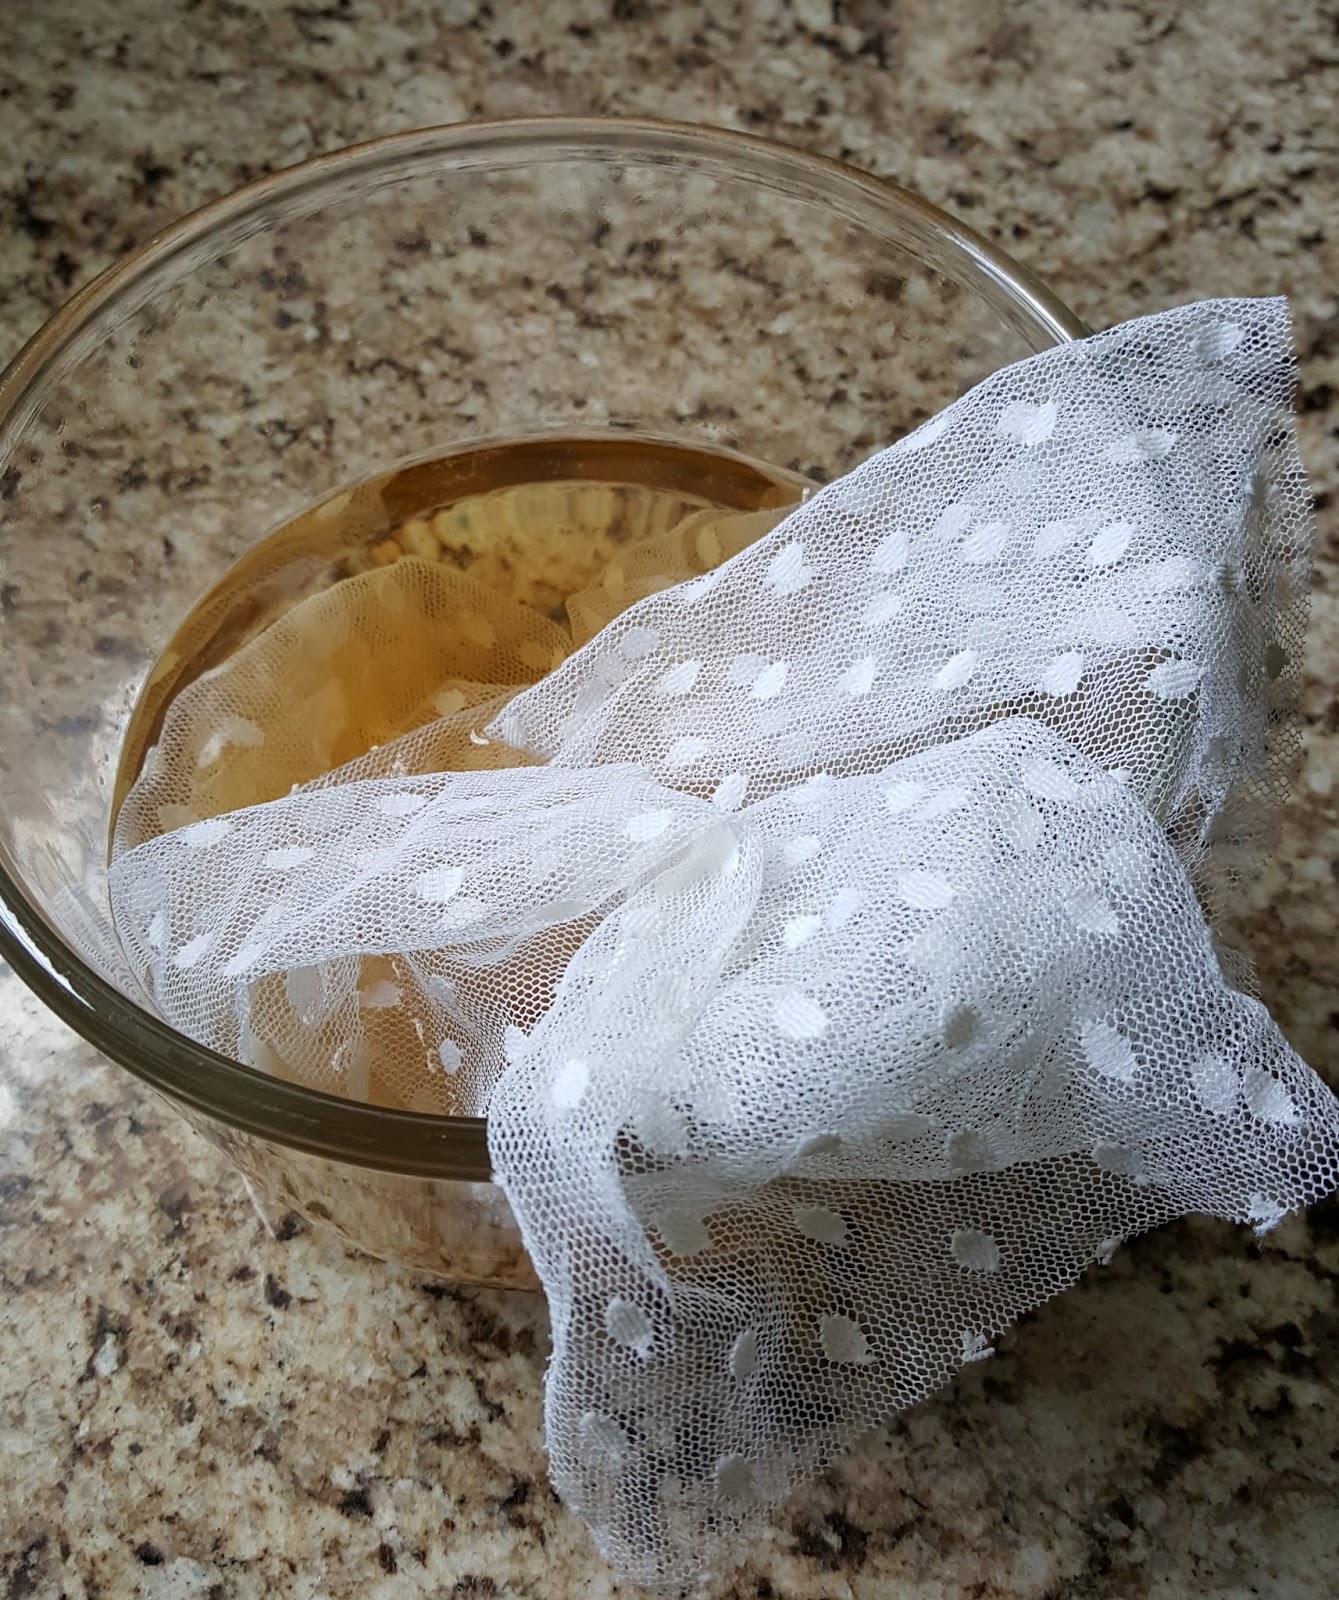
This beautiful swiss dot net became beautifully dark with some soaking in black tea.  And it still smells like Chai Spice.


The velvet flowers on the left are vintage.  I purchase vintage pieces online or in flea markets whenever I find them knowing that eventually they will fit on a hat perfectly.  The other flowers on this bonnet are made from two stems of modern florals.  I disassemble them, discard all plastic bits, and hand sew them to millinery wire and wrap the stems with floral tape.  For this bonnet I've combined parts of several different floral picks and cut, wet, and reshaped the petals.
 
When the net and all floral embellishments are sewn to the bonnet it creates quite a mess inside!  I use different colored thread as it matches the embellishment.  All this mess will be covered with the lining so all will be beautiful inside as well as out.

Finally this little beauty is ready to wear!  I love the way the base fits on the head and the black satin ribbon is a perfect fit to the base lower edge.  Here are a group of pretty photos I took outside this morning just as the sun was coming up.


I made a collage to compare my recreation to the extant original.  While my blue straw is more vivid than the original, perhaps almost 150 years ago the original was a bit more vivid as well.  Don't you wish these originals could tell us their story?  Who wore this bonnet?  What were they doing, feeling, and thinking on that day?  Did they love this beauty and feel pretty when they tied it on their head?  I can only imagine so!


Historical Sew Monthly
 
The Challenge:  #8 Extant Originals
Material:  Buckram, silk crepe, plaited straw
Pattern:  Mid-Victorian Winter Bonnet by Out of a Portrait
Year:  1870s
Notions:  Millinery thread, millinery wire, French elastic, tea dyed net, vintage and hand made flowers, ribbon
How historically accurate is it?  Recreation of an extant original in the Victoria and Albert Museum, London, using both vintage and modern materials and historical techniques.
Hours to complete:  12 hours
First Worn:  Photos taken today
Total Cost:  $82


Tuesday, July 31, 2018

Historical Sew Monthly Challenge #7 - Sleeves

There are some amazing examples of historical sleeves styles out there.  Put the focus on the arms and shoulders in your creation for this challenge.
The Dreamstress

There is no way for me to sew any historical fashion with falling down the rabbit hole of research.  The time period, the people of that time, their lifestyles, the joys and sorrows are all eventually woven into the final fabric that hangs on my simple dressform.  I've heard the names of those famous 19th century and early 20th century fashion designers - Jeanne Lanvin, Madeleine Vionnet, Coco Chanel, Elsa Schiaparelli, Jacque Doucet, Lucy Lady Duff-Gordon, Jean Patou, Louis Vuitton, Charles Frederick Worth, Salvatore Ferragamo.  For this Historical Sew Fortnightly Challenge one name came immediately to mind:  Paul Poiret.

Paul Poiret (pronounced pwah-rey) was a leading French fashion designer who lived from 1879 to 1944.  Recognized as the first "modern" master couturier he had a profound influence on 20th century fashion.  Early in his career he worked for Doucet and the House of Worth where he was considered too non-conservative.  In 1903 he established his own design house.

His major contribution to fashion was the development of the dressmaking technique known as draping.  He is remembered for freeing women from 19th century corsets and modernizing the Victorian silhouette.  Construction techniques were along straight lines and made of rectangles.

One of his iconic designs has been brought into a current pattern by Folkwear as their Poiret Cocoon Coat.


The pattern sketch shows the beautiful draped design with a sleeve that is basically an extension of the front and back of the coat looking like a bat wing.  Although the pattern is simple, just a single piece that is cut twice and a collar, I am truly confused as to exactly how this is all going to work!


There is a dart and a curved portion at the outward edge of the pattern.  After the fabric is cut and the dart is sewn the sleeve seam is created from the bustline outward by folding the fabric onto itself.  It is a brilliant design!  And look at that beautifully created sleeve!  Perfection!


See the seamline running along the front center of the sleeve where I have the fabric pinned?
 The four pieces are cut and sewn for both the outside embellished velvet fabric and the interior taffeta fabric.  All that is left is a collar piece which is interfaced and piped with velvet.  Velvet piping also made a nice finish to the sleeve edge.


Since I have just barely enough fabric to create this coat and the one-way design leaves some open spaces, I cut appliques from the remaining scrap fabric and work to position them.


The final coat design.


The interior taffeta.
With a lot of saving and selling I was fortunate to be able to attend Costume College 2018 in Woodland Hills, California this past weekend.  There were 650 people in attendance for a theme of Dressing the  Royals.  I attended classes and lectures, laughed with friends new and old, and costumed day and night.  This Poiret-inspired coat with a beaded gown I had made for a spring event were my Red Carpet and Gala gown for Saturday night.  The coat swished and sparkled and I added some attitude with my rose design Meerschaum pipe.


Those sleeves!!!

Does this coat strike you as a bit Art Deco?  Perhaps you know a Russian-born French artist and designer named Romain de Tirtoff.  His first employer was Paul Poiret.  He was best known by the pseudonym from the French pronunciation of his initials - Erté.  Oops, down another research rabbit hole!

Bonne couture,
Jeanette

Historical Sew Monthly

The Challenge:  #7 - Sleeves
Material:  Velvet blend, taffeta blend
Pattern:  Folkwear 503
Year:  1911 - 1919
Notions:  Frog closure, cord for piping
How historically accurate is it?  The technique of draping and this style is accurate.
Hours to complete:  27 hours
First worn:  Costume College 2018
Total cost:  $80

Saturday, June 30, 2018

Historical Sew Monthly Challenge #6 - Rebellion and Counter-Culture

Create an item that pays homage to fashion rebels and clothes that flaunt their place on the fringes of standard sartorial society, or that was signature to a rebelling cause.
The Dreamstress


Prior to 1795 women's fashions had retained a similar silhouette, with minor variations, for about 300 years.  Following the French Revolution and the Reign of Terror in 1794, a new style emerged reflecting the Revolutionary belief in the values of republican Rome.  Named from the French Revolutionary Government known as the Directory, Directoire style describes a brief transitional period from 1795 to 1799 in the decorative arts, fashion, and especially furniture design.

A cutaway jacket, or Directoire jacket, became popular during this period.  The jacket was cut short in front with a long tailcoat back.  The jacket style fell out of fashion around 1810.   In the early 20th century French designers brought the style back into fashion and it was very popular during 1912 and 1913.

The Fashion Archaeologist developed a pattern from an early 1912 French design and offered the pattern under their Edwardian Rose Antique Patterns line.


The elegant shape of the jacket comes from the cut of the pieces.  For the perfect drape I used a wool suiting fabric completely interlined (underlined) with silk organza, and lined with a very light faux silk fabric.  There were many pieces and the day I had them finally cut and organized on my bed was a wonderful day!


The outer assembly begins with underlining each piece with the silk organza and then assembling them as instructed.  The silk velvet cuffs and collar also underlined with silk organza and are pre-assembled and added.


The lining is assembled and includes the silk velvet lapel facings which are also underlined with silk organza.


The lining is stitched to the outer layer and a small opening left at the lower edge where the entire jacket is pulled through to its right side.  The opening is slip-stitched closed.  The interior of the cuffs is stitched to the lining.


The neckline is under-stitched by hand to prevent the lining from rolling outward when worn.


There are many small details, such as tacking the lining to the jacket in strategic places, that are all defined in the instructions.  The sash/belt is constructed separately as part of the jacket.  I covered buttons and added them to the jacket front and back and placed similar sized buttons on the skirt below the sash.  This was the finished jacket in April.


I love this suit and wore it for an event in April.  This past week I wanted to finish the suit according to the 1912 French illustration by adding the fringe to the collar.  Since I had not added fringe to the collar prior, I stitched the fringe next to the seam and through each upper loop of the fringe.


What a beautiful addition!  This is the suit for photos yesterday.


Historical Sew Monthly

The Challenge:  #6 June - Rebellion and Counter-Culture
Material:  Wool suiting, silk organza, silk velvet, faux silk lining
Pattern:  Edwardian Rose Antique Patterns:  Ladies 'Directoire' (Cutaway) Jacket
Year:  1912
Notions:  Thread, buttons for covering, fringe
How historically accurate is it?  Other than the synthetic lining, very accurate.
Hours to complete:  20 hours
First Worn:  Worn in April, but finished this past week and worn for photos
Total Cost:  $88.00 and $24.00 for pattern and shipping

Tasha Puppy likes the suit too!!