.jpg)
So this is where I would normally put some little quote related to the Challenge. But today all you're going to get is this:
Woo Hoo!!!
Why is that, you ask? First, this is my 17th completed Historical Sew Fortnightly Challenge and I'm thoroughly amazed that I've gotten this far. Woo Hoo! Secondly, this is the last major piece toward the completion of the recreation of the Manet painting "Spring". Woo Hoo! And lastly, I made it through the Yellow Challenge! The rules stated "any shade of yellow" and while this is more gold, I'm going to call it success and say Woo Hoo!
Then, this is where I would normally put all the progress pictures. But for those who don't care how I did it, here are the finished photos and the Historical Sew Fortnightly details.
 |
| Manet "Spring" 1882 - The parasol inspiration. |
 |
| My recreation bonnet and parasol - indoors since it's raining and this parasol is to keep the sun off, not the rain. |
 |
| The gown, bonnet, and parasol. |
 |
| Lace trim with a satin edge. |
 |
| A lace lining. |


Historical Sew Fortnightly Details
What It Is: Parasol
The Challenge: #17 - Yellow
Fabric: Silk, lace
Pattern: None
Year: 1882
Notions: Satin ribbon, modern nylon parasol with wooden handle
How historically accurate is it? The handle is wood and the ribs are metal which is accurate. The tips and ferrule are plastic which is not. The fabrics are historically appropriate.
First Worn: For the Manet recreation photos which will happen if it stops raining this year.
Total Cost: $15.00 for the parasol, scrap fabric from other projects but probably $15.00 for a yard of silk, a yard of lace, 2 yards of lace trim and satin ribbon.
The rest of the photos will be a step-by-step of how I recovered the parasol and, hopefully, a help to those who might want to try. It's really very simple and so very fun to have your own specially designed parasol!
This is where I got my nylon parasol. I use style MBB30 which comes in a variety of colors.
I've used this as a parasol for recovering and also as a base for adding a variety of fabrics and trims. A post from 2011 shows how to make a reversible cover for this same style of parasol.
The parasol can be easily disassembled and painted with a spray paint for plastics/metal if you desire more authenticity or are not lining your parasol.
Here is a pictorial step-by-step of how I recovered this parasol.
 |
| This is the nylon parasol. It has a wooden handle, metal ribs, and plastic rib tips.... |
 |
| ...and a plastic ferrule. Looks like fall outside my window. That's my Eastern redbud tree. Isn't it gorgeous? |
 |
| 1. Remove the ferrule: The ferrule is the little knob on the top. It is usually glued on and can be pulled off. You can twist a little to remove it but take care you don't break the wooden end of the parasol. |

 |
| 2. Remove the rib tips: The plastic tips on the ends of the metal ribs are the rib tips. Hold the tip and slide the metal rib out of the tip. Once you have the ribs out of the rib tips the parasol will look like this on the inside. |
 |
| 3. Clip the cover from the ribs: At each rib, near the joint, the cover is stitched to the rib. Clip those stitches with your seam ripper. |
 |
| 4. Remove the cover: Now the cover slides off the wooden end of the parasol and everything looks like this. |
 |
| 5. Remove the rib tips from the cover: Study the way the rib tips are stitched to the cover so that you can sew them on your new cover the same way. It might be a good idea to leave them on the old cover until you are ready and then just clip them off the old cover with your seam ripper as you need them for your new cover. |
 |
| The rib tips are sewn on securely as there is a lot of tension when the parasol is raised. |
 |
| Note the seam on the nylon cover. This is called a "parasol seam". The pieces are placed together right sides facing and then folded 1/4". Then the seam is sewn near the folded edge through all 4 layers. This seam will handle a lot of stress. |
 |
| 6. Remove one section of the old parasol cover: Using your seam ripper gently remove one section of the old cover to use as a pattern for your new cover. |
 |
| The destruction part is over! For this parasol I will use a strong silk for the outside and a lace for the lining. A lining isn't necessary but for me this saves painting the metal ribs and will cover the trim stitching. |
 |
| 7. Create your pattern: With a low heat setting iron the wrinkles out of your nylon parasol section constantly moving the iron. Not too much, however, or you will shrink the nylon. (Believe me, I've done it.) Fold your nylon section in half and put it over whatever you will use to make the pattern. Here I've placed it over red-dot pattern saver and pinned it into the ironing board so that I can get it as straight and flat as possible. |
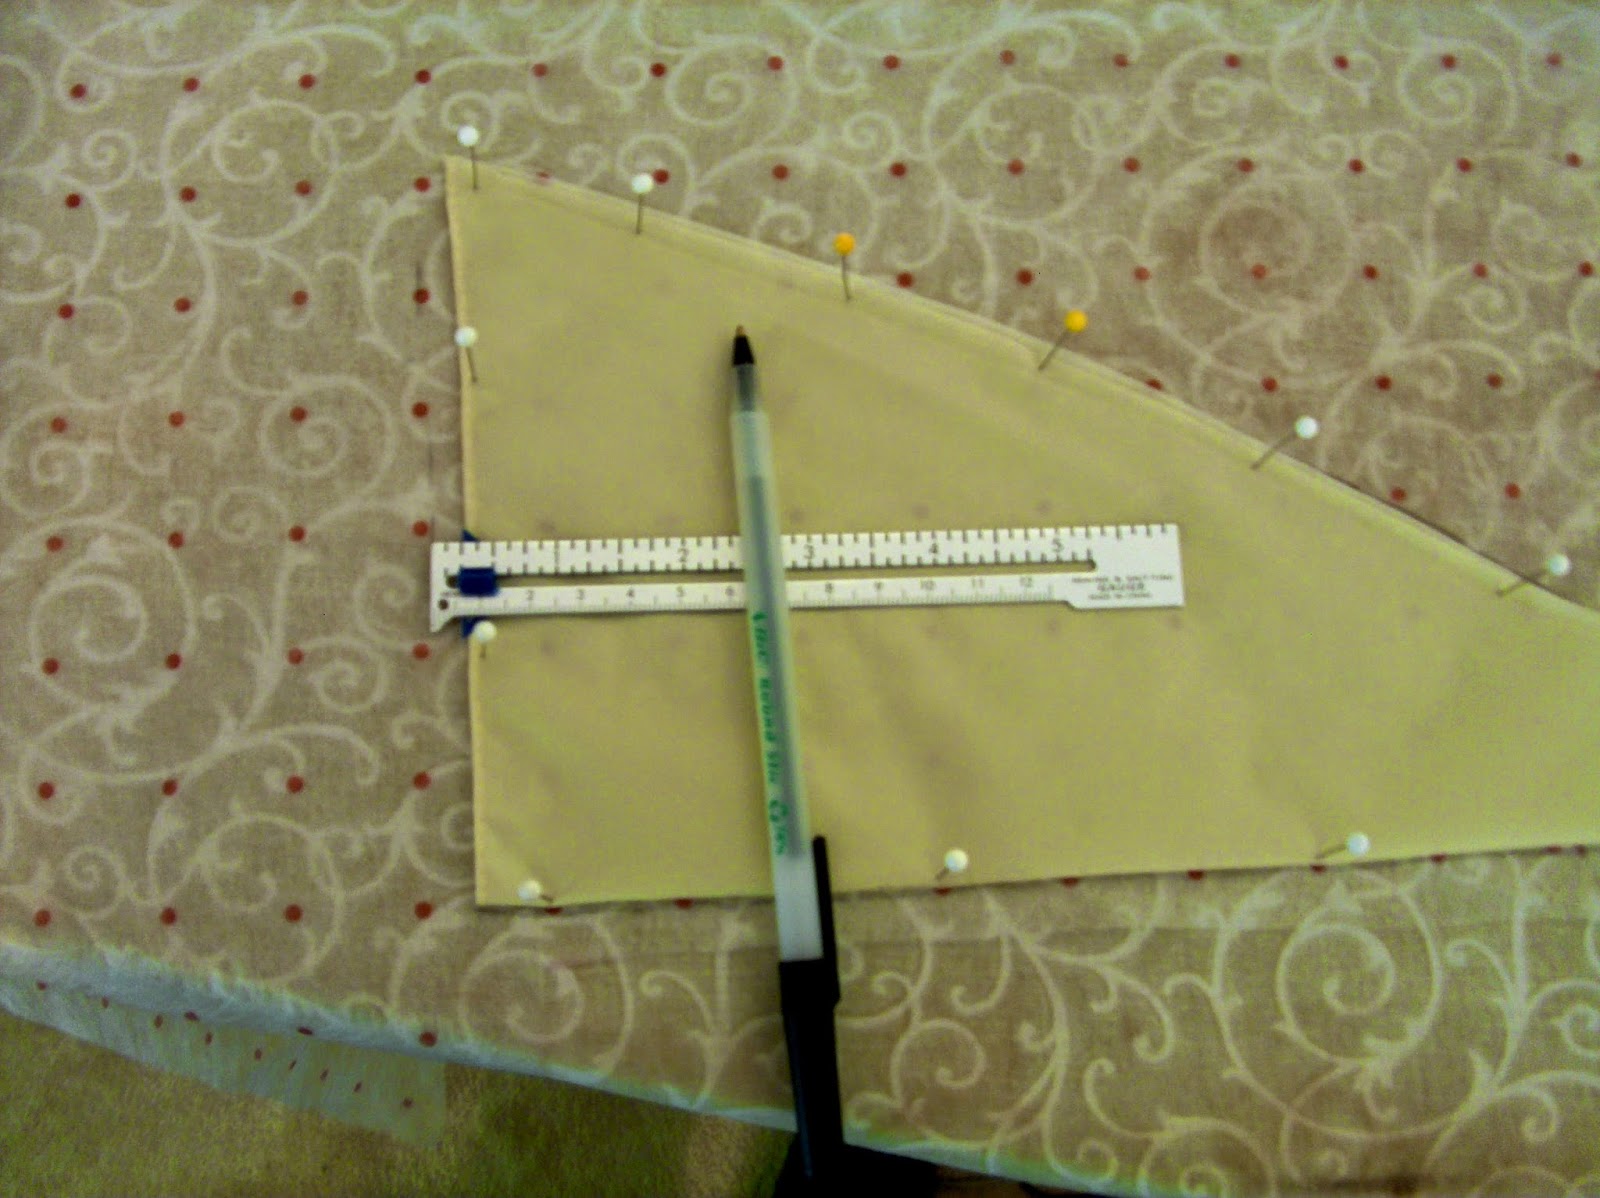 |
| 8. Trace your pattern. Trace around the curved and straight section of your pattern piece. Since I didn't open the hem of the old piece, I have to add that to my new pattern. Since I'm lining this parasol I only need 1/4" added. If you need a more finished seam on your parasol you might want to add more. |
 |
| 9. Cut 6 pieces from your new pattern: Lay your pattern along the fabric grain parallel to the selvedge and on a fold. This is the strongest direction of the fabric. I used the same pattern for the lining and am using those pictures as it's easier to see in the picture. |
 |
| 10. Hem each panel: Since I have a lining I simply turned 1/4" and sewed a hem. If you don't have a lining you will want a more finished hem on your panels. |
 |
| Six panels hemmed. |
 |
| 11. Sew the panels together: Place two panels together with right sides facing and pin about 3/4" from the edge. This will help keep the panels from shifting during sewing and is especially useful if you have a pattern or stripes which need to remain aligned. I have a pattern in this lace and want to keep everything aligned. |
 |
| Turn the edge 1/4" and pin. Sew from the hemmed edge to the point and about halfway from the folded edge to the raw edge of where you turned the fabric. Stop about 1/4" from the top to leave an opening to slip the cover over the top and also to slip the lining over the handle. This is the "parasol seam" and you will be sewing through 4 layers of fabric providing the strength needed. |
 |
| All 6 panels joined with a parasol seam. |
Here are the steps again with the gold silk.
 |
| Six panels hemmed. |
 |
| 2 panels right sides together pinned at 3/4". Folded over 1/4" and pinned. |
 |
| Close-up of pinning. |
 |
| The parasol seam sewn from hemmed edge to 1/4" short of top and halfway from fold to raw edges. |
 |
| All 6 panels sewn together. |
 |
| 12. Sew the rib tips on the new cover: This is where it is a good idea to remove your rib tips from your old cover as you are putting them on the new cover so you can see how it's done. Place the closed end of the tip down and facing the outside of the cover. Fold the cover around the tip so that the rib tip holes are just covered by the fabric. Stitch through the fabric and holes and wrap the thread completely around the rib tip as you stitch. You will be alternating the entry and exit holes. Five or six stitches holds nicely. Secure your thread. |
 |
| Another view. |
 |
| The finished stitching and wrapping. |
 |
| When the stitching is finished, flip the rib tip inside the cover and it is in the right position to receive the metal rib. |
 |
| 13. Replace protector: Between the rib mechanism and the fabric you will have found a thin piece made to protect the fabric from the metal ribs as they turn during raising and lowering the parasol. If you are putting in a lining this piece will not be seen, but if you are not lining your parasol you will want to replace this protector with something prettier. |
 |
| A 2" pinked circle with a center hole works perfectly. |
 |
| Slip your new protector over the top of the parasol before you place your new cover and your fabric will be protected in style. |
 |
| 14. Place your new cover: Yay!! Slip your new cover over the top of the parasol turning your unfinished center edges to the inside. If the hole is too big or you want to feel more secure you can baste the hole tighter from the inside and wrap the thread around the top several times. Align the seams with the ribs, slip the ribs back into the rib tips and then gently open your parasol. |
 |
| Your beautiful new cover! Ready for the final touches and trim! |
 |
| 15. Stitch your cover to the ribs: About 1" below the join of the metal rib place a few stitches through the seam and around the rib. This will keep the seams from shifting. |
 |
| 16. Attach your ferrule: Glue your ferrule back onto the wooden end. To conceal the plastic I tied a satin ribbon bow around mine. |
Guess what??!! You might be finished. If you aren't using any trims or lining, you're finished! 16 steps from nylon to a beautiful custom parasol.
I'll share here the steps for the trim and lining I used on the Manet-inspired parasol. Trimming is the most creative part of the parasol and also the most time-consuming. All trim has to be hand sewn with the parasol open. For this parasol I needed a lace with satin edge.
 |
| Hand stitched satin ribbon. |
 |
| Lace sprayed with fabric/fresh flower spray for an "aged" appearance. |
 |
| Lace edge tucked inside the satin ribbon and then hand stitched to parasol along lower edge of ribbon. |
 |
| Close-up of sewing satin ribbon and lace. |
 |
| Lace and satin ribbon finished! |
 |
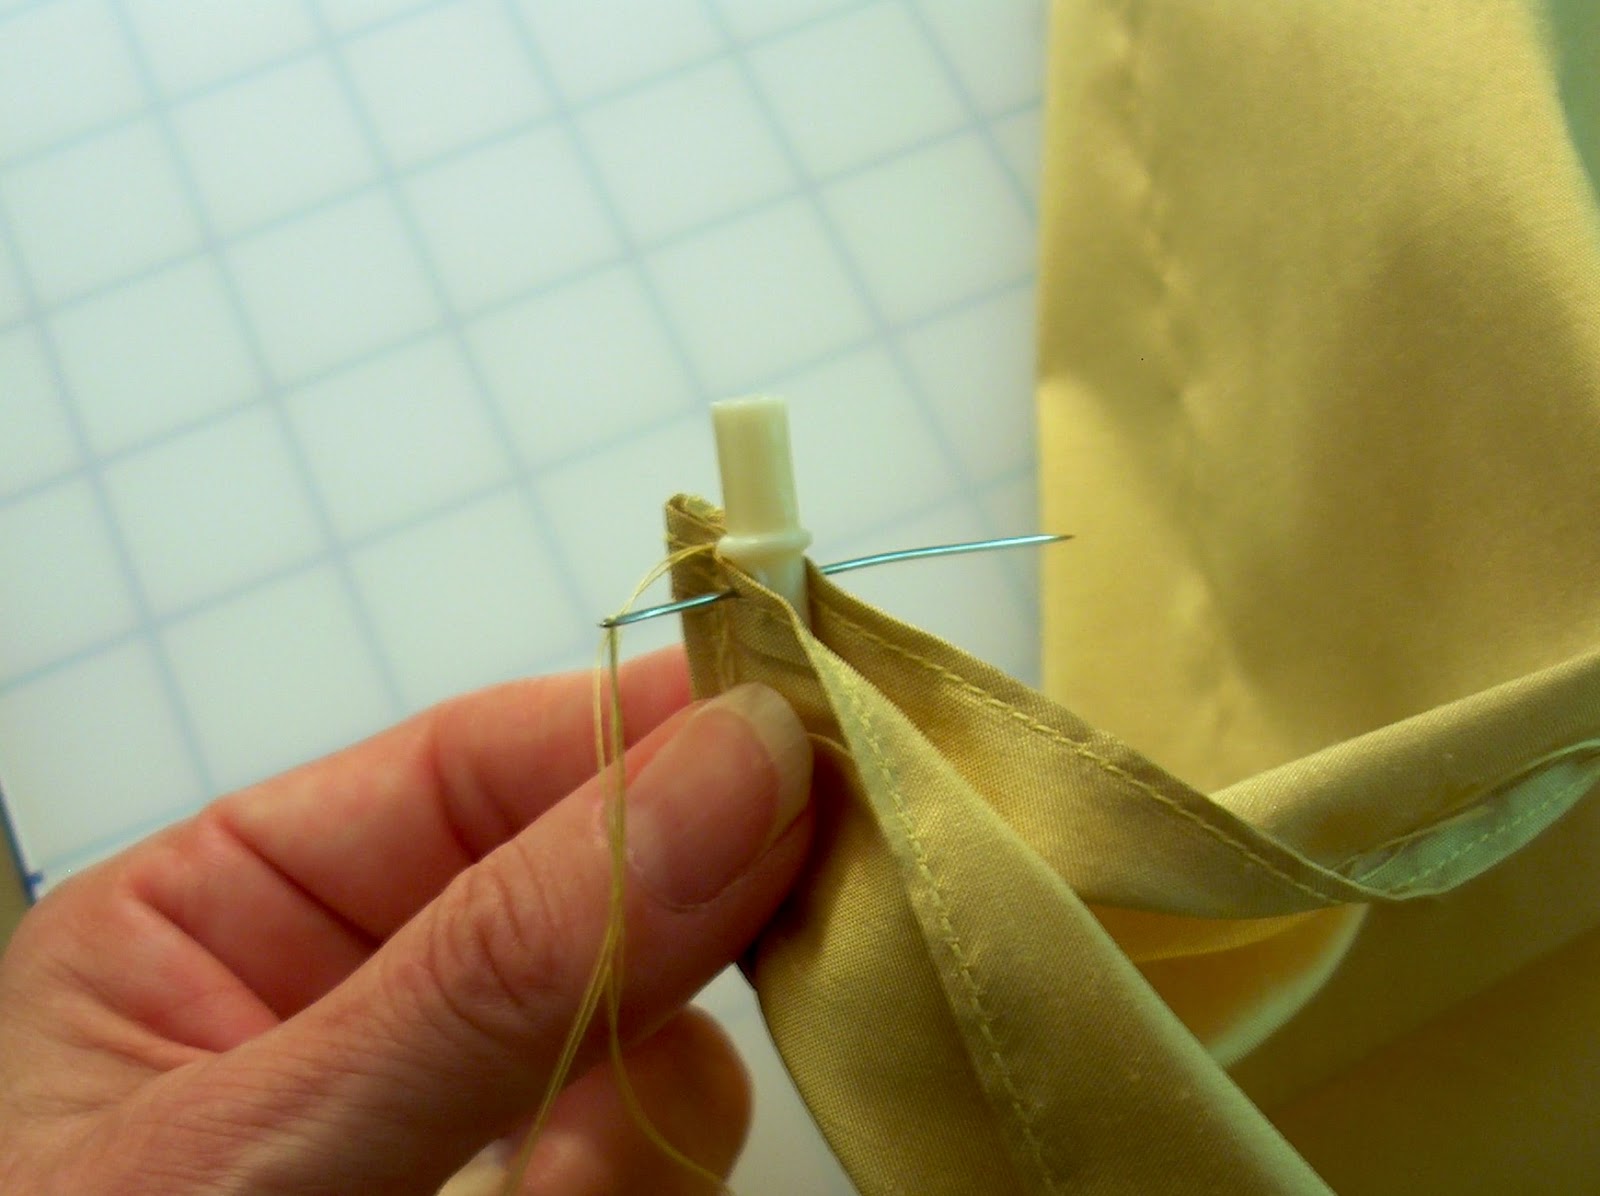
| The lining is slipped over the handle up to the rib support with the unfinished fabric edges to the inside. A few stitches of basting and a few wraps of the thread to tighten the lining to the support. |
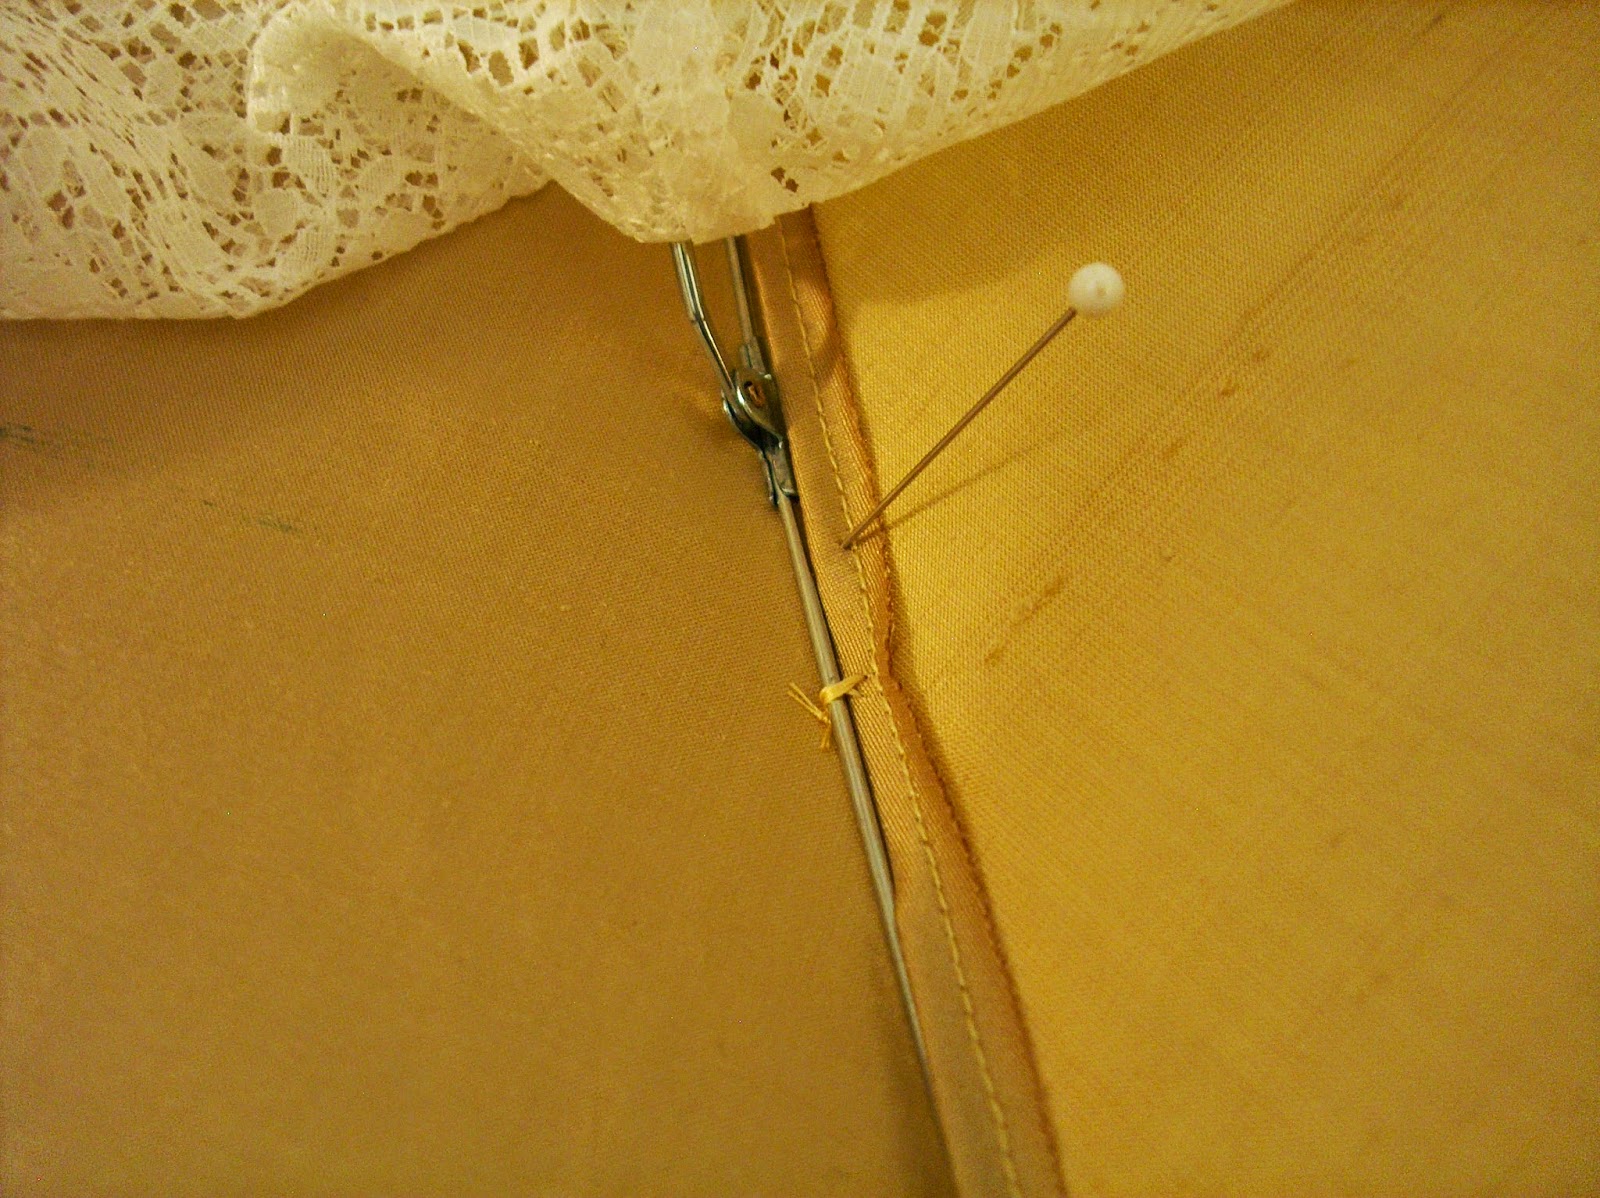 |
| The lining is positioned so that the seams align and smoothed down to just past the rib joint. A few loose stitches through the seams of both cover and lining to hold the lining in place. I use a French tack to allow some movement as I'm stitching the lining in place. |
 |
| Stitch the lining to the cover along the edge. A curved needle is my best friend here. |
The End!! If you have any questions or comments about the steps I used please write me. You can tell it took me a while to photograph and write this and if you make a parasol of your own I would truly love love love to see photos and hear about it!

Love always,
Jeanette


