.jpg)

YouTube Companion Video: https://youtu.be/ypoOBEEGzeg
Vintage Pattern Lending Library #1353 Ladies Hat, Collar, Gloves and Bag, Circa 1934. The minute this pattern appeared in my search for additions to my 1930s wardrobe I knew it was the perfect addition to extend my capsule wardrobe with these stylish accessories.


There are 21 pattern pieces to create the four accessories.

The fabric I'm using is a polyester/spandex blend in a beautiful red to burgundy velvet.

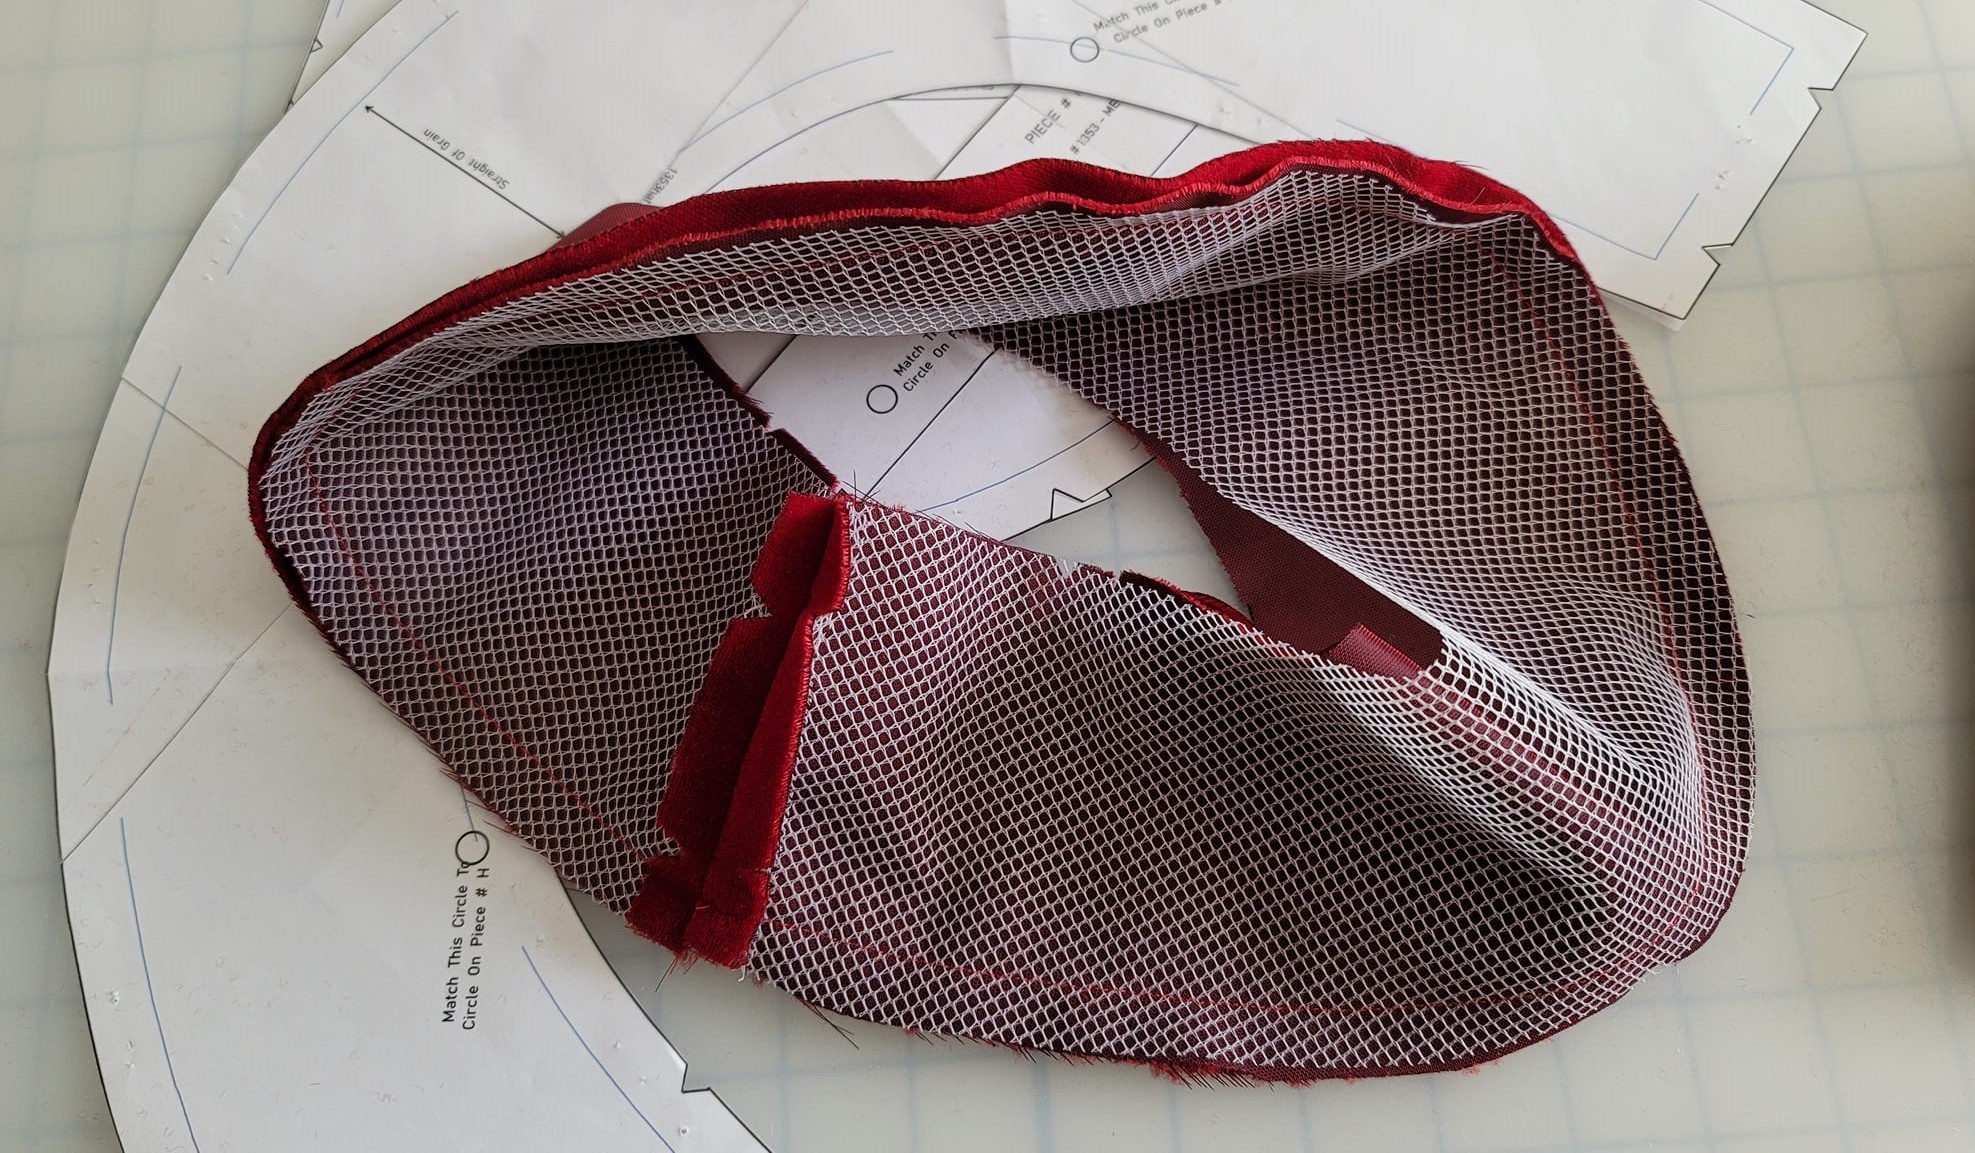
I begin by cutting all pieces for the hat, collar, and bag from the velvet, lining, and crinoline.

The Hat
The hat consists of 6 pieces cut from the velvet: Flared Trimming, Upper Left Back Crown, Lower Left Back Crown, Right Back Crown, Front Crown, and Brim.

A patterned cotton is used for the lining which consists of 2 pieces: Upper Hat Lining, and Lower Hat Lining. A piece of crinoline is also cut for the Flared Trimming.

One Flared Trimming piece is faced with the crinoline and the 2 velvet pieces sewn together. The seam allowance is trimmed

The Flared Trimming is turned right side out and basted to the Upper Left Back Crown.

Since there is going to be quite a bit of topstitching on this hat, I tested a sample to make sure I had the look I wanted.

The seam allowance is turned in on the Lower Left Back Crown and topstitched to the Upper Left Back Crown with the Flared Trimming already attached.

The Right Back Crown is attached using the same topstitching method.

The back of the crown is now finished. A Stay is cut from paper with all markings transferred.

The upper edge of the Front Crown is sewn with a gathering stitch.

The Stay is basted to the Front Crown matching markings and gathering the crown as necessary.


The paper Stay is torn away.

The finished Front Crown and complete Back Crown are now sewn together with the topstitching method.

The Flared Trimming is subtle yet outstanding!


A gathering stitch is sewn along the lower edge of the crown.

Crinoline is used to face one brim piece. The seams are sewn on each brim piece to create the circle. The right sides of the two brim pieces are placed together and sewn at the outer edge.
The brim is turned right sides out. The entire brim is topstitched 1/4" from outer edge and repeated all the way to inner edge.

A double-layer crinoline band is created and sewn to the inner edge of the brim.


The seam allowance is turned in on the lower edge of the crown. Matching markings and gathering as necessary, the crown is slipstitched to the brim.

Now the lining can be sewn. The back seam on the Lower Hat Lining is sewn and the Upper Hat Lining sewn to the Lower.

The lower seam allowance of the lining is turned in and the lining slipstitched to the brim.


In sourcing patterns, fabrics, and notions for the 1930s wardrobe I came across a bundle of metal buttons.

I placed 3 up the side of the hat, rolled the back of the brim upward, and this stylish hat is ready to wear.


The Historical Sew Monthly
The Challenge: May: Protection: Create a garment that protects you from something: weather, dirt, wear, weapons, etc.
Material: Rayon velvet, cotton lining
Pattern: Vintage Pattern Lending Library 1930s Ensemble
Year: 1934
Notions: Buttons
How historically accurate is it? Sewn from a reproduction of a vintage pattern.
Hours to complete: 6 hours
First worn: Part of a complete 1930s wardrobe for a future event.
Total cost: $7
The Collar
The collar is made of 6 pattern pieces. One is cut 4 times, four are cut twice, and one is cut once for a total of 13 sections. Since I'm making the collar and its facing from the same fabric, I have 26 separate pieces. To keep them organized I mark each with marker as they are cut.

The pattern pieces from center back are a Back Inset, Back, Side Back and Front Inset, Side Back, Side Front, and Front. The instructions provide an excellent illustration for assembly and I lay all my pieces out as indicated and sew as instructed.

Each piece is sewn to the next leaving 1/2" (the seam allowance for this pattern) open at both the upper and lower edges.


At this point a bound buttonhole would be sewn to the collar but because of the weight of the fabric I'll make a buttonhole and use the same button as the hat.

Those pointed bits at the neckline are so fabulous!

Now I'll repeat the entire process for the facing.


All sewn seams are trimmed to 1/8".


The layers are pinned together for sewing.

The neckline, right front edge, and lower edge are sewn. The left front edge is left open for turning.

The collar is turned right side.

A pointed wooden stick is used to fully turn the many points on both the neckline and lower edge.

The left front edge opening can now be slipstitched closed.

With the buttonhole and button sewn the collar is finished!
.jpg)

The Historical Sew Monthly
The Challenge: February: Neck & Shoulders: Make something to wear around your neck or on your shoulders
Material: Rayon velvet
Pattern: Vintage Pattern Lending Library 1930s Ensemble
Year: 1934
Notions: Button
How historically accurate is it? Sewn from a reproduction of a vintage pattern.
Hours to complete: 10 hours
First worn: Part of a complete 1930s wardrobe for a future event.
Total cost: $15
Material: Rayon velvet
Pattern: Vintage Pattern Lending Library 1930s Ensemble
Year: 1934
Notions: Button
How historically accurate is it? Sewn from a reproduction of a vintage pattern.
Hours to complete: 10 hours
First worn: Part of a complete 1930s wardrobe for a future event.
Total cost: $15
The Bag
The bag is made from 2 pieces: the main Bag and Bag Insets for the sides. I've cut those pieces from the burgundy velvet.

The same pieces are cut from both the lining and crinoline.


The crinoline is basted to the burgundy velvet.


The Insets can now be sewn to the bag body.

My Insets didn't fit exactly right, so I just created a small pleat at the lowest point.


The lining is made from a patterned cotton and has a useful pocket attached.


The bag lining and insets are sewn. The seam allowance of upper edge of the lining is pressed inward.

With the lining and bag wrong sides together, and the upper seam allowances turned in, the bag is pinned together and the upper edge slipstitched closed.


Now the bag can be topstitched as desired. I topstitched along the entire upper edge.

Buttonholes and buttons and the bag is finished!


Historical Sew Monthly
The Challenge: April: Bags: Make a bag!
Material: Rayon velvet, cotton lining
Pattern: Vintage Pattern Lending Library 1930s Ensemble
Year: 1934
Notions: Buttons
How historically accurate is it? Sewn from a reproduction of a vintage pattern.
Hours to complete: 4 hours
First worn: Part of a complete 1930s wardrobe for a future event.
Total cost: $10
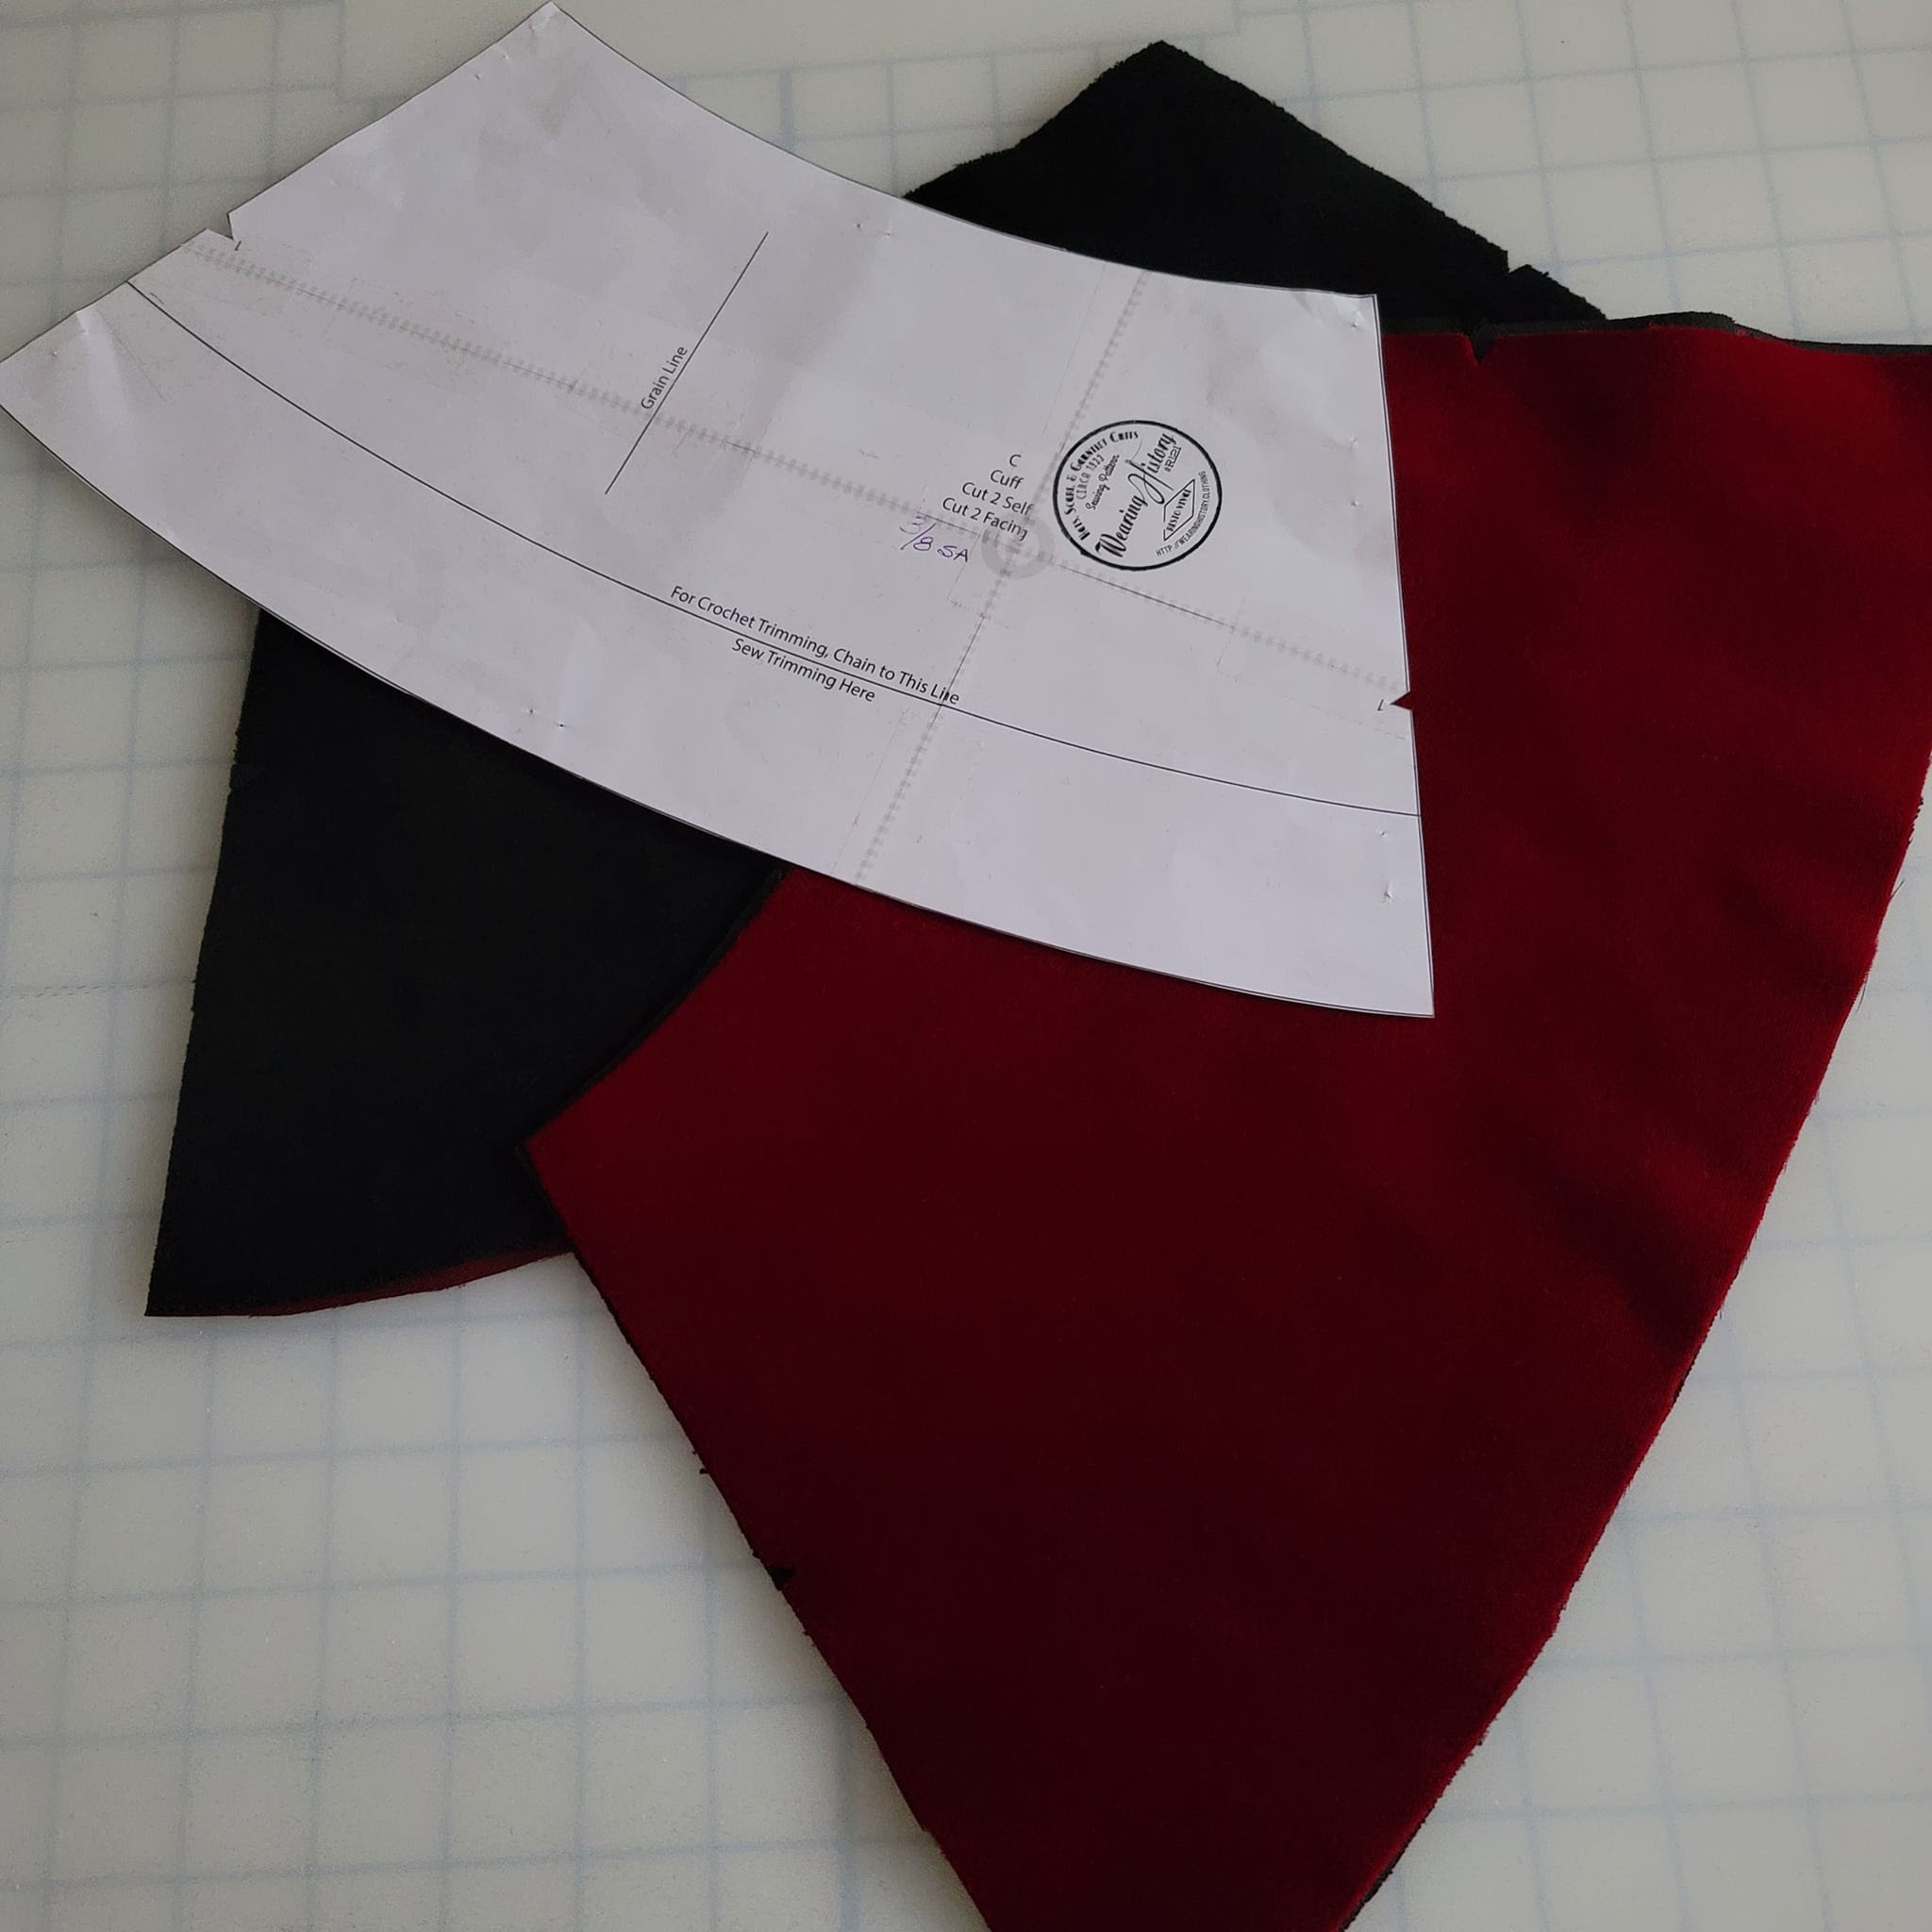
The Cuffs

In the patterns I had found was Wearing History R121 1933 Hats, Scarf, Gauntlet Cuffs.

I decided to make reversible gauntlet cuffs to wear with the black gloves.

I cut the cuffs from both the burgundy and a black velvet adding an additional inch of length.

Each cuff is sewn at its side seam.

The two colors sewn at the upper edge right sides together.

The seam allowances are turned in at the lower edges and the two parts of the cuff slipstitched together.


The additional inch I added allows me to turnback the upper edge for more variety.


With a hat, collar, bag, and gauntlet cuffs added to the 1930s wardrobe, it's time to celebrate with something in the perfect color - a Virgil's Black Cherry Soda.


The Belt
The very first 1930s garment I made was an Original 1933 Design from Vintage Vogue Pattern V8686. I was treated to learning vintage techniques: bound buttonholes, lapped seams, and a detachable peplum with the very exacting instruction of a Vogue pattern.

I wore the dress to a Literary Tea in the persona of Nancy Drew, with a purchased vintage hat and bag. This make was also my submission in the Historical Sew Monthly Challenge for May 2015 - Practicality. I demonstrated this by changing the accessories for a day to evening option.


I have a dress diary for this make and I'll share a link:
.jpg)
Sadly I sold the vintage hat and bag to help pay for the 1930s wardrobe and event, but I do still have the dress and pattern. I decide to use the peplum belt pattern piece to sew a belt to switch up this dress for a new look.

The piece is folded in half right sides together, stitched at the long edge, and turned right side out.

The seam allowances are turned in at both ends and slipstitched closed.

A buttonhole is machine-made and the threads pulled to the back side and tied off.

The buttonhole is opened, the button sewn, and the belt is finished!


The Shoes
Vintage shoe shopping was a joy and there were a lot of choices. These by memery in Denmark are listed as 1940s but very much like these beauties in what has become my go-to for 1930s vintage detail.


They are such a fun color and style that when the sale happened to include these I snapped them up. These are Esther Vegan in Burgundy. The perforated upper and velvet ties are stunning and they coordinate well with my newly made burgundy accessories. Link provided.


A 1930s Ensemble


.png)
Hugs,
Jeanette


No comments:
Post a Comment