What do we all love? Pockets! What do we all need? Pockets! What can't we live without? Chocolate!
Well, that's maybe just me but to stay on topic let's say...pockets!
And then an idea magically appeared and a group of costuming friends decided to share our love of pockets with each other through a collaboration called #pocketswap2021.
The guidelines were simple and fun! First, choose to create and choose to receive a specific style of pocket: 18th century style of pocket, utility pocket, the creator's own design, or whatever the creator/recipient's heart desired.
And second, use fabric scraps and trims possibly from a project made in 2021. Perhaps use a special embellishment technique learned recently. Watch your recipient's YouTube videos to inspire a pocket made with a personal and special touch.
I collected the names, paired the 22 participants and their choices in a highly sophisticated and technical manner *wink*, and we set out to create. Only after the pocket was finished and contact needed to be made for a mailing address would each participant know who was making their pocket. Until then, a secret!!
Melissa of Hat to Hem
I wanted to create a utility pocket and that is the style Melissa asked to receive. Melissa has a wonderful YouTube Channel called Hat to Hem. She says:
"Hi! My name is Melissa. I'm a self-taught seamstress living just outside of Philadelphia. I started sewing in 2012 and taught myself using YouTube and Google as my instructors. Now, I enjoy making costumes for myself and my clients. My true love is historical costuming and I’ve experimented with Renaissance, Georgian, Victorian, and Edwardian. I’ve also made several hats for those eras. I can truly dress you from “Hat to Hem”!
Melissa had recently created several videos from her project of designing a Victorian costume inspired by Lady of Lady and The Tramp. That was also my inspiration for the pocket I would create for her.
But here I have to share another part of the story. A month after the participants were paired another costumer wanted to join. Since I had my plan for Melissa's pocket but had not started the construction, it was easy for me to include the new costumer by simply pairing her with Melissa and I would now create for....
Gigi of La Bella Donna Historical and Costuming in Color
Gigi says:
"Hi, I'm Gigi and this is the home for LaBellaDonna Historical, a channel for my living history and costuming endeavors! Here you'll find videos on historical costuming, historical reenactment, historical travel spots, historical cosmetics, SCA shenanigans, costuming camaraderie, all things historical Italy, plus interviews with BIPOC reenactors/ costumers. "
The Costuming in Color channel says:
Welcome to Costuming In Color! A monthly YouTube Show dedicated to showcasing amazing costumers of Color and the people that support them!
I'm excited to create for Gigi! I'll create for her a Utility Pocket from a pattern I've recently used. The pattern is by Miss Violet Needleturn for her Fantastical Utility Pocket. I have a YouTube video and blog post of that creation and will give you links here:
There are four sections to the pocket: front, front compartment, back compartment, and back.
Each section requires two fabric pieces and fusible interfacing.
There is a pincushion which is held to the pocket by a magnet and can be removed and held to an elasticized and magnetized wristband.
The edges of the pocket will be trimmed with bias tape. The same color bias will be interfaced for strength and fitted with an adjustable slide.
The toile fabric has carried me through several projects. I used it to create my first pair of 18th century stays. This year I used it to make the Hamilton Spencer pattern. There are just pieces left of this mid-weight linen and I think it will make a stunning Utility Pocket for Gigi!
The fabric is interfaced per the instructions.
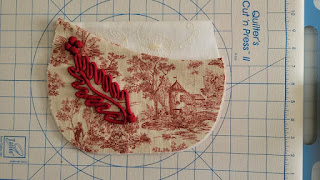
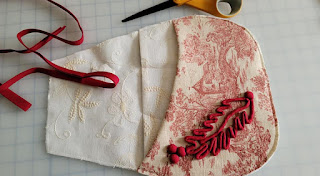
In making my Hamilton Spencer where I used this toile fabric I learned the technique of rouleaux trim. The Hamilton Spencer has 3 different size designs and I determine which one fits best on the pocket front.
I trace the pattern onto tissue paper and position the tissue on the fabric.
The rouleaux is created with 4/32" cotton cording covered with bias binding.
The cord is cut double the length of rouleaux that will be needed. The bias binding is cut to the length that will be needed. In both cases I added additional length for that inevitable mistake.
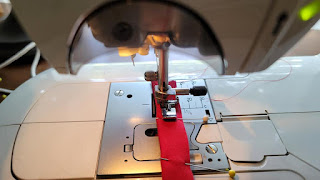
The binding is sewn over the cording right sides together using a zipper foot. It will be turned inside out after sewing which will then bring the right side out.
After the length is sewn the end of the bias fabric is stitched to the cording.
Then the seam allowance is trimmed. Narrow enough to reduce bulk when the fabric is turned inside out, but not so narrow as to pop open with tension. I trimmed with this cotton bias approximately 1/8".

Starting at the point where you stitched the bias fabric to the cording, tease the fabric to begin to pull the fabric tube down the cording turning the fabric inside out. It takes a bit of patience in the beginning and it is best to do just a bit at a time and not allow the fabric to bunch up.
Once you have passed the point where the bias fabric is sewn to the cording the turning moves quickly.
The embellishment also requires balls created from the same bias fabric, gathered, stuffed with the remaining fabric turned into the center, and stitched closed. I've left enough thread at the ends to use when attaching the balls to the final design.
With the fabric in an embroidery hoop attached to the desk it was time to begin attaching the rouleaux.
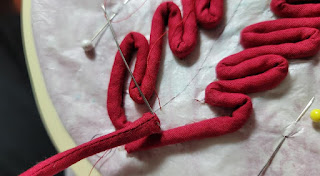
The rouleaux is positioned so that the seam is facing the fabric.
I'm sure there are many methods for attaching rouleaux. With my little bit of experience I found one that worked for me. I would bring the needle and thread up from underneath the fabric and catch one stitch through the seam...
... then take the needle back down through the fabric...
... and tighten the thread pulling the rouleaux to the fabric right at the seamline and the design line.
My finished rouleaux leaf and the underside.
Now the tissue can just be torn away and the balls sewn in place.
The rouleaux trim is finished! I think this is such a beautiful embellishment technique!
Now the 2 parts of the back compartment can be sewn at the top edge, turned and pressed. And the same is done for the front compartment. The front parts are also sewn at the top edge, clipped, turned, and pressed.
The front compartment is marked and sewn to create separate areas, and then sewn to the inside layer of the front so that the stitching cannot be seen from the front of the pocket.
In the instructions the elastic is located in front of the back compartment. I located the elastic behind the back compartment for Gigi's pocket so that the beautiful embroidery on the ivory linen would not be hidden by the elastic.
Now the areas can be marked for the back compartment and sewn to one layer of the back through the elastic.
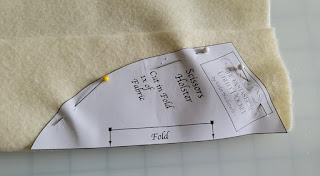
The area with the diagonal seam on the far left has created a space which will hold a scissors holster. It will protect the pocket and can be replaced as necessary. I sew one from felt.
The elastic has loops sewn to hold marking pencils and other small tools.
Before the pocket is sewn together a magnet is attached.
Fabric sewn around a paper support, stitched to the pocket inserting a magnet before the last edge is closed.
The back fabric piece can be positioned wrong side up, the back with back compartment layered, and then the front with front compartment layered on top of those.
The edges are aligned, clipped, and basted all around.
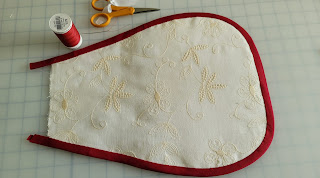
The bias binding is machine sewn to the front of the pocket and hand stitched to the back.
The pocket is ready for a waistband. The same bias binding is pressed flat to remove the creases and a fusible interfacing added for strength.
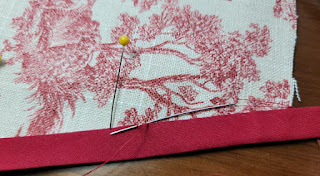
The waistband is sewn to the top edge of the pocket. The ends are sewn, clipped, and turned.
The seam allowances are turned in, the waistband clipped and blind stitched closed by hand.
With the waistband finished the adjustable slide can be sewn to the shorter end. When used, the longer end can be threaded back through the slide creating a strong hold when the utility pocket is filled with all the sewing tools, phone, and snacks.
Remember that magnet added to the pocket? Now it's time to create a pincushion that can be attached to the magnet.
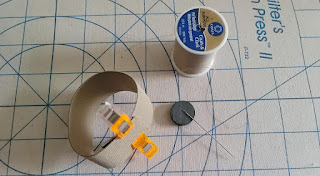
The pincushion is made from a bottle cap, magnet, and fabric cover for the bottom and fabric with stuffing for the top.
The pincushion top is gathered around the edge and stuffed.
The lower fabric is gathered around the cap and the magnet glued inside making sure that the polarity is compatible with the magnet already on the pocket.
The top and bottom of the pincushion are sewn together. An ivory satin ribbon is sewn to cover the stitches.
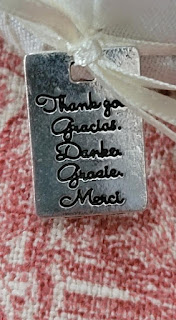
As a special touch for Gigi I attach a silver charm with Thank You in multiple languages for her work to bring a spotlight to costumers through the Costuming in Color YouTube channel.
The pincushion can be removed from the pocket and attached to an elastic and magnetized wristband I have made for her.
On her La Bella Donna Historical channel Gigi has a great tutorial for pattern weights and I decide to create some for her to match her new sewing utility pocket. It's a great tutorial and I recommend these useful sewing helpers!
Gigi's utility pocket and pattern weights are finished and ready to pack and send! Now is the time I write her to let her know I'm the secret pocket creator and get her address to mail her pocket.
Here the story takes a sad turn. On August 29 Hurricane Ida made landfall on the continental United States leaving damaged areas and people without power.
Hurricane Ida was a deadly and destructive Category 4 Atlantic hurricane that became the second-most damaging and intense hurricane to make landfall in the U.S. state of Louisiana on record, behind Hurricane Katrina in 2005. In terms of maximum sustained winds at landfall (150 mph ), Ida tied 2020's Hurricane Laura and the 1856 Last Island hurricane as the strongest on record in the state. en.wikipedia.org
As I went to write Gigi, she had written me telling me about the damage and interruption to utilities and basic services in her area. She assured me that, thankfully, she was fine! We wrote several times and in the end agreed that the pocket swap was something easily taken off her now overflowing plate.
Postal services were interrupted in Gigi's area so I wrote her partner in the Costuming in Color channel, Noelle of Costuming Drama. Noelle was going to be meeting Gigi in New York City and would happily receive my pocket for Gigi and give it to her as a surprise! I was thrilled! I had created the pocket just for Gigi and wanted her to have it for the day calm returned to her life and she was back to sewing!
So I took these last photos of Gigi's pocket, packed it, and shipped it to Noelle! I hope you enjoy it, Gigi!!
Making a Pocket for Melissa of Hat to Hem
Since Gigi won't be creating a pocket for Melissa, I go back to my original plan for Melissa's pocket. As Melissa had desired a Utility Pocket and I have just a bit of the toile fabric and bias remaining and some of the ivory embroidered linen, I decide to create a pocket for Melissa which is similar to the pocket I have just created for Gigi.
I cut all the fabric pieces with only the front out of the toile and the remainder out of the ivory embroidered linen. All parts are prepared including more rouleaux and balls.
I decide to try a new method of attaching the rouleaux and cut the leaf design out of the pattern and trace it on the fabric with Frixion pen.
The pincushion and wristband and magnet on the pocket are finished.
An ivory felt scissors holster is sewn.
Melissa's pocket is ready for the four sections and elastic to be assembled and sewn.
The sections are layered, clipped, and basted.
The bias binding is attached by machine at the front and handstitched at the back.
The waistband bias strip is pressed and a mid-weight fusible interfacing applied for strength. The waistband is sewn to the top of the pocket and the ends are sewn closed, clipped, and turned.
The waistband seam allowances are turned in and the waistband handstitched closed along the length.
The scissors holster is inserted.
And now for one special touch. Remember I told you about Melissa's Lady and The Tramp project? It seemed fitting that Melissa's pocket should have a sterling silver Lady charm.
With Lady prettily sitting on her cushion Melissa's pocket is finished!
Time to write Melissa a note and pack her pocket to be shipped. I really hope she enjoys it!!
A Pocket Gift From Cait of Willoughby & Rose
Cait has a beautiful YouTube Channel!
She also has a beautiful Etsy shop and if you saw my Tale of Two Housewives blog or video you will have seen one of her items. Visit both her channel and shop, they are so worthwhile!
Cait knew that I was collecting the names of people wanting to join the collaboration and so she knew I knew she would be creating my pocket. Often the creators would ask me to find out specifics about their pocket recipient - if they had pets, their favorite animal, their favorite color. Cait wrote me asking what was her recipient's favorite color and I answered "All of Them!"
I was so excited the day Cait's package arrived!
No! Not the fabric scissors!
Yes! The paper scissors!
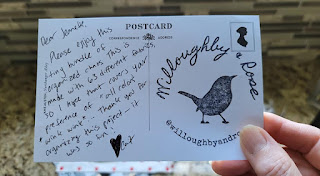
The pocket is extraordinary!! And Cait has enclosed the most lovely card!
It has all my favorite colors because it has 63 different fabrics in every color imaginable!
Cait has embroidered my initials and the year and a beautiful gold scroll ending in a beautiful shamrock. I'm completely touched and completely in love with my new pocket!
I have just begun my journey into 18th century costuming and this pocket is a perfect addition to my wardrobe!
When Cait's pocket arrives I am in the middle of my first 18th century ladies Riding Habit.
The Riding Habit Shirt is almost finished and Cait's beautiful work is perfect for this costume!
Thank you so very much, Cait! I could not have imagined a pocket so beautiful and personal! Thank you for being part of #pocketswap2021!
Enjoy!
Hugs,
Jeanette
Historical Sew Monthly - January 2021
Joy - Create an item that brings you joy or that epitomizes the joy you find in costuming.
What the item is: 18th Century Pockets
How it fits the challenge: While creating brings me joy, sharing with other costumers increases the joy immeasurably. Several friends created pockets for each other in surprise designs. I created the two on the right and the pocket on the left was made especially for me.
Material: Cotton and linen fabrics left from other projects.
Pattern: 18th century pocket and Fantastical Utility Pocket Pattern
Year: 18th century
Notions: Tape for ties and embellishments, embroidery thread, slide closure, magnets.
How historically accurate is it? The pocket made for me is completely accurate. The pocket I made for others has been adapted for modern use as a sewing utility pocket.
Hours to complete: The pockets I made required 6 hours each partially due to the rouleaux embellishment.
First worn: When my 18th century costume is complete in 2023.
Total cost: The pockets I made would cost approximately $22.00 each with specific fabrics purchased.
.jpg)




 p
p